
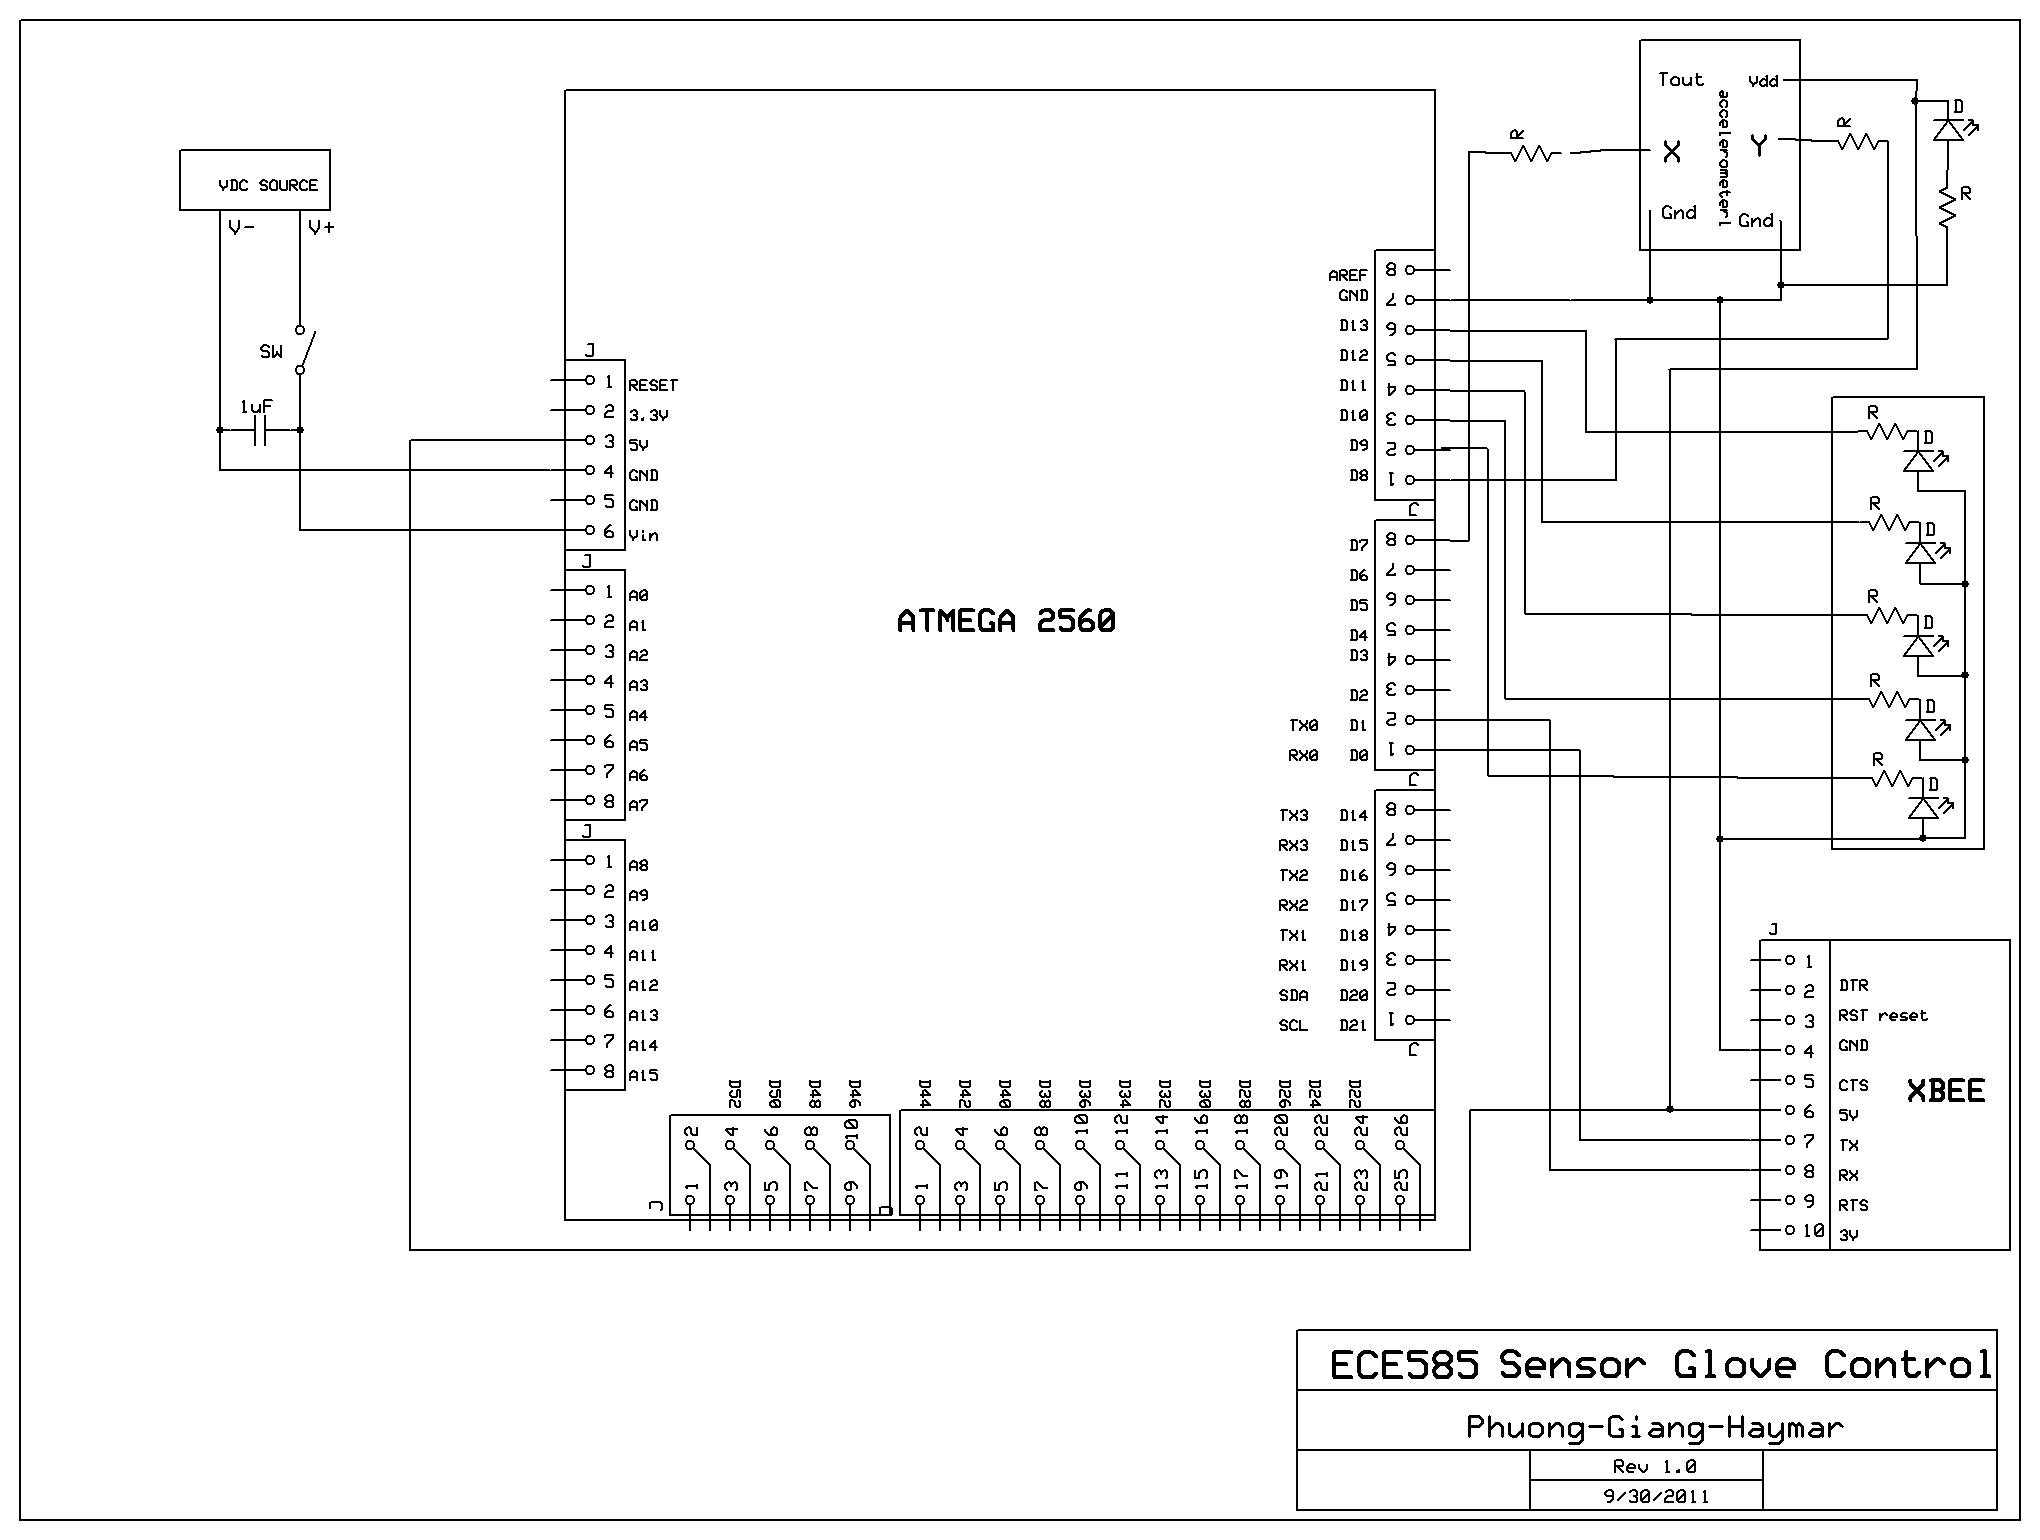
Smart Sensor Glove
The process of compiling and uploading software to an Arduino microcontroller involves several critical steps that ensure the successful execution of the intended program. The initial step is to copy the source code into the Arduino Integrated Development Environment (IDE), which is compatible with current and newer versions. Upon pasting the code, the user must compile it by clicking the compile button, typically represented by a play-like icon. This action triggers the IDE to analyze the code for syntax and logical errors. Any errors detected during this process will be displayed at the bottom of the IDE interface, allowing the user to identify and rectify them before proceeding.
Once the code is error-free, the next phase involves connecting the Arduino microcontroller to a computer via a USB cable. This physical connection is essential for communication between the computer and the microcontroller. Following the connection, the user must configure the IDE to recognize the correct communication port. This is achieved by navigating to the Tools menu, selecting the Serial Port option, and choosing the corresponding COM port associated with the Arduino device.
Subsequently, it is crucial to specify the correct board type in the IDE to ensure compatibility with the microcontroller. This is done by accessing the Board option in the Tools menu and selecting the specific model of the Arduino board being utilized. The appropriate board selection guarantees that the compiled code is tailored for the hardware specifications of the microcontroller.
Finally, the user can initiate the upload process by clicking the upload button, symbolized by a right arrow. This action sends the compiled program to the Arduino microcontroller, where it is stored in memory for execution. The upload process may take a few seconds, during which the IDE will display progress indicators. Upon successful completion, the program will be ready to run on the microcontroller, enabling the implementation of various projects and applications.To compile this software just copy and paste it into any current or newer version of arduio software. To compile to check for error click the play like button and wait for the software to process. If any errors is found, it should indicated at the bottom of the page. Find the error, fix it and continue. To upload it into amicro-controller, first need to connect any type of arduino micro-controller using the usb cable. Next go to tools => Serial port=> select the right comm port. Next go to board, on top of tools and select the right version of arduino board you are using. Then click upload( the right arrow like). Wait for a few second for the program to upload. 🔗 External reference
Related Circuits
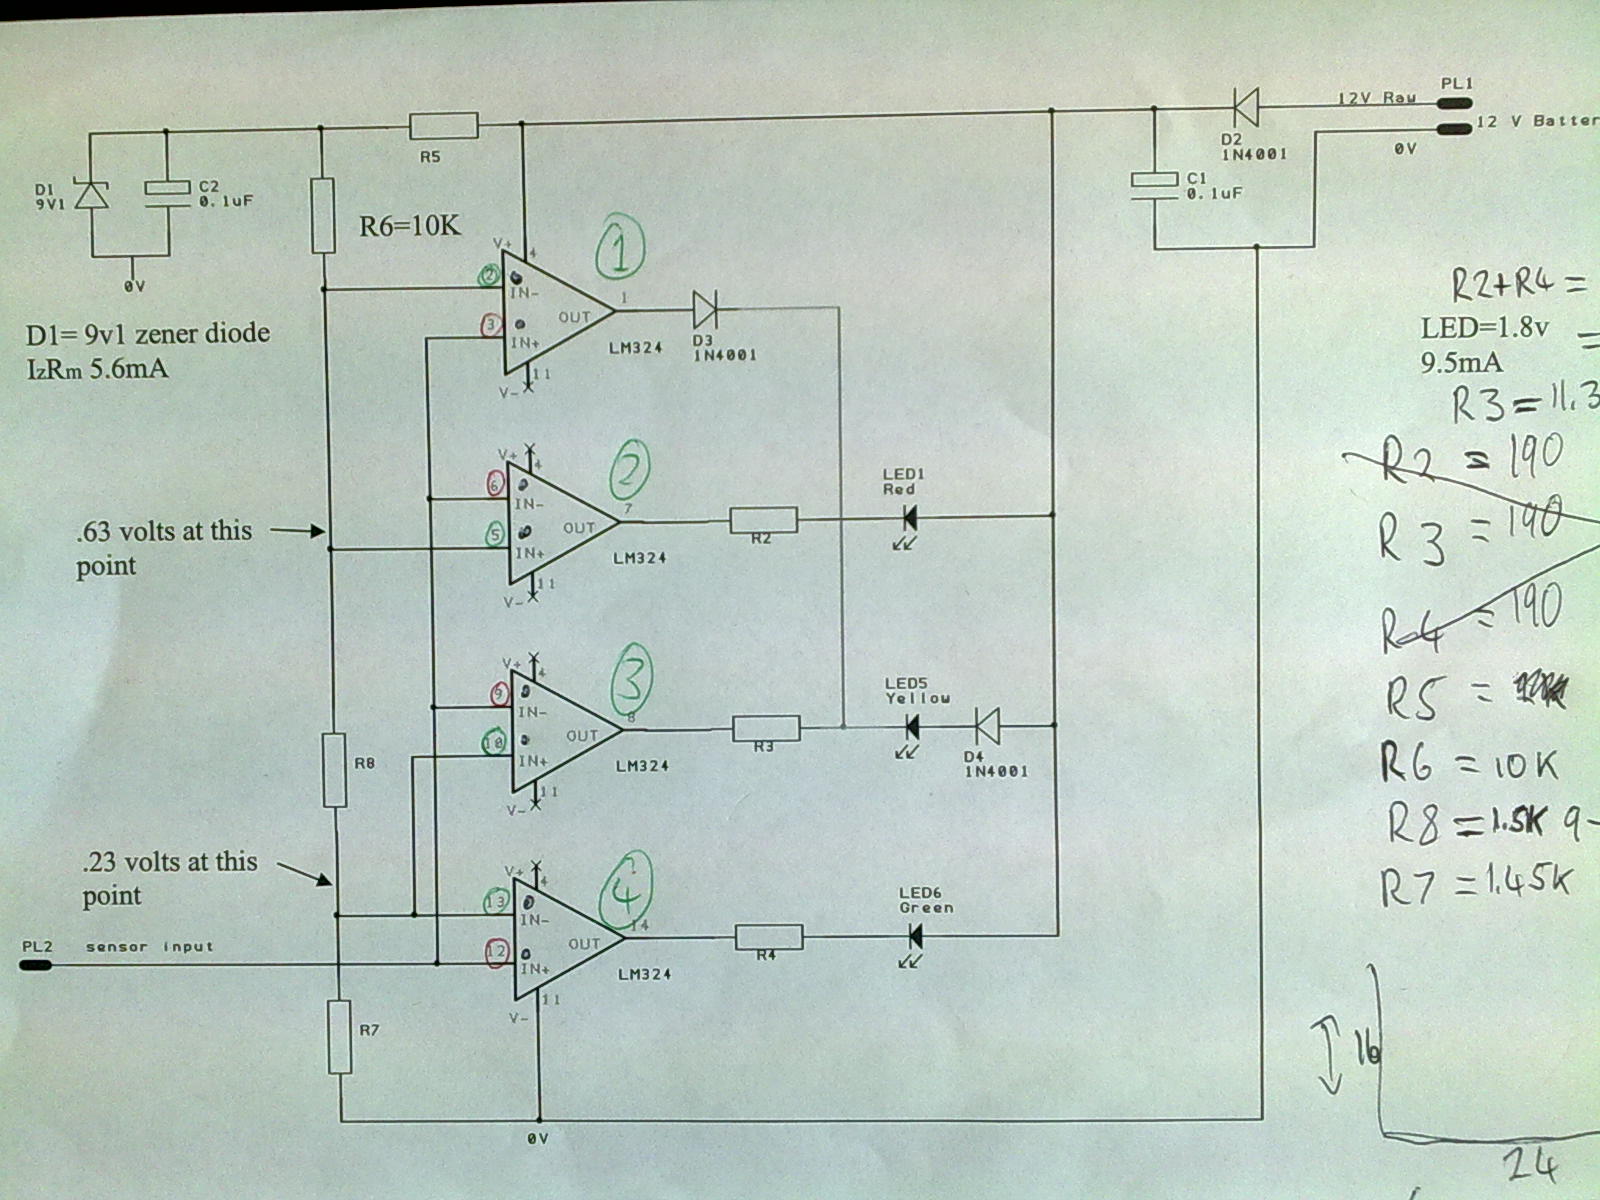
A 12V power supply is connected to the positive terminal, allowing current to flow through a protection diode and a capacitor that smooths the voltage. A zener resistor (R5) limits the current to the zener diode, which regulates the...

This design circuit is for a temperature sensor that utilizes an LM335 integrated circuit (IC) to convert ambient temperature into an equivalent output voltage. The output voltage of the LM335 increases by approximately 10 mV for every 1 degree...
The water tank overflow liquid level sensor alarm circuit is a straightforward electronics project suitable for school students. Previous discussions have covered numeric water level indicators and water level controller circuits, which are more complex and intended for engineering...
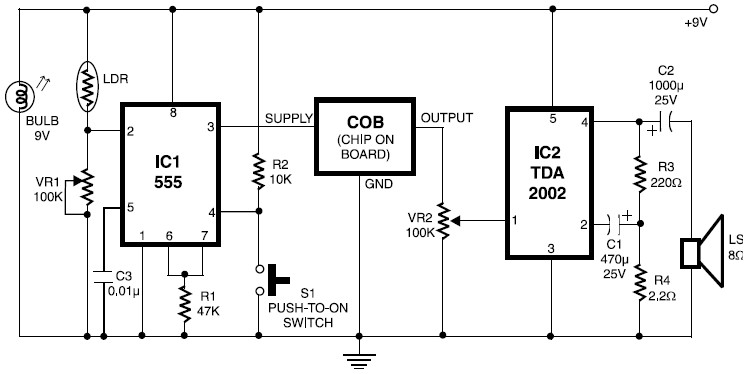
This circuit is an alarm system that utilizes an LDR (Light Dependent Resistor) sensor. The sensitivity of the circuit is influenced by the distance between the light bulb and the LDR, as well as the setting of the preset...
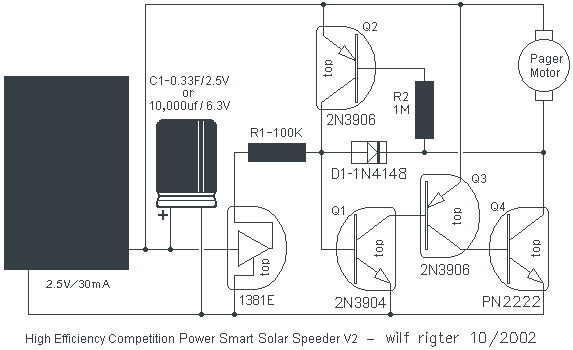
This must be the most efficient bipolar transistor motor driver design for this application and I recommend it for the solar roller competitions. A 1381E is used to trigger at 2.4V. While it takes a total of 10 components...

The LinkSwitch-LP family is designed to replace inefficient line frequency linear transformer-based power supplies with output powers less than 2.5 W in applications such as cell/cordless phones, PDAs, digital cameras, and portable audio players. LinkSwitch-LP may also be used...
Warning: include(partials/cookie-banner.php): Failed to open stream: Permission denied in /var/www/html/nextgr/view-circuit.php on line 713
Warning: include(): Failed opening 'partials/cookie-banner.php' for inclusion (include_path='.:/usr/share/php') in /var/www/html/nextgr/view-circuit.php on line 713