


diy solar cell phone usb charger
#solar
#USB charger
#DIY
#cell phone
#Ni-MH batteries
#rechargeable
#solar panel
#voltage regulation
#portable charger
#energy
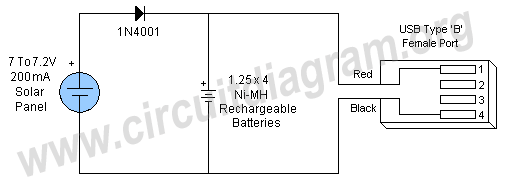
Description: This schematic illustrates a simple DIY solar cell phone or USB charger circuit. It is designed to charge any device that can be powered from a computer USB port, such as MP3 players, cell phones, and iPhones. The circuit utilizes a solar panel rated between 7 to 7.2 volts, a single diode, and four Ni-MH rechargeable batteries, each with a voltage of 1.25 volts and a capacity of 2000 mAh. The fully charged batteries will output 5 volts on a digital multimeter, which is the ideal voltage for a USB charger. After assembling the circuit, it is advisable to check the voltage of the new Ni-MH batteries using a digital multimeter, as new batteries are typically 50% to 70% charged by the manufacturer. If the batteries do not register between 5 and 5.1 volts, they should be charged for 3 to 4 hours by positioning the solar panel in direct sunlight. In cases where the batteries are fully discharged, a charging time of 8 hours is recommended if the solar panel output current is 250 mA in direct sunlight, or 10 hours if the output current is 200 mA. After charging, the battery voltage should be rechecked; if it shows between 5 and 5.1 volts, the DIY solar cell phone or USB charger is ready for use. When the solar charger batteries need recharging, a 3 to 4 hour charging cycle is sufficient. It is important to avoid charging devices simultaneously while the solar charger batteries are being charged. First, charge the USB charger batteries, disconnect them from sunlight, and then connect the devices for charging. The batteries should not be charged for more than 8 to 10 hours.
The circuit operates on a straightforward principle of converting solar energy into electrical energy to charge rechargeable batteries. The solar panel acts as the primary energy source, converting sunlight into electrical voltage. The diode serves as a protective component, preventing reverse current flow that could discharge the batteries back into the solar panel when sunlight is not available. The four Ni-MH rechargeable batteries are connected in series, providing a combined nominal voltage of 5 volts, which is suitable for USB charging applications.
The design should include a USB type "B" female port, allowing for easy connection to various devices. The batteries should be housed in a secure compartment to prevent movement and potential damage. Additionally, incorporating a voltage regulator may enhance the circuit's performance by ensuring a stable output voltage, regardless of variations in battery charge levels.
It is essential to ensure that the solar panel is positioned for optimal sunlight exposure to maximize charging efficiency. Regular maintenance of the solar panel and batteries will help maintain performance and longevity. Users should be advised to monitor the charging process and avoid overcharging, as this can lead to reduced battery life and efficiency. Proper usage and adherence to recommended charging times will ensure that the DIY solar cell phone or USB charger operates effectively and reliably.Here is the schematic of a simple DIY solar cell phone or USB charger circuit. This solar USB battery charger circuit can be used to charge any device, which can be charge from computer USB port. For example MP3 players, cell phone, iphone etc. The circuit is using a solar panel of 7 to 7. 2 volts, one diode and four Ni-MH rechargeable batteries of 1. 25 volt and 2000 mAh and a USB type "B" female port. The fully charge batteries will show 5 volt on the digital millimeter which is an ideal voltage to for a USB charger. panel of 7 to 7. 2 volts, one diode and four Ni-MH rechargeable batteries of 1. 25 volt and 2000 mAh and a USB type "B" female port. The fully charge batteries will show 5 volt on the digital millimeter which is an ideal voltage to for a USB charger.
After completing the circuit check the voltage of your new Ni-MH batteries with your digital multimeter, new batteries are often 50 or 70 percent charged by the manufacturers. if your batteries are not showing 5 or 5. 1 volt then charge them for 3 to 4 hours by placing the solar panel in direct sunlight. If you batteries are fully discharged then charge them 8 hours if your solar panel output current is 250mA in direct sunlight or 10 hours if your solar panel output current is 200mA in direct sunlight.
After charging the batteries in sunlight again check your batteries voltage with multimeter now if your batteries are showing 5 or 5. 1 volt then your DIY solar cell phone or USB charger is ready to charge your devices. Next time when your solar charger batteries require charging charge them only 3 to 4 hours cycle. Do not charge your devices at the same time when you are charging the batteries of your solar USB charger.
First charge your USB charger batteries and then remove it from the sunlight and then connect your devices to charge. Do not charge your batteries more than 8 to 10 hours.
The circuit operates on a straightforward principle of converting solar energy into electrical energy to charge rechargeable batteries. The solar panel acts as the primary energy source, converting sunlight into electrical voltage. The diode serves as a protective component, preventing reverse current flow that could discharge the batteries back into the solar panel when sunlight is not available. The four Ni-MH rechargeable batteries are connected in series, providing a combined nominal voltage of 5 volts, which is suitable for USB charging applications.
The design should include a USB type "B" female port, allowing for easy connection to various devices. The batteries should be housed in a secure compartment to prevent movement and potential damage. Additionally, incorporating a voltage regulator may enhance the circuit's performance by ensuring a stable output voltage, regardless of variations in battery charge levels.
It is essential to ensure that the solar panel is positioned for optimal sunlight exposure to maximize charging efficiency. Regular maintenance of the solar panel and batteries will help maintain performance and longevity. Users should be advised to monitor the charging process and avoid overcharging, as this can lead to reduced battery life and efficiency. Proper usage and adherence to recommended charging times will ensure that the DIY solar cell phone or USB charger operates effectively and reliably.Here is the schematic of a simple DIY solar cell phone or USB charger circuit. This solar USB battery charger circuit can be used to charge any device, which can be charge from computer USB port. For example MP3 players, cell phone, iphone etc. The circuit is using a solar panel of 7 to 7. 2 volts, one diode and four Ni-MH rechargeable batteries of 1. 25 volt and 2000 mAh and a USB type "B" female port. The fully charge batteries will show 5 volt on the digital millimeter which is an ideal voltage to for a USB charger. panel of 7 to 7. 2 volts, one diode and four Ni-MH rechargeable batteries of 1. 25 volt and 2000 mAh and a USB type "B" female port. The fully charge batteries will show 5 volt on the digital millimeter which is an ideal voltage to for a USB charger.
After completing the circuit check the voltage of your new Ni-MH batteries with your digital multimeter, new batteries are often 50 or 70 percent charged by the manufacturers. if your batteries are not showing 5 or 5. 1 volt then charge them for 3 to 4 hours by placing the solar panel in direct sunlight. If you batteries are fully discharged then charge them 8 hours if your solar panel output current is 250mA in direct sunlight or 10 hours if your solar panel output current is 200mA in direct sunlight.
After charging the batteries in sunlight again check your batteries voltage with multimeter now if your batteries are showing 5 or 5. 1 volt then your DIY solar cell phone or USB charger is ready to charge your devices. Next time when your solar charger batteries require charging charge them only 3 to 4 hours cycle. Do not charge your devices at the same time when you are charging the batteries of your solar USB charger.
First charge your USB charger batteries and then remove it from the sunlight and then connect your devices to charge. Do not charge your batteries more than 8 to 10 hours.
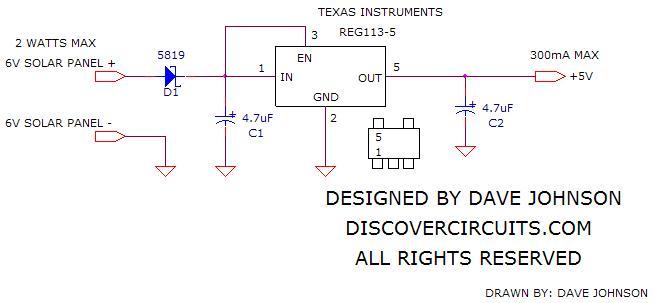
Solar Powered Cell Phone Charger
The simple circuit below regulates the voltage from a 6V solar panel to a fixed +5V. This voltage can be supplied to any cell phone or USB-connected portable device to charge its battery. The circuit utilizes a Reg113-5 voltage regulator...
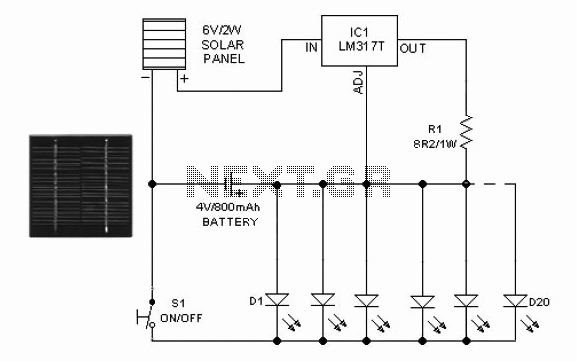
DIY Solar Birdhouse Light
This solar birdhouse light is an economical circuit of a mini solar lighting system. At the heart of the circuit is a mini 6V/2W solar panel, which is used to charge a 4V/800mAh rechargeable battery.
The solar birdhouse light circuit utilizes...
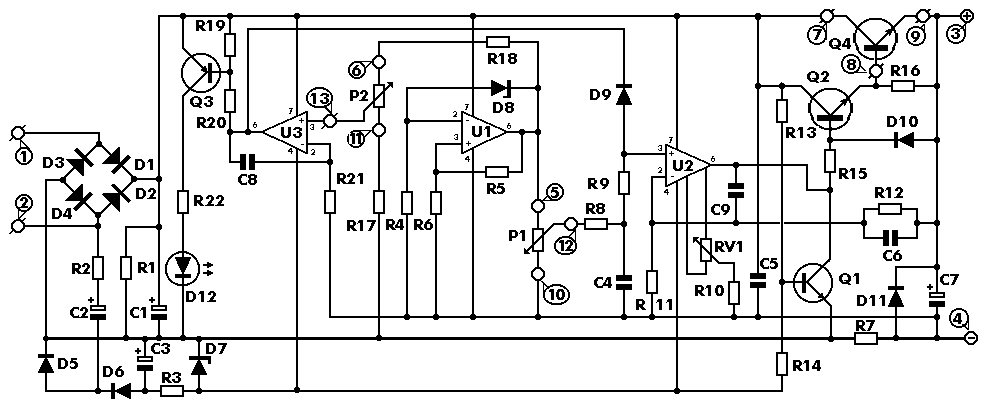
0-30 VDC Stabilized Power Supply with Current Control 0.002-3 A
The circuit begins with a step-down mains transformer featuring a secondary winding rated at 24 V/3 A, which connects across the input points at pins 1 and 2. The quality of the output supply is directly related to the transformer's...
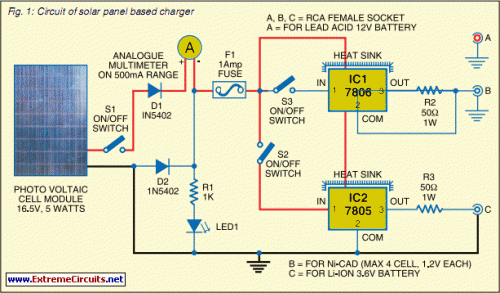
Solar Panel Based Charger And Small LED Lamp
Switching to alternative power sources can lead to savings on electricity bills. The photovoltaic module or solar panel discussed here has a power output of 5 watts. Under full sunlight conditions, the solar panel generates 16.5V and can provide a...
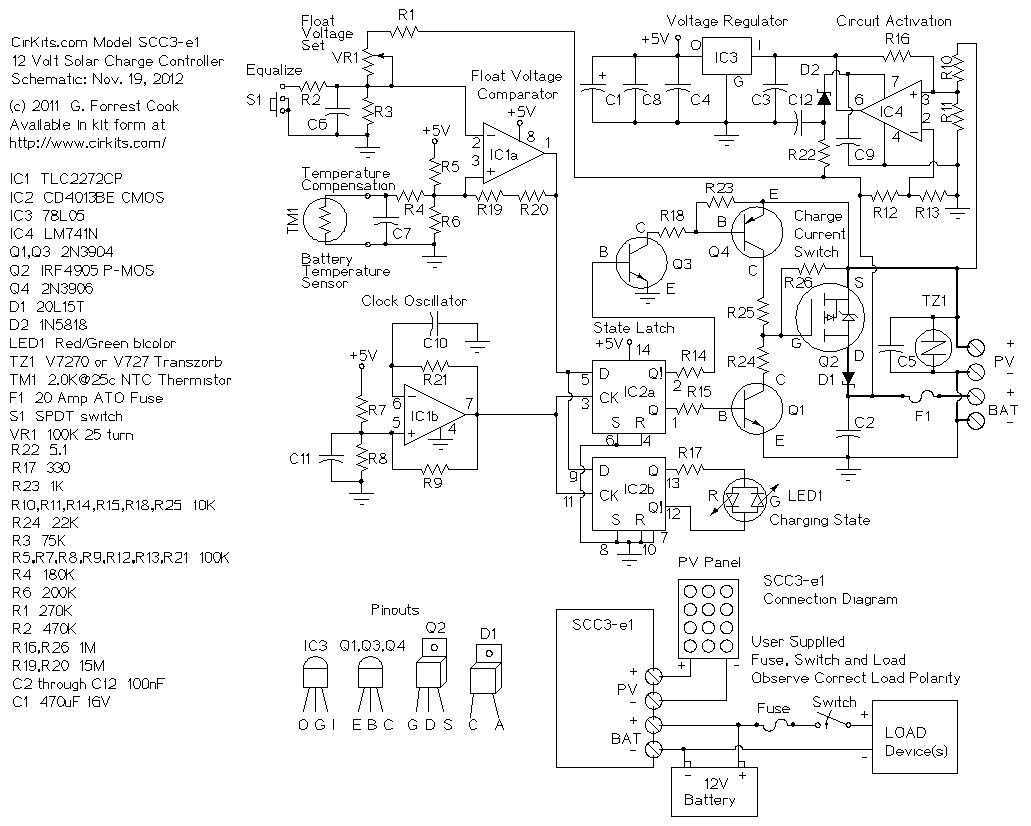
12 Volt 20 Amp Solar Charge Controller
A 12 Volt solar power system can provide power to a wide variety of devices. Some examples include: lighting systems, cellular phones, CB and Ham radios, car stereos, televisions, recording equipment, fans, water pumps, and other low voltage DC loads....
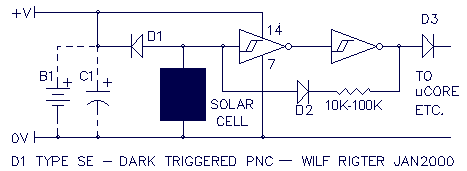
Wifl Rigter`s SIMD1 V0
It provides much quicker turn-on when the Sun goes down. Note that a smaller value for the resistor will provide faster turn-on; the trade-off is that a smaller value for the resistor also makes the solar engine less efficient at...
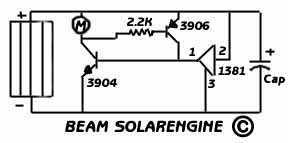
Solar Engine
Well the most common use is in a solaroller which is a small wheeled car that charges up and then moves in a quick burst of speed. Since you can only use motors and coils with this circuit robots built...
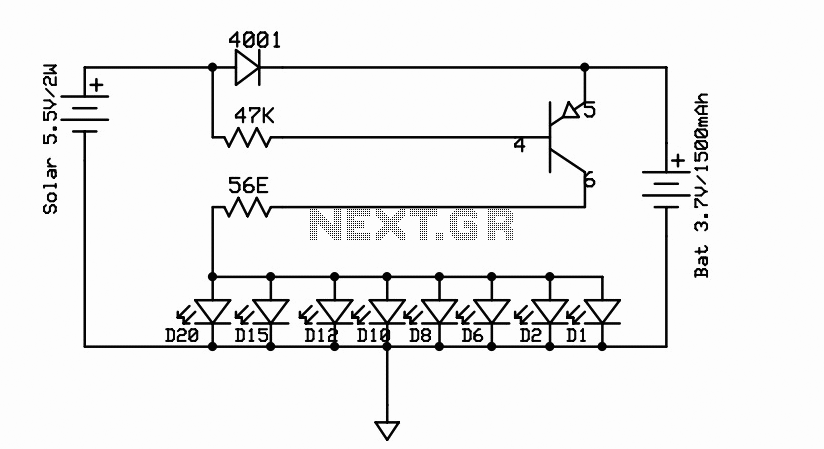
Automatic Solar Garden Lights with LEDs
An efficient automatic solar garden lights circuit with minimal components. The advantage is that it operates entirely autonomously, with the solar panel functioning as a light detector. It switches the lamp off at dawn, charges the battery during the daytime,...
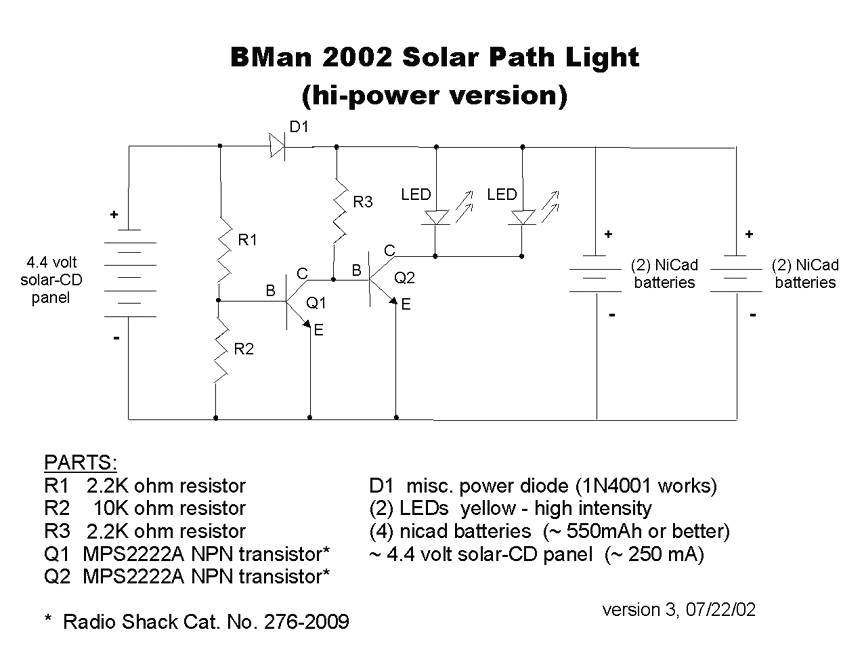
pathlight circuit
The completed Solar CD Two LED circuit is presented with components labeled to correspond with the schematic. Although the soldered circuit may appear different from the schematic, the connections remain consistent, which is crucial. To transition from the schematic to...