


pickup winder project blog
#pickup winder
#lathe
#DIY
#winding machine
#crafting
#electrical components
#homemade tool
#project blog
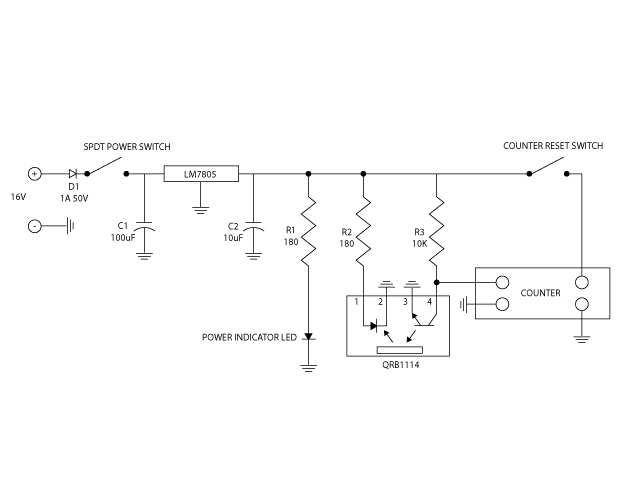
Description: When starting to create pickups, a larger lathe was acquired, while a mini lathe that was intended for sale was repurposed.
In the realm of electronics, pickups are essential components, especially in applications such as electric guitars and other stringed instruments. A pickup converts the mechanical vibrations of the strings into electrical signals, which can then be amplified. The process of crafting pickups involves precision engineering and an understanding of electromagnetic principles.
The repurposing of a mini lathe can significantly enhance the fabrication process. The lathe is a critical tool for shaping components, allowing for the creation of custom parts that meet specific design requirements. By utilizing both the larger lathe and the mini lathe, an engineer can optimize the production of pickup components, ensuring consistency and quality.
The design of a pickup typically involves the arrangement of magnets and coils. The magnet creates a magnetic field, and when the strings vibrate, they disturb this field, inducing an electrical current in the coil. The configuration of these components can vary, leading to different tonal qualities and output levels.
In a professional setup, it is advisable to implement a schematic that outlines the electrical connections and component placements. The schematic should include details such as the type of magnets used (e.g., Alnico or ceramic), the gauge of the wire for the coils, and the number of turns in the coil, as these factors influence the pickup's performance.
Furthermore, incorporating adjustable pole pieces can allow for fine-tuning of the output from individual strings, enhancing the overall playability and sound quality. The use of shielding techniques may also be necessary to minimize electromagnetic interference, ensuring a clean signal.
Overall, the integration of a mini lathe into the pickup manufacturing process not only optimizes production but also allows for innovation in design and functionality, leading to enhanced musical performance.When I started out making pickups, I had just bought a bigger lathe and had one of those mini one that I was just going to sell. I instead turned it into a wi..
In the realm of electronics, pickups are essential components, especially in applications such as electric guitars and other stringed instruments. A pickup converts the mechanical vibrations of the strings into electrical signals, which can then be amplified. The process of crafting pickups involves precision engineering and an understanding of electromagnetic principles.
The repurposing of a mini lathe can significantly enhance the fabrication process. The lathe is a critical tool for shaping components, allowing for the creation of custom parts that meet specific design requirements. By utilizing both the larger lathe and the mini lathe, an engineer can optimize the production of pickup components, ensuring consistency and quality.
The design of a pickup typically involves the arrangement of magnets and coils. The magnet creates a magnetic field, and when the strings vibrate, they disturb this field, inducing an electrical current in the coil. The configuration of these components can vary, leading to different tonal qualities and output levels.
In a professional setup, it is advisable to implement a schematic that outlines the electrical connections and component placements. The schematic should include details such as the type of magnets used (e.g., Alnico or ceramic), the gauge of the wire for the coils, and the number of turns in the coil, as these factors influence the pickup's performance.
Furthermore, incorporating adjustable pole pieces can allow for fine-tuning of the output from individual strings, enhancing the overall playability and sound quality. The use of shielding techniques may also be necessary to minimize electromagnetic interference, ensuring a clean signal.
Overall, the integration of a mini lathe into the pickup manufacturing process not only optimizes production but also allows for innovation in design and functionality, leading to enhanced musical performance.When I started out making pickups, I had just bought a bigger lathe and had one of those mini one that I was just going to sell. I instead turned it into a wi..
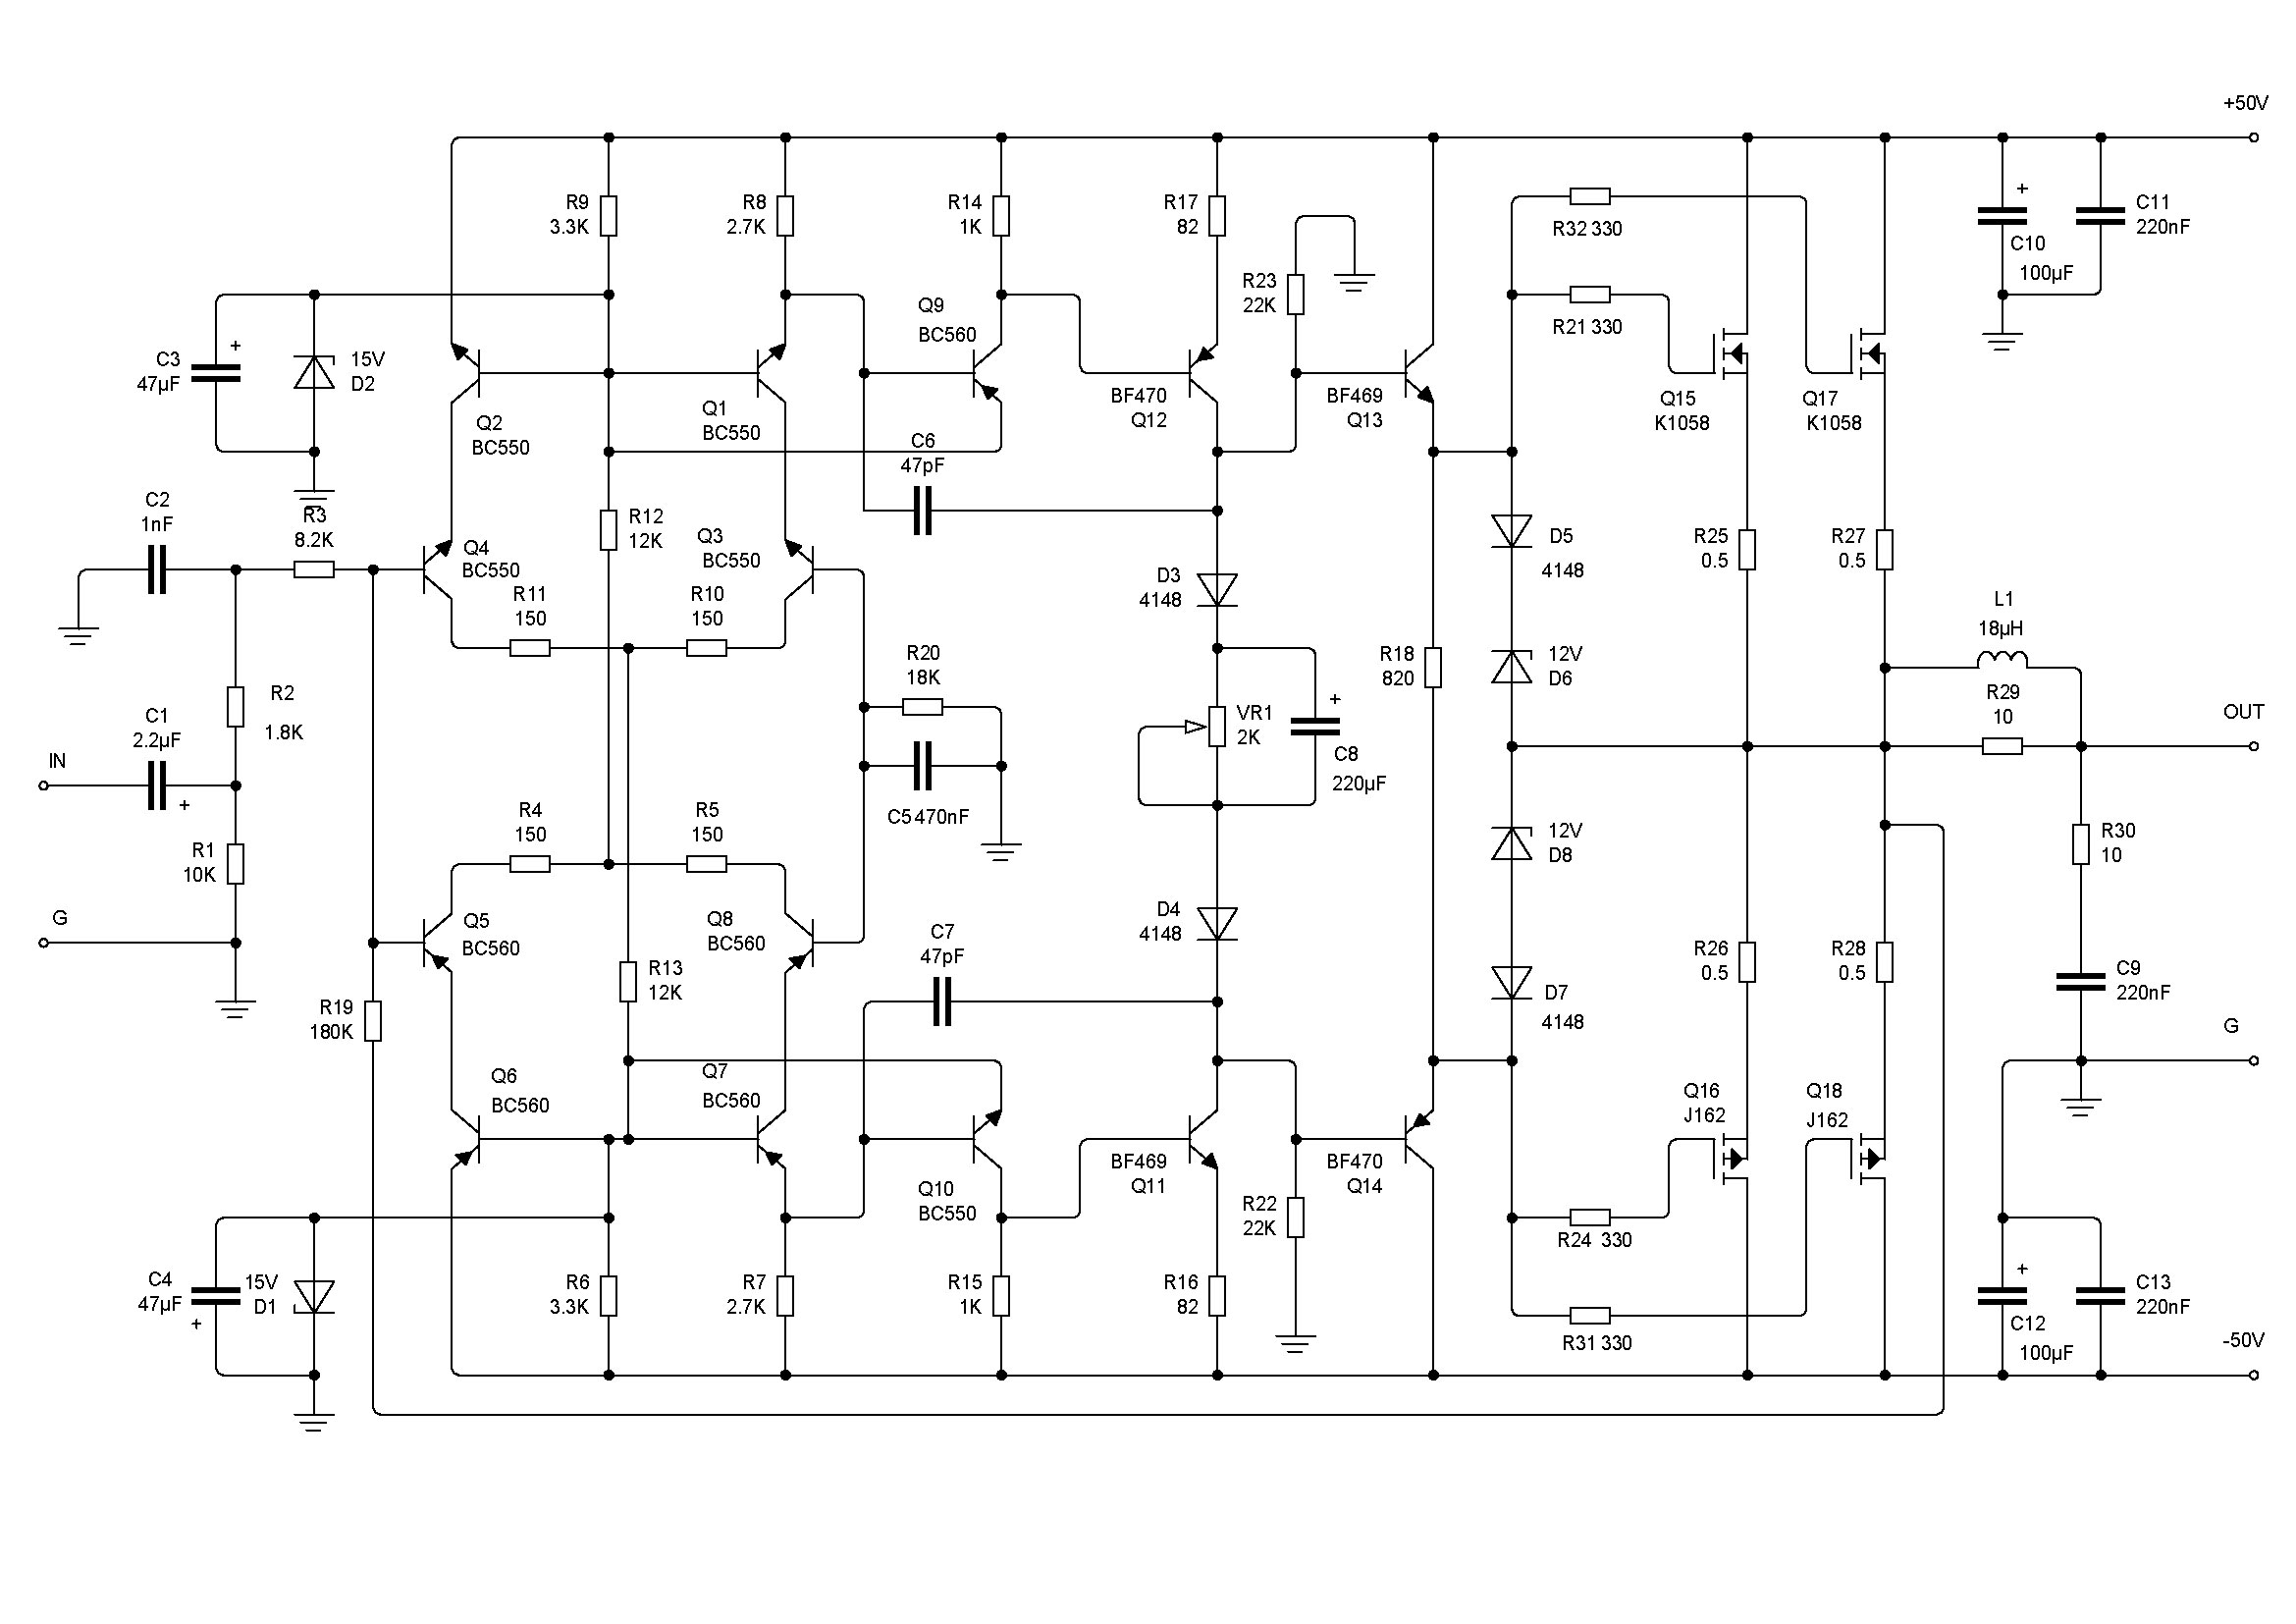
Crescendo ampilifier elektor1982
The Elector Crescendo was the first DIY amplifier that was not a kit. The design was sourced from the Elector magazines available at a local library.
The Elector Crescendo is an innovative audio amplifier designed for DIY enthusiasts. It features a...
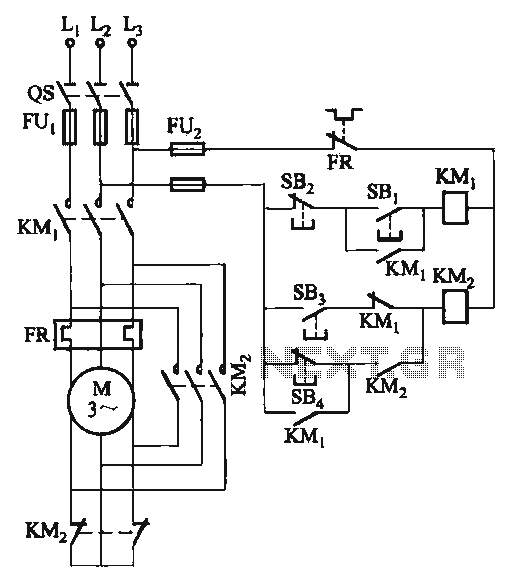
C620 lathe Y- conversion and other power-saving circuit
The C620 lathe Y-conversion includes a power-saving circuit designed for controlling the motor's reversing functionality. This system is applicable to machines such as the C620, C630, and CW61100A lathes, as well as radial drilling and milling machines.
The C620 lathe Y-conversion...
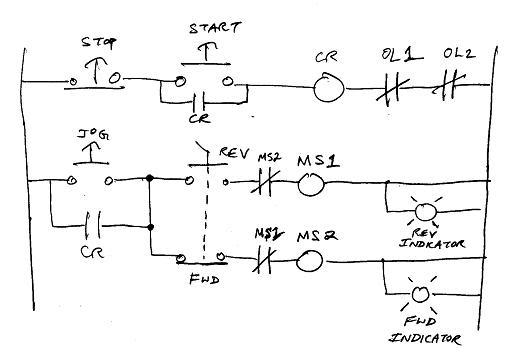
Enco 12X36 lathe contactor box
This is a first post expressing desperation. A used model #110-2079 gap bed 18-speed lathe with an American motor has been purchased, but there was a lack of realization regarding certain aspects.
The model #110-2079 gap bed lathe is a versatile...
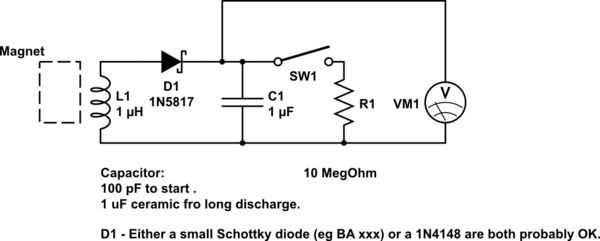
DIY kinetic energy harvester
A DIY kinetic energy harvester utilizing the electromagnetic method to generate electricity. The materials that will be used are currently known.
The project involves creating a kinetic energy harvester that converts mechanical energy from motion into electrical energy through electromagnetic induction....
C620 lathe Y- conversion and other power-saving circuit
The C620 lathe Y-conversion includes a power-saving circuit designed for controlling the motor's reversing functionality. This system is applicable to machines such as the C620, C630, and CW61100A lathes, as well as radial drilling and milling machines.
The C620 lathe Y-conversion...
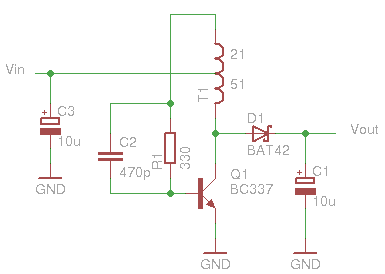
Glue stck torch
This project, developed around 2005, involves constructing a torch using a glue stick, which conveniently accommodates an AA battery within its plastic casing. To create a functional battery holder, contacts for both the positive and negative connections are necessary. The...

turret diy
For maximum mini-security, this RC Tupperware Turret delivers a formidable deterrent against food theft. While it lacks motion sensors, potential food thieves will think twice before attempting to swipe baked goods. This 11-hour project, designed by Chris of PyroElectro, emphasizes...
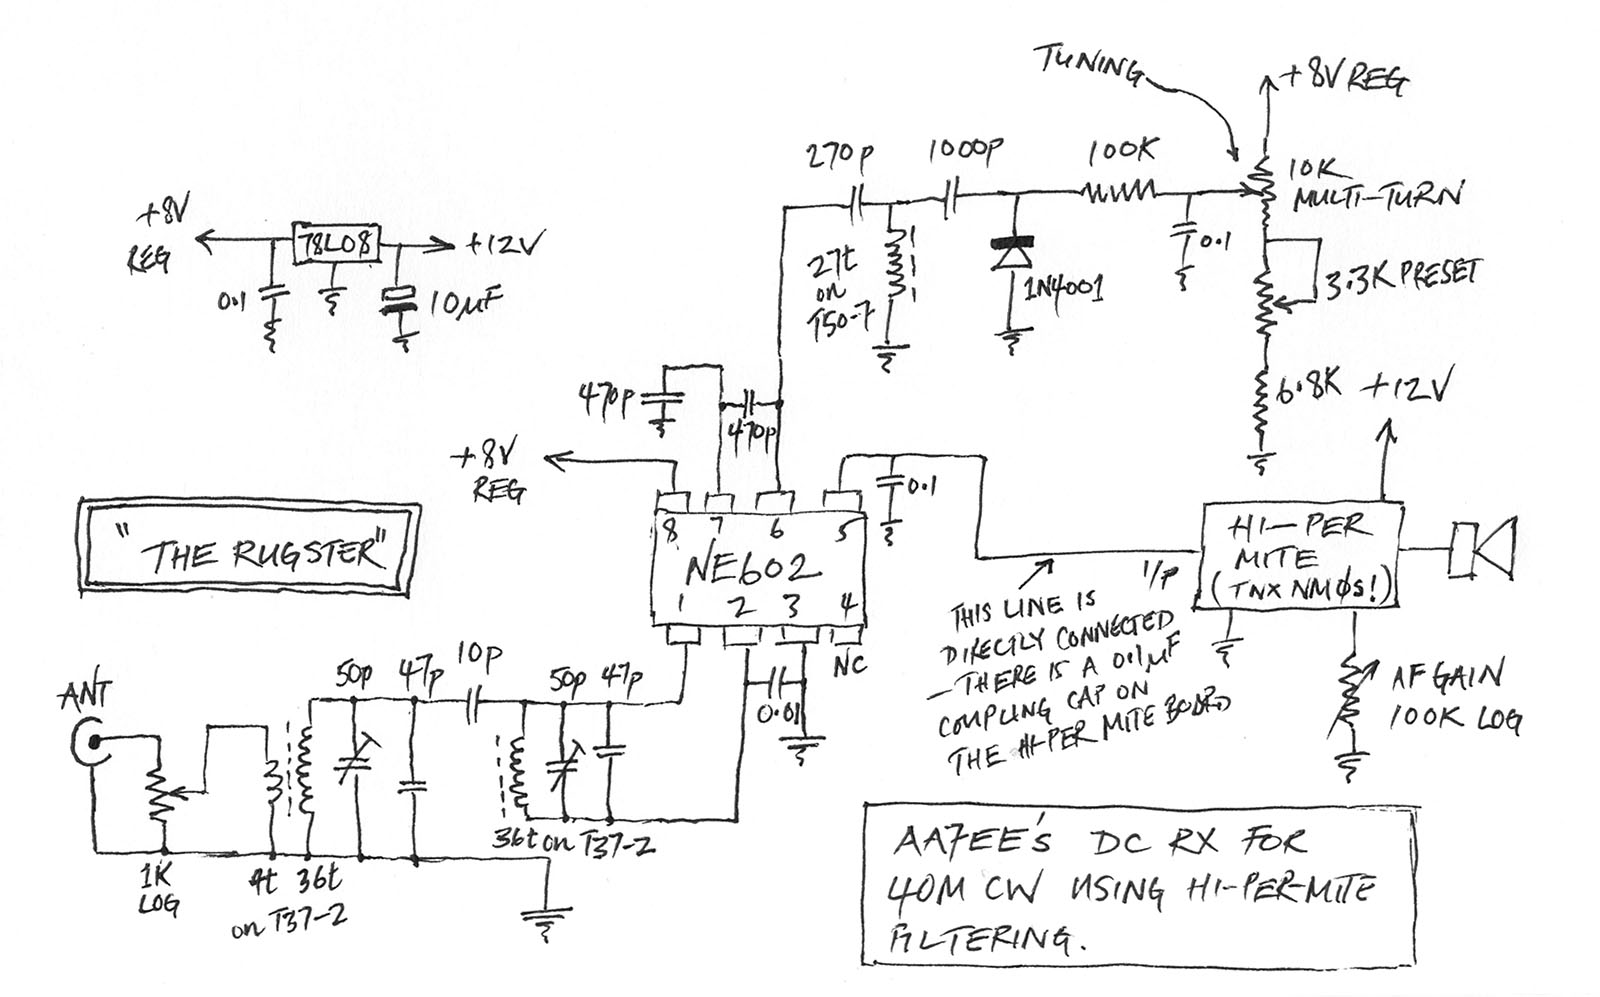
MePADS
If you are considering building the Desert Ratt 2, it is advisable to read all the accompanying text, as it contains relevant construction details. Engaging with the comments and replies can also provide additional insights, as previous blog posts have...
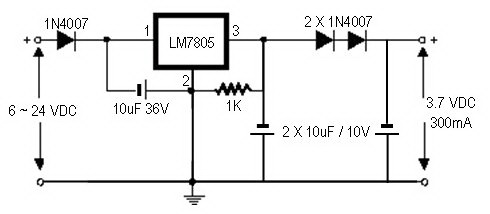
how to convert a 9v battery to 3.7v
A regulator circuit is needed for this DIY project. Familiarity with electronic components, circuitry, the use of a multitester, and a soldering iron is essential. The schematic diagram provided can accept an input voltage ranging from 6 to 24 volts...