
LED Bike Light Circuit Project

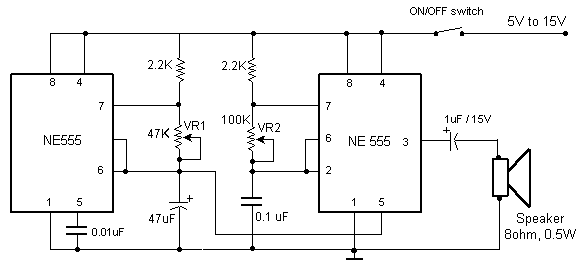
The circuit design begins with a dynamo hub integrated into the front wheel, which generates alternating current (AC) voltage. This AC voltage is rectified and regulated to supply a stable DC voltage suitable for powering the LED lights. The BD911 transistors serve as switches in the power supply circuit, capable of handling the required load while providing sufficient current to illuminate the LEDs effectively.
The astable multivibrator circuit is crucial for creating a flashing effect. It consists of two resistors (R2 and R3) and two capacitors (C4 and C3), which determine the oscillation frequency. The calculated time period of 0.2 seconds implies a flashing rate that can be visually appealing and attention-grabbing for safety during night rides.
The prototyping board arrangement allows for efficient layout and organization of the LED lights. The use of series resistors with the LEDs ensures that the current flowing through each LED is within safe limits, preventing damage and extending the lifespan of the components. The choice of white LEDs for the front and red LEDs for the rear adheres to standard cycling safety practices, enhancing visibility to others on the road.
Mounting the PCB under the seat protects it from environmental factors such as rain and debris, contributing to the reliability of the system. The suggestion to incorporate an on/off switch would enhance user control, allowing the rider to deactivate the lights when not in use, thereby conserving energy and preventing unnecessary wear on the components.
Considering the use of surface-mount devices (SMD) in future iterations could streamline the design, reduce the circuit footprint, and facilitate easier integration near the front light. This would also simplify the wiring layout, minimizing the distance the dynamo cable must travel and reducing potential points of failure. Overall, this project exemplifies the practical application of electronics in enhancing cycling safety and convenience.On my mountain bike I always used to have one of those well-known flashing LED lights from the high street shop. These often gave me trouble with flat batteries and lights that fell off. As an electronics student I thought: this can be done better . First I bought another front wheel, one which has a dynamo already built in the hub. This supplie d a nice sine wave of 30 Vpp (at no load). With this knowledge I designed a simple power supply. The transistors that are used are type BD911. These are a bit of an over-kill, but there were plenty of these at my school, so that is why I used them. Something a little smaller will also work. The power supply is connected to an astable multi-vibrator. This alternately drives the front light and the rear light. The frequency is determined by the RC time-constant of R3 and C3, and R2 and C4. This time can be calculated with the formula: t = R3G—C3 = 20G—103G—10G—10-6 = 0. 2 s You can use a 22k (common value) for R2 and R3, that doesn`t make much difference. On a small piece of prototyping board are six LEDs with a voltage dropping resistor in series with each pair of LEDs.
Such a PCB is used for both the front and the rear of the bike. Of course, you use white LEDs for the front and red ones for the rear. The PCB with the main circuit is mounted under the seat, where it is safe and has been working for more than a year now. There are a few things I would change for the next revision. An on/off switch would be nice. And if the whole circuit was built with SMD parts it could be mounted near the front light. This would also be more convenient when routing the wiring. Now the cable from the dynamo goes all the way to the seat and from there to the front and rear lights.
🔗 External reference
Related Circuits

A simple TV audio-video transmitter circuit can be designed using this schematic diagram. This circuit can transmit video signals from a VCR or other devices to a TV without the need for cables. Video signals input at jack J1...

A 555 IC is configured to function as a Schmitt trigger. Inputs above and below the threshold level will turn the circuit on and off, producing a square wave output. The 555 timer integrated circuit (IC) is a versatile device...
Dark Activated Switch or Porch Light Switch. This circuit activates a relay when the light level drops below a preset threshold. The light sensitivity can be adjusted using variable resistor VR1, and the relay contacts can control an external...

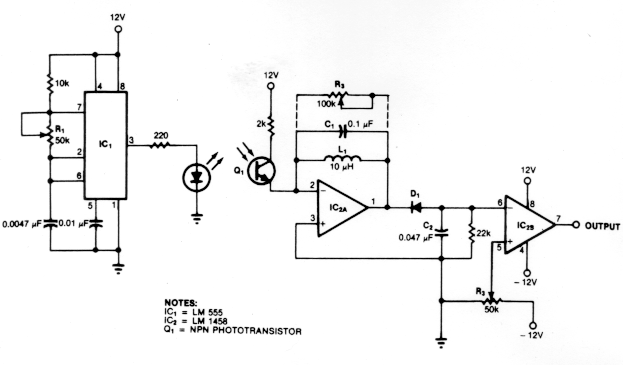
The circuit utilizes a dual operational amplifier integrated circuit (IC), specifically the 1458, which contains two separate op-amps within a single package. In this configuration, the first op-amp functions as a voltage follower, directing its output to charge capacitor...
Police siren circuit diagram. This circuit produces a sound similar to a police siren. It utilizes two 555 timer ICs. The police siren circuit typically employs two 555 timer integrated circuits (ICs) configured in astable mode to generate a square...

In many instances, the dimmer described here may be integrated into a wall-mounted box that also contains the light switch. It is designed specifically for use with 240 V incandescent lamps. Upon activation, the lamp does not reach full...
Warning: include(partials/cookie-banner.php): Failed to open stream: Permission denied in /var/www/html/nextgr/view-circuit.php on line 713
Warning: include(): Failed opening 'partials/cookie-banner.php' for inclusion (include_path='.:/usr/share/php') in /var/www/html/nextgr/view-circuit.php on line 713