
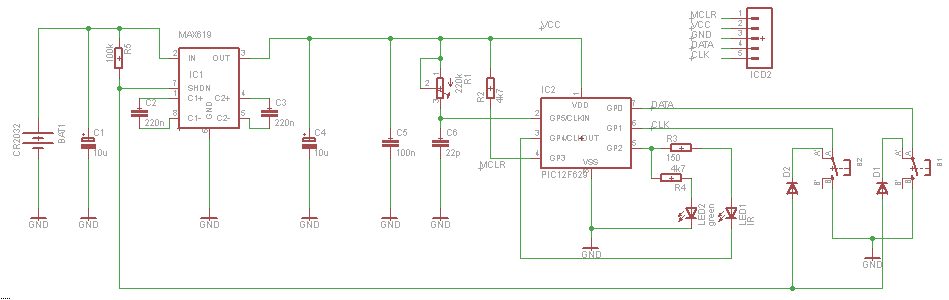
Infrared remote control receiver for Media Centers

The described remote control receiver circuit is a practical solution for integrating multiple electronic devices into a single media center, allowing for simplified control through the use of a universal remote. The choice of the ATtiny13 microcontroller is significant, as its compact size and capability for reprogramming offer flexibility for future enhancements. The infrared receiver's operation at 30 kHz ensures compatibility with standard remote signals, while the use of the RS-232 port for communication allows for reliable data transfer between the remote and the media center.
The circuit's design includes essential features such as the dual power control options (remote and physical switch), which enhances user convenience. The integration of diodes for polarity-free connections simplifies installation and reduces the risk of errors during assembly. The careful selection of the "+5VSB" pin for power supply is crucial, as it ensures that the circuit remains operational even when the media center is in low-power states, thereby maintaining its responsiveness to remote commands.
Furthermore, the EEPROM storage feature for remote control key programming allows users to customize their experience easily. The limitation to RC5 remote controls should be noted, as it dictates the compatibility of the system with existing remotes. Overall, this circuit represents a cost-effective and user-friendly approach to modernizing home entertainment systems, leveraging readily available components and open-source software to achieve its functionality.A few time ago I decided to create a media center box to replace my DVD player, sattelite receiver, VCR and my kid`s Play Station 2, toone device. So, I made a core 2 duo processor system that actually replaced with succeed, all my electronic devices.
The only thing that was missing was a remote control to switchOn/Off my Media Center. After I sea rched on the net to buy a complete remote control system, I saw that the price was a little bit high (about 90euros). I checked my stuff to find my old 7-in-one remote control that I hadbought 2 years ago and Istarted to build my own remote control receiver circuit.
I focused onATtiny13 microcontroller because of its small size and its RAM in case Iwould like to rebuild the source code in C language. After a second thought, Idecided to build a completely remote control receiver that it could handle both On/Off and windows or program commands.
I searched again on the net and Ifound an old version of Girder 3. 2. 9that was freeware. I went atplug-in settingsand I made a few tests to see which plug-in is the easiest to be handled via RS-232 port. I chose the "Creative infra RS232" hardware type under "UIR/IRman/IRA/CTInfra/Hollywood+" plug-in. This plug-in is receiving up to 6 bytes from serial port with 2400 bps (Bits Per Second) making it ideal for my purpose.
The circuit consists of ordinary components (except of ATtiny13 in some cases). The IC1 is an infrared receiver at 30 kHz. The T2 makes the switchOn/Off of Media Center when it getsa High level by IC2. The K2 is connected tothe "Power-ON switch" connector of your PC`s mainboard (motherboard). BE CAREFUL!NOT THE 220V AC power connector. The two diodes are put to make the connection of K2 to the mainboard, easy. You don`t have to worry about which polarityyou have to connect this connector to the mainboard. Connect it as you wish. K1 is connected to the power switch (button) of your PC`s case. So, you can turn On/Off your media Center withboth remote control and your case`s power on/off switch. K3 is connected at your RS-232 port of your Media Center. It can work on both real RS-232 ports and USB-to-RS232 converters, in case youhaven`t got a real RS-232 port.
The +5V can be taken by 20pin ATX connector and specific by the pin "+5VSB" (purple cable). The powersupply of the circuit must be done by this cable (+5VSB) because it`s the only cable that has +5V voltage when the computer is in hibernate, stand-by or power-offmode. The circuit has to be power supplied always for being functional. The ground pin (GND) of the circuit has to be connected with one of the black cables. This circuit can work ONLY with RC5 remote controls. If your remote control works with RC6 code, or any other IR (InfraRed) system different than RC5, you will never makethis circuit work.
Select which key of your remote control do you want it to act as "Power On/Off" key. Normally you have to choose the red key that is the most common topower on/off the electronic devices. Press that key continuously and then press the S1 button of the circuit simultaneously with the remote control`s key.
The red LED will flash. Release the key and S1 both. Now the code of this key has been stored in eeprom. If you want to change the power On/Off key, you have to remake the above proccess and the code of the new key will be stored in the eeprom. The distribution of Girder 3. 2. 9 has been stopped from Promixis. I contacted with Promixis to give me the permission to redistribute Girder 3. 2. 9 from my web site. They told me that redistributionis not allowed and they offered a 2 months demo witha 20% discount in case you buy Girder 5 standard.
Thisoffer is for all friends of web site. The only thing you have to do is to fill outthe "Coupon Code (Optional)" field with this code: GirderPromo09A and click to "Recalculate" button. 🔗 External reference
Related Circuits

This circuit enables the control of any equipment operating at 115 volts AC. It utilizes the Radio Shack infrared receiver module (MOD), part number 276-137, which can also be sourced from other suppliers listed on the Links page. The...
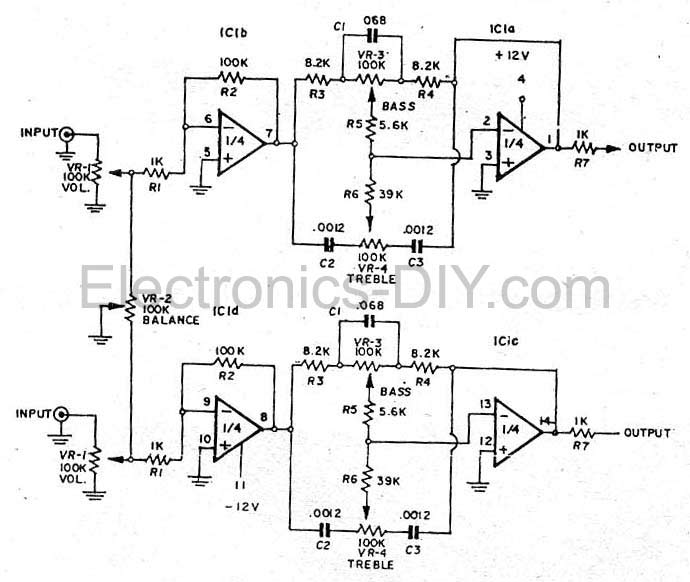
This simple tone control (bass and treble control) can be utilized in various audio applications. It can be integrated into amplifiers, function as a standalone control module, or even be incorporated into new and innovative instruments. The circuit employs...

The intelligent control circuit for the iron is presented. This circuit utilizes the integrated circuit PT8A351X to manage functions such as direction detection, relay control, and LED indication. When the iron is positioned horizontally, it will power off after...
The Tiny Remote is a compact infrared remote control featuring only two buttons designed to operate an iRobot Roomba. It emits three different infrared signals. The Tiny Remote is designed for simplicity and ease of use, making it an ideal...
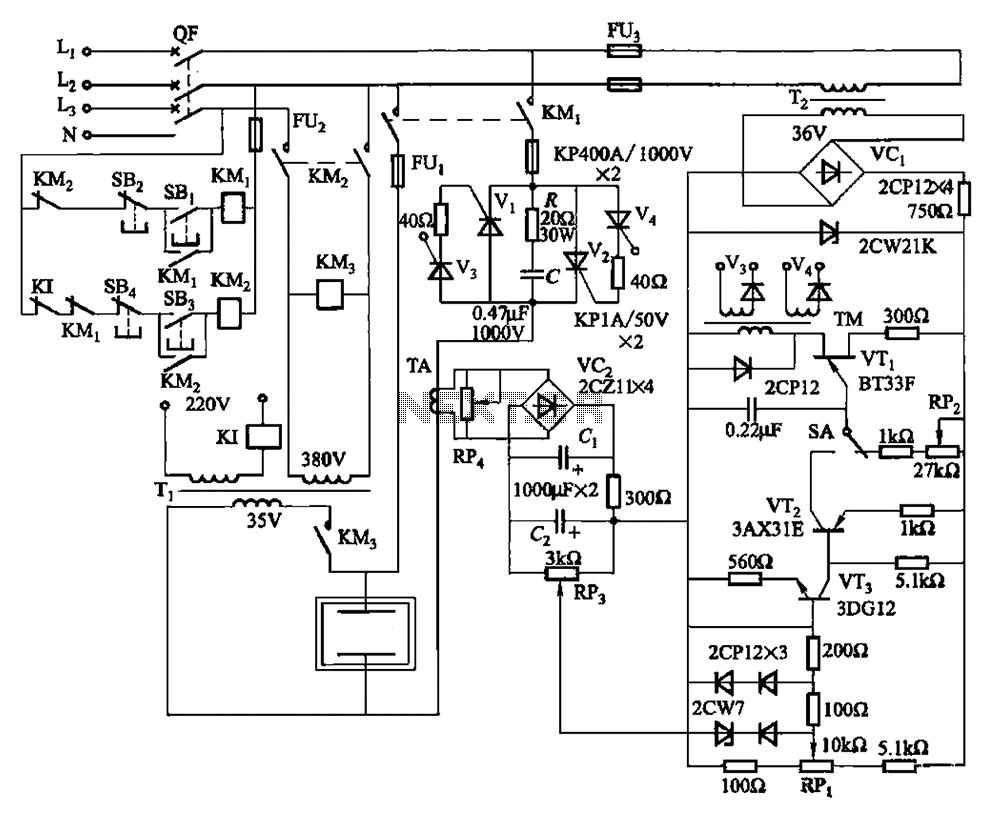
80 kW resistance salt bath furnace control circuit. The salt bath resistance furnace is a high-power device that employs fast start and temperature control technology to significantly save energy. The circuit includes a single-junction transistor (VTi) used as a...
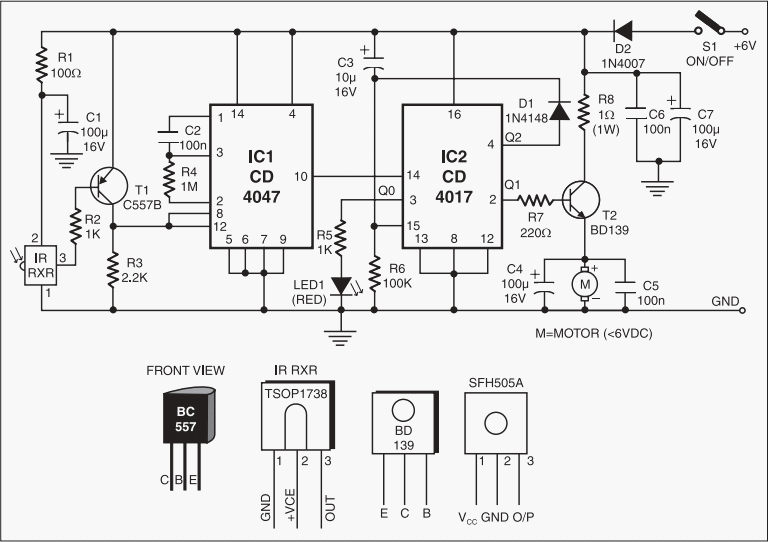
This add-on circuit enables remote switching on and off of battery-operated toy cars using a TV or video remote control handset that operates at 30 to 40 kHz. When powered by a 6V battery, the decade counter CD4017 (IC2),...