
pic16f877 up down counter code and proteus simulation

The PIC16F877 microcontroller is a versatile device commonly used in various applications, including counter circuits. An up-down counter can increment or decrement its value based on input signals. The implementation involves configuring the microcontroller's I/O pins, setting up an interrupt service routine, and using timer functions to achieve the desired counting behavior.
To begin, the microcontroller's pins must be configured as either input or output. Typically, two pins will be designated for counting direction: one for incrementing and another for decrementing. The remaining pins can be used to display the count value, often through a 7-segment display or an LCD module.
In the schematic, the up-down counter is designed to respond to external signals, such as push buttons. Each button press triggers an interrupt, which is processed by the microcontroller to either increase or decrease the count. The interrupt service routine must be carefully programmed to ensure that it accurately reads the state of the buttons and updates the count accordingly.
Additionally, the use of timers can enhance the functionality of the counter by allowing it to count at a specific frequency or to debounce the button presses. A timer interrupt can be configured to periodically check the button states, ensuring that the count is updated smoothly without missing any inputs.
The output display can be connected to the microcontroller through a series of GPIO pins, with appropriate resistors to limit current and protect the display. The code running on the PIC16F877 will include logic to convert the numerical count into a format suitable for the display, ensuring that the user can easily read the current count value.
In summary, implementing an up-down counter with the PIC16F877 microcontroller involves careful planning of the hardware connections, programming of the microcontroller to handle input signals and display outputs, and consideration of timing functions to ensure accurate counting. This application showcases the capabilities of the PIC16F877 in handling real-time input and output operations effectively.This PIC16F877 microcontroller tutorial answers the question, "" How to implement a up down counter using PIC16F877 ? "" Using PIC16 simulator (Proteus) you.. 🔗 External reference
Related Circuits

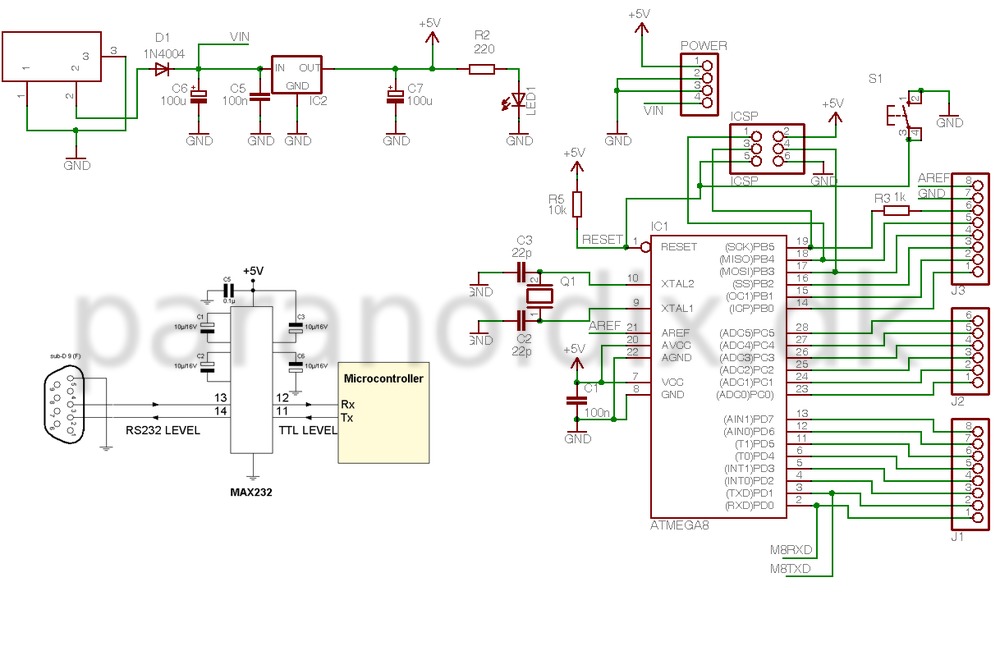
The design primarily consists of the ATmega328P-PU microcontroller and an LCD display. Both components necessitate a stable power supply. The ATmega328P-PU microcontroller is an 8-bit AVR microcontroller that operates at a clock speed of up to 20 MHz. It features...
Built primarily as a proof of concept, this unit is capable of sending an ASCII string terminated with a carriage return (CR) and line feed (LF) via an RS232 connection. It emulates the transmission of a barcode and can...

This key code switch circuit is an electronic circuit designed to replace conventional key switches, eliminating the need for physical key inserts. The key code switch circuit utilizes a microcontroller or a dedicated integrated circuit (IC) to interpret key codes entered...
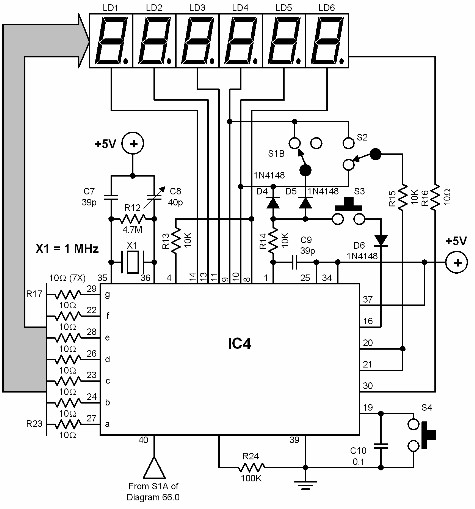
A digital audio frequency (AF) counter can be constructed using a minimal number of components by employing a single 7226B integrated circuit (IC) from Intensil, as depicted in the accompanying diagram. This circuit has an upper frequency limit of...
This design explains how to use an encoder to set the number shown by a 7-segment display. Turn the knob clockwise to increment the number, turn it counterclockwise to set it back. Encoders are the most practical way to...
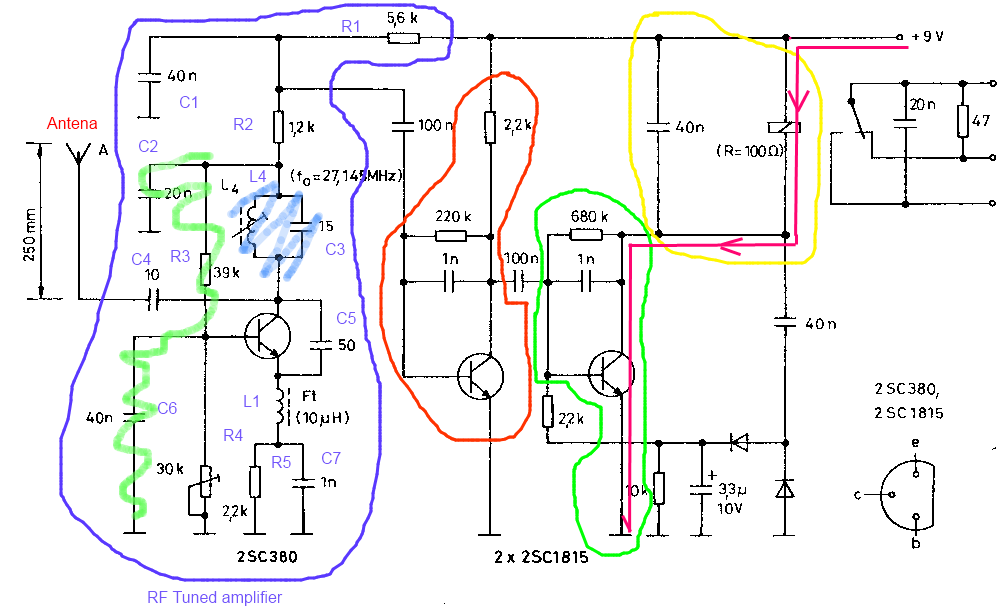
The circuit described is a toy car receiver, which operates similarly to the transmitter but in reverse and with additional filtering. The receiver is tuned to a frequency of 27.145 MHz to capture signals at this frequency. Following the...