
spider

The spider prop's electronic circuit design is centered around the use of a stepper motor, which is known for its precise control capabilities. The motor's operation is facilitated by a microcontroller, which sends control signals to the power transistors that manage the motor coils. Each of the four motor coils is energized in a specific sequence to achieve smooth and accurate rotation. The TIP120 power transistors serve as switches that control the flow of current to the motor coils based on the signals received from the optoisolators.
The optoisolators are critical components in this design as they provide electrical isolation between the high-power motor circuit and the low-power microcontroller circuit. This isolation prevents potential damage to the microcontroller from current spikes or voltage fluctuations in the motor circuit. Each optoisolator receives a control signal from one of the microcontroller's output pins, which is limited by a 1K resistor to prevent excessive current flow through the LED inside the optoisolator. When the microcontroller activates an output, the LED lights up, allowing current to flow through the phototransistor side of the optoisolator, thereby activating the corresponding TIP120 transistor.
The entire circuit is designed to run on two separate power supplies: one for the stepper motor at 12 volts and another for the microcontroller at 5 volts. This separation is essential for the reliable operation of both components. The TIP120 transistors, which are capable of handling significant current, are mounted on a circuit board, and it is advisable to use heat sinks to dissipate heat generated during operation, particularly when the motor is under load.
In terms of physical layout, the circuit board is organized to facilitate easy connections to the stepper motor leads and the microcontroller outputs. The terminal strip allows for straightforward wiring, while the toggle switch provides a simple means to power the circuit on and off. An LED indicator is included to show when the circuit is powered, enhancing usability. The capacitor serves to filter any noise from the power supply, ensuring stable operation of the circuit. Overall, this design effectively combines mechanical and electronic elements to create a functional and controllable spider prop.The spider prop is fairly simple in terms of mechanical setup. Where it gets somewhat complicated is in the electronics setup. It is based around a stepper motor. By their very nature, stepper motors are non-trivial to control. By that, I mean that you can`t just apply power and expect them to turn. They need a controller of some type, such as a computer or a microcontroller. However, the advantage of a stepper motor is that the controller has a very high degree of control over the position of the motor`s shaft. By keeping track of the number of steps executed, the controller knows exactly how far the spider has been unwound, and so it knows exactly how many steps it needs to execute in the other direction to wind it back up.
As I mentioned earlier, the mechanical set up is pretty basic. Attach a couple of L-brackets to the motor, and attach the motor to a small sheet of plywood. Drill a hole about the size of the motor shaft into the end of a dowel that is three inches long or so. The diameter of the dowel is up to you. The thicker the dowel, the faster the spider will wind and unwind. Glue the dowel onto the motor shaft. Drill a hole in the piece of plywood the motor is attached to. The hole should be directly under the dowel attached to the motor shaft. Run a string through the hole and attach it to the dowel. I stuck a thumbtack into the dowel and tied the string to that. Tie the other end of the string to the spider, or whatever else you want to go up and down. Now, for the electronics side. The stepper motor I use has 6 leads. Two of them are to supply power to the four coils within the motor. Each of the other four leads is connected to one of the four coils. By connecting each of the four leads to ground, one at a time, in the proper order, the motor shaft rotates.
Reverse the order, and the shaft rotates the other direction. In the future, I will provide details on how to determine which leads are which. The four leads are not control leads, like that of a servo. These leads have a lot of current going through them - more current than a typical microcontroller can handle. Also, the stepper motor I use runs best at 12 volts, while my PIC microcontroller runs at 5 volts, so I need separate power supplies for the two.
As a result, I have a separate board to supply power to the motor. Each of the four leads from the stepper motor (not counting the two power leads) is connected to a TIP120 power transistor. Since the motor is on a separate power supply from the PIC, however, I don`t want the PIC directly controlling the base of the transistor.
Instead, I use an optoisolator to keep the two power supplies completely isolated. So, each of four PIC outputs are connected to the LED side of the optoisolator, with a 1K current-limiting resistor. When the PIC turns on one of its outputs, the LED lights up, which turns on the transistor side of the optoisolator.
This turns on the TIP120, which closes the circuit for one of the motor coils, energizing the coil. Below is a schematic for one of the four coils in the stepper motor. The real circuit has four copies of this circuit, as you will see in the pictures that follow it. Technically, this schematic isn`t quite accurate. Both the 4N33 optoisolator and the TIP120 are actually Darlington transistors but I only show one transistor. The idea is still the same, though. In this last picture, you have the four 4N33 optoisolators running down the middle. The four TIP120 power transistors run down the right side. A terminal strip along the left side provides connection points for the stepper motor leads and the control signal leads from the PIC.
At the bottom are a couple of power connecters, a toggle switch to turn the power on to the circuit, an LED to indicate that power is on, and a 220uf capacitor. I probably should use heat sinks on each of the TIP120s. The fact that the motor doesn`t really run that much and that it`s 🔗 External reference
Related Circuits
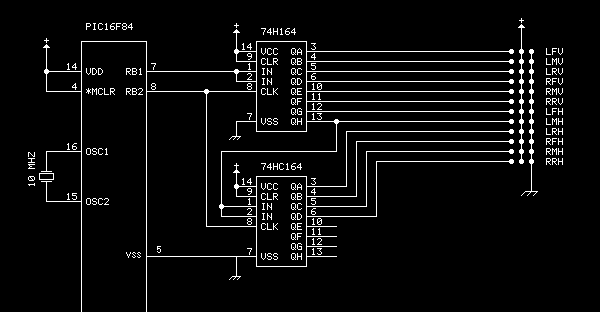
To get enough outputs from the PIC chip, a pair of 74HC164 shift registers was used. These need only two lines from the PIC (data & shift) to produce the twelve signal pulses for the servos. A single bit...

The avr-gcc/binutils combination can generate Intel Hex files that are suitable for uploading to an AVR microcontroller using sp12. If assembly language is being used, an assembler is necessary to convert human-readable assembly into microcontroller-readable machine code. Tom Mortensen...

For the Smart Cities exhibition in Leeds in a couple of weeks, a physical representation of an agent-based simulation is being developed. Hex Bug Spiders are inexpensive hexapod robots controlled via an infra-red transmitter with an A or B...