
2d Contact Robotics
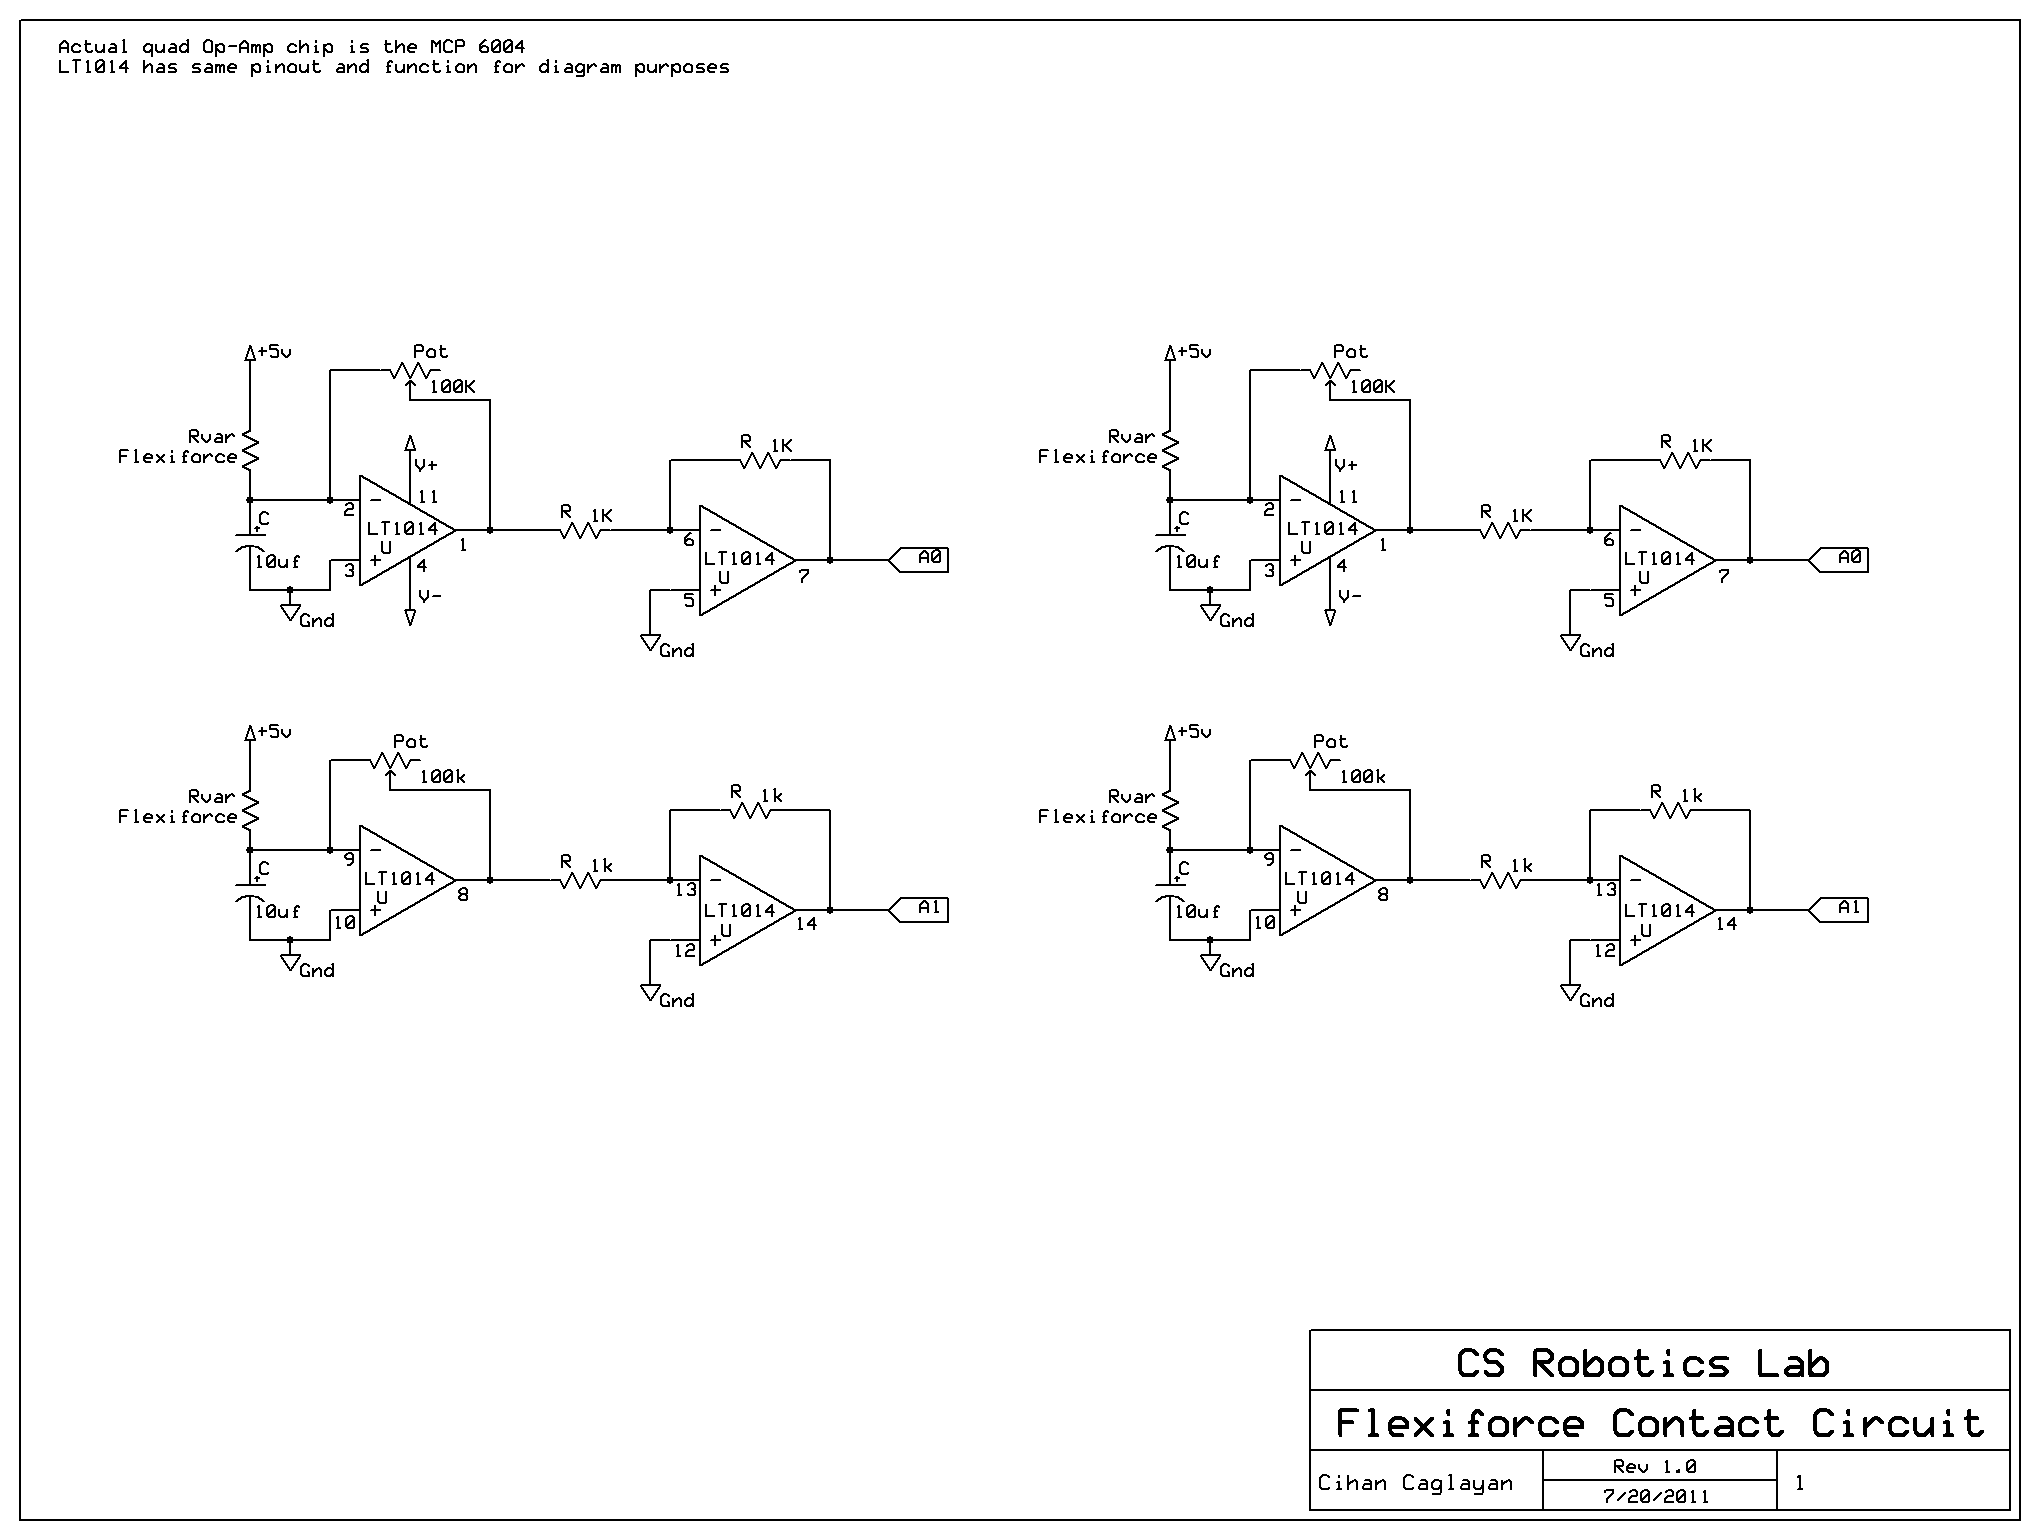
The project involves utilizing the MATLAB support package specifically designed for Arduino integration, which facilitates communication between MATLAB and Arduino hardware. The primary challenge encountered was the inability to access the COM port assigned to the Arduino when using the Ubuntu 11.04 operating system. This situation can arise due to permission settings or driver issues that may prevent MATLAB from recognizing the Arduino's serial interface.
To resolve this, it is essential to ensure that the appropriate drivers are installed and that the user has the necessary permissions to access the serial ports. This can typically be achieved by adding the user to the 'dialout' group in Ubuntu. Additionally, confirming that the correct board type is selected in MATLAB is crucial, as the Arduino Mega2560 has a different pin configuration than the Arduino Uno, necessitating modifications in the code and library files.
The README file accompanying the project outlines specific changes made to accommodate the Mega2560's additional pins, which may involve adjusting pin assignments in the code. The files modified for this purpose should be reviewed to understand the adjustments made.
For successful uploading of the .pde file to the Arduino, it is important to navigate to the Tools menu in MATLAB, select the appropriate board type, and identify the correct COM port associated with the Arduino. This information can be found in the Devices and Printers section on Windows. After ensuring all settings are correct, the upload process can be initiated by clicking the right-pointing arrow button in the MATLAB interface. It is critical to wait until the serial lights on the Arduino board stop blinking, which indicates that the upload process is complete, before disconnecting the board to avoid any potential data corruption or communication errors.There were issues connecting to the while in Ubuntu 11. 04, where the COM port assigned to the Arduino was not accessible through MATLAB. This issue will be investigated later if needed. MATLAB Arduino Library: The MATLAB support package for Arduino was used for this project. A few changes, outlined in the README, were put in place to accommodate for the Arduino Mega2560`s greater number of pins than the standard Arduino Uno. The altered files is attached to this page, and the rest of the files remain unchanged. In the Tools drop down menu, select your version of the Arduino board under Board, and identify the board`s COM port (found in Devices and Printers if on Windows) under Serial Port. Select the right-pointing arrow button from the ribbon, which will upload the. pde file to the Arduino, do not unplug anything until the serial lights have stopped blinking on the board.
🔗 External reference
Related Circuits

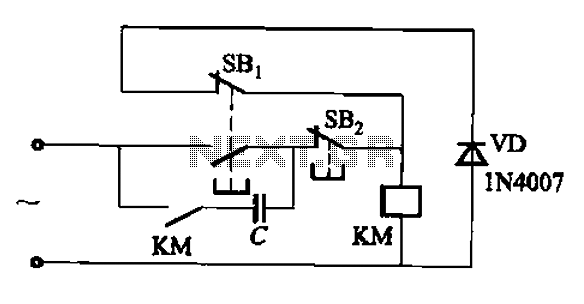
Competition among relay contacts in contactor control systems often leads to significant issues that can be cumbersome to address. In some cases, this requires the addition of numerous components. However, utilizing a negative temperature coefficient thermistor (NTC) for delay...
An AC contactor switch, when used with DC or pulse DC excitation, can minimize short circuit and core power consumption. This results in a significant reduction in the power consumption of the electromagnet, which can eliminate noise and reduce...
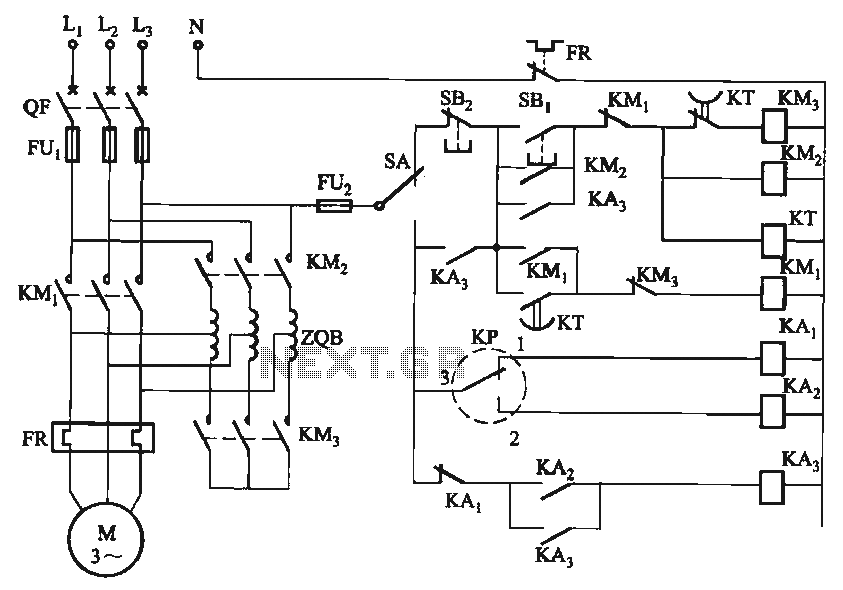
The circuit utilizes a motor auto-voltage transformer for starting. The motor auto-voltage transformer start circuit is designed to provide a controlled method for initiating the operation of an electric motor. This type of circuit is particularly beneficial in applications where...
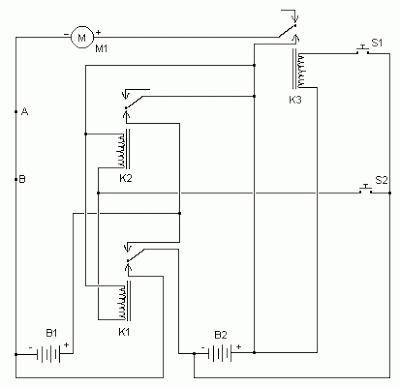
The simplest form of motor controllers, apart from a basic on/off switch, is the contactor controller. This contactor controller is recommended for use in electric scooter projects. It is based on three 12V relays, two 12V batteries, two switches,...
This page contains links to various projects and items of interest for the RoboticsArt Studio class projects. The RoboticsArt Studio class projects encompass a range of innovative endeavors that integrate art and robotics. These projects typically involve the design, assembly,...

The AC contactor operates silently, demonstrating significant energy-saving effects, low noise, and a reduced operating temperature, which contributes to an extended lifespan. It is widely utilized in the production industry. When the SB2 button is pressed, the N-terminal receives...