
arduino on breadboard

The USB to serial converter IC is a critical component in the Arduino Uno architecture, facilitating the interface between the microcontroller and a host computer. The ATmega 16U2, used in the R3 version, enhances communication capabilities and offers improved performance over its predecessor, the ATmega 8U2. The SMD design of the IC allows for a compact form factor, which is essential in maintaining the small footprint of the Arduino Uno board.
The installation process for the driver is designed to be user-friendly. Upon downloading the driver from Cytron’s website, users will execute the installer, which configures the necessary settings for the operating system to recognize the Arduino board as a serial device. Once the installation is complete, the device manager will reflect the presence of the Arduino, confirming that the board is ready for programming and communication.
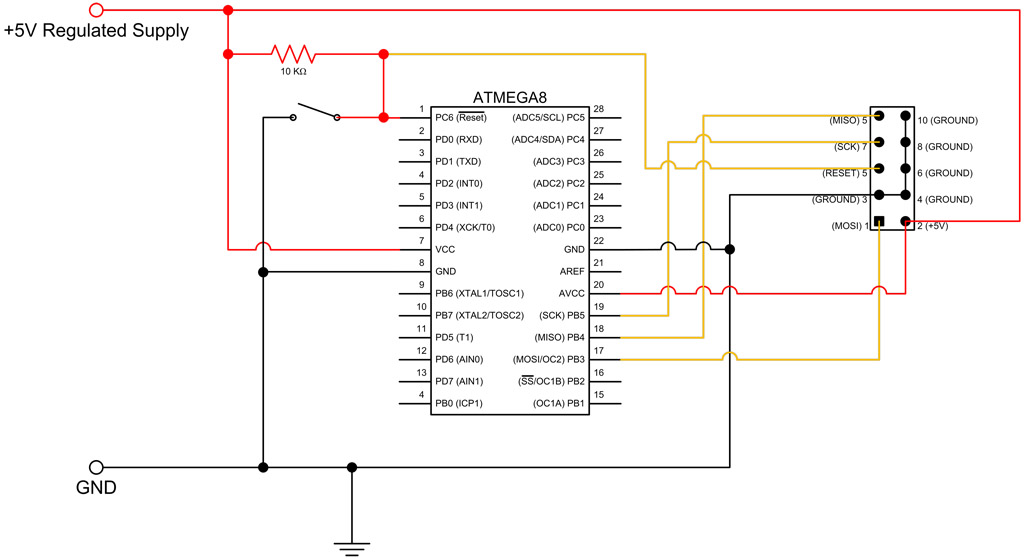
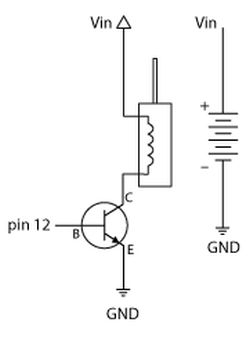
For those interested in constructing an Arduino on a breadboard, various schematics are accessible online. These schematics provide a foundation for building a custom Arduino setup that can be tailored to specific project requirements. The modifications made during the design process can optimize the circuit layout, enhance component accessibility, and improve overall functionality. The resulting design can serve as a valuable resource for both novice and experienced electronics enthusiasts looking to explore the capabilities of Arduino-based projects.On the Uno boards, there`s an IC which is responsible as a USB to serial converter and it makes it possible to program the Arduino and also communicate with it from the computer. The problem here is the IC is an SMD (Surface Mounted Device). The R3 uses an ATmega 16U2 while the older revisions uses the 8U2. Installation is pretty easy. Just download the driver from Cytron`s website and execute the installer. Here`s what you`ll see in the device manager after installation. There are many schematics available online for constructing an Arduino on a breadboard, but after an extensive research and some personal modifications, I`ve come up with this. 🔗 External reference
Related Circuits
This tutorial continues from the ATmega8 Breadboard Circuit Part 1, where a small power supply was built on a breadboard. In this part, the ATmega8 microcontroller will be added along with an interface for programming. The first step is...
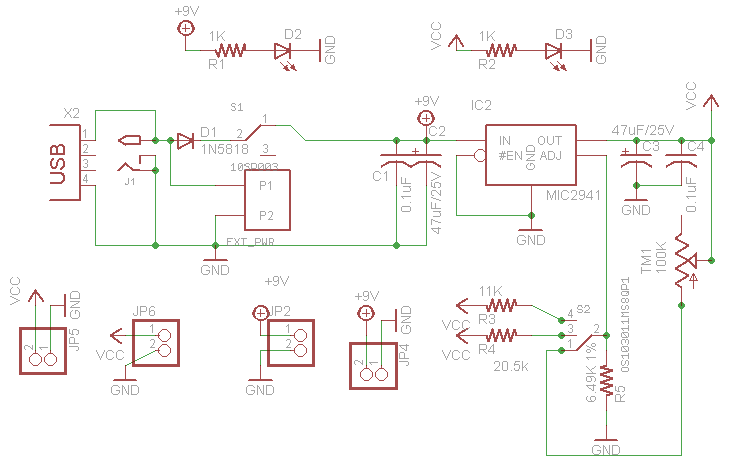
This project outlines the design of a very low dropout adjustable power supply. A reliable power supply is crucial for electronic projects. Although numerous existing designs for adjustable power supplies are available, this particular design introduces enhancements that increase...

A project is underway to determine the number of sun hours available at a specific location and to track this data over time as part of solar power installation design. The concept involves utilizing a light detector exposed to...
A rotary encoder generates two square wave outputs (A and B) that are 90 degrees out of phase. The number of pulses or steps produced per full rotation varies by model; for instance, the Sparkfun Rotary Encoder has 12...
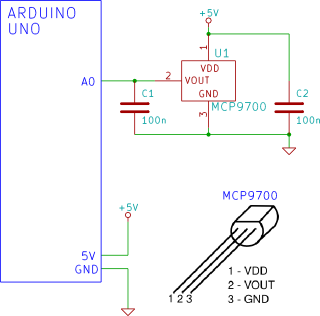
The Arduino reads temperature from an MCP9700 temperature sensor IC and displays the temperature in the Arduino IDE serial monitor window. The circuit utilizes an Arduino microcontroller along with an MCP9700 temperature sensor integrated circuit (IC) to measure ambient temperature....
Humanity has long grappled with the concept of Time, often seeking ways to interact with it meaningfully. A proposed solution is a knocking platform designed to address these fundamental needs, exemplified by the Knock Block KUI and its associated...