
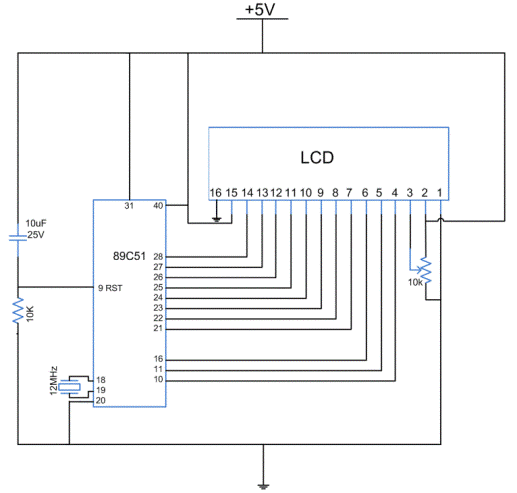
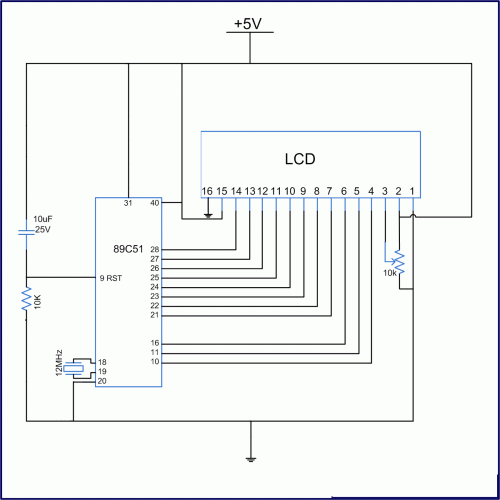
interface 16x2 lcd with 8051 microcontroller at89c51
Monitoring the functionality of automated and semi-automated devices is crucial for ensuring optimal performance and reliability. This can be achieved through the integration of various electronic circuits designed to track operational parameters. For instance, a basic monitoring circuit could include sensors to measure voltage, current, and temperature, along with a microcontroller to process this data.
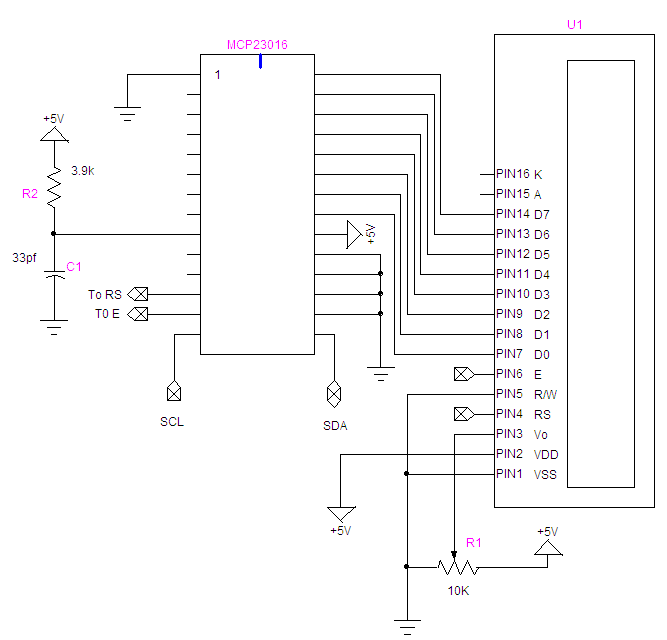
In such a system, sensors like current transformers or Hall effect sensors can be employed to monitor electrical current, while thermistors or thermocouples can be used for temperature measurements. These sensors feed data to a microcontroller, which can be programmed to evaluate the operational status of the device. The microcontroller may also interface with a display unit, such as an LCD or LED indicators, to provide real-time feedback to the user.
Moreover, the circuit can include communication modules, such as Bluetooth or Wi-Fi, to allow remote monitoring and control. This is particularly beneficial in applications where devices are located in hard-to-reach areas or when users desire to access operational data from their smartphones or computers.
To enhance reliability, the circuit design should incorporate protective elements like fuses and transient voltage suppressors to safeguard against electrical surges. Additionally, power supply considerations are vital, ensuring that the microcontroller and sensors receive stable voltage levels, typically achieved through voltage regulators or power management ICs.
Overall, the design of an automated device monitoring system requires careful selection of components and consideration of the operational environment to ensure accurate tracking and reporting of device performance.INTRODUCTION It is very important to keep a track of the working of almost all the automated and semi-automated devices, be it a washing machine, an autonomous.. 🔗 External reference
Related Circuits
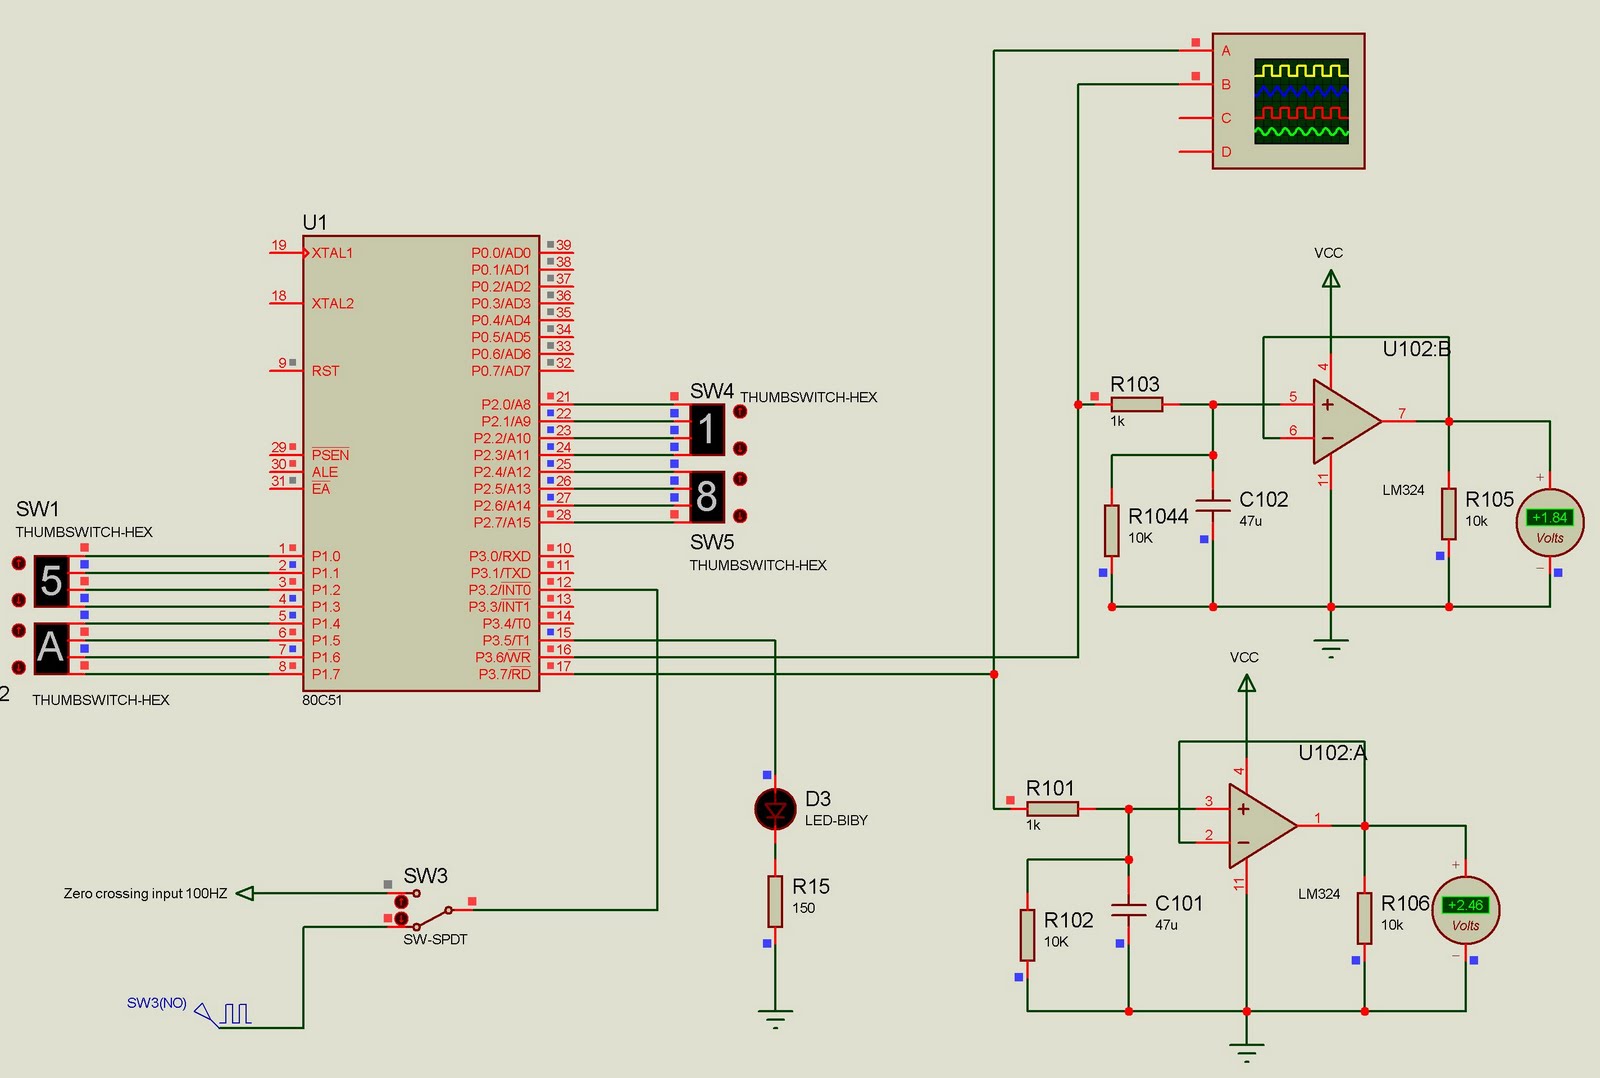
This project currently outputs two PWM signals but can be easily extended to generate multiple PWM signals. The input to the microcontroller consists of 100Hz pulses serving as zero-crossing signals. It is designed for a two-channel DAC, where the...
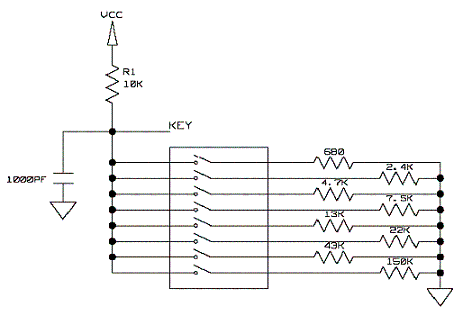
A keyboard is typically connected using a matrix configuration of rows and columns. For example, a 12-button keyboard requires 3 to 4 digital inputs from a microcontroller. However, it is possible to construct a keyboard that connects to a...
Best Microcontroller Projects. Do you want to learn how to use a microcontroller in your electronic projects, or do you need inspiration for your next project? If so, you have found the right place! Here is a tutorial on...
Interface the LCD with the 8051 microcontroller AT89S52. However, upon powering up the microcontroller, the LCD displays only black boxes. Multiple codes have been tried, but the output remains the same. The circuit has been simulated in Proteus, where...
How to connect and program the Arduino/Atmega168 microcontroller to an LCD display and DS1307 RTC. To interface the Arduino/Atmega168 microcontroller with an LCD display and a DS1307 Real-Time Clock (RTC), the following steps outline the necessary connections and programming considerations. The...

The interface circuit is placed between the computer's standard video signal output terminal and the television. It amplifies the standard 1V (Peak-to-Peak) video signal to 3V (Peak-to-Peak). The negative feedback circuit consists of transistors T1 and T2, providing a...
Warning: include(partials/cookie-banner.php): Failed to open stream: Permission denied in /var/www/html/nextgr/view-circuit.php on line 713
Warning: include(): Failed opening 'partials/cookie-banner.php' for inclusion (include_path='.:/usr/share/php') in /var/www/html/nextgr/view-circuit.php on line 713