
microcontroller interfacing pic16f877a keypad lcd
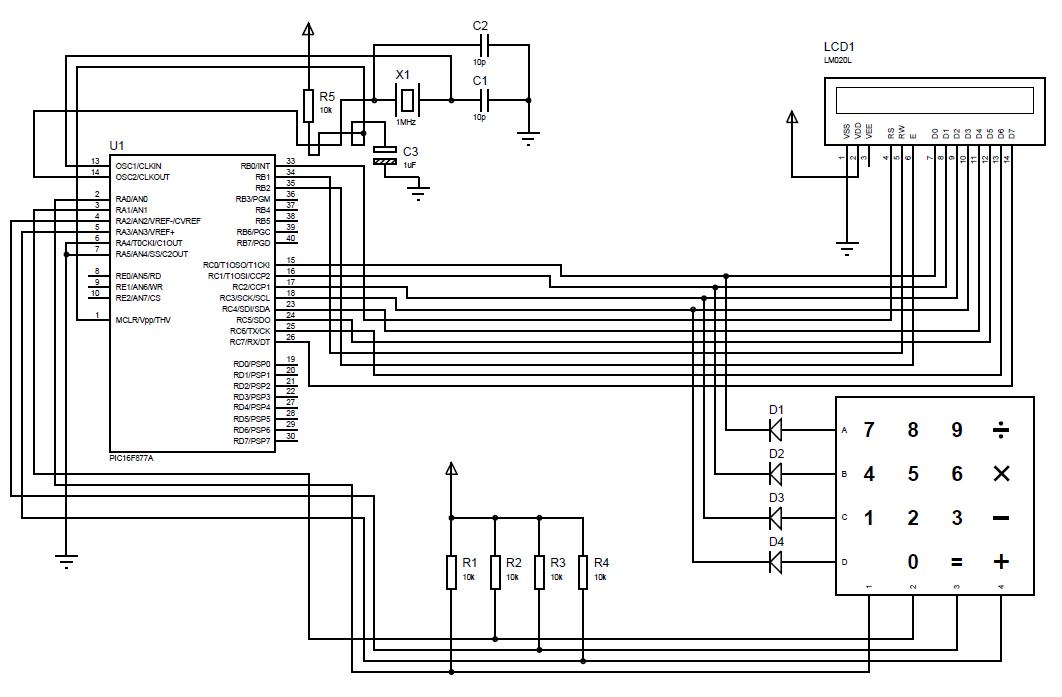
To achieve the desired functionality of displaying output on an LCD in response to a button press on a keypad, a microcontroller-based circuit can be designed. The circuit primarily consists of a microcontroller, a keypad, an LCD, and necessary supporting components such as resistors and capacitors.
The microcontroller serves as the central processing unit, interpreting inputs from the keypad and controlling the output to the LCD. A commonly used microcontroller for such applications is the Arduino, which is user-friendly and well-documented for beginners.
The keypad can be a 4x4 matrix keypad, which allows for multiple button inputs. Each button press sends a specific signal to the microcontroller, which can be programmed to recognize these signals. The microcontroller’s digital input pins are connected to the rows and columns of the keypad. When a button is pressed, it completes a circuit that the microcontroller can detect.
The LCD, typically a 16x2 character display, is connected to the microcontroller through a series of digital output pins. The microcontroller sends commands to the LCD to control what is displayed. It is important to initialize the LCD in the code to set up the display parameters.
Supporting components such as pull-up resistors may be used to ensure stable readings from the keypad. Additionally, a power supply circuit is necessary to provide the appropriate voltage to the microcontroller and the LCD.
The programming involves writing a code that continuously scans the keypad for button presses. Upon detecting a button press, the corresponding action is executed, which includes sending the appropriate data to the LCD for display. This can be done using libraries available for the microcontroller platform, which simplifies the process of interfacing with the LCD and keypad.
In summary, this project encompasses the integration of a microcontroller with a keypad and an LCD, allowing for interactive output based on user input, making it an excellent learning experience for beginners in microcontroller applications.I am a beginner/hobyist and would like to learn more about Microcontrollers. All I want to do is receive an output on an LCD when pressing a button on the keypad. 🔗 External reference
Related Circuits
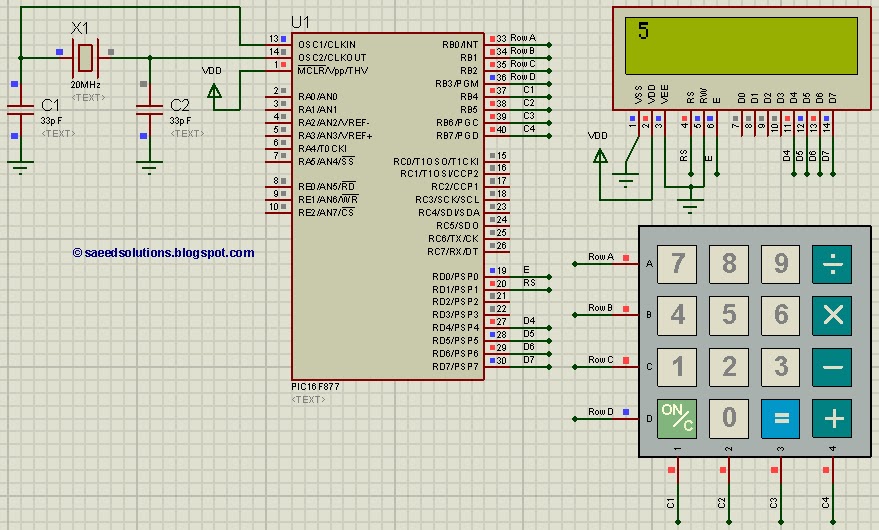
This PIC microcontroller tutorial provides a straightforward method to interface any keypad (e.g., 4x4 or 4x3) with the PIC16F877 microcontroller. This code is written... The tutorial outlines the steps necessary to connect a keypad to the PIC16F877 microcontroller, which is...
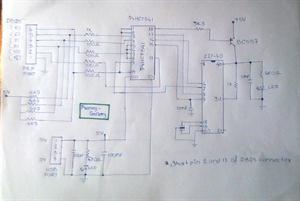
The AT89C family of microcontrollers features a parallel programming interface for flash memory. To write information, a programming voltage of 12V is required, and nearly all pins of the ports are utilized for this purpose. Consequently, parallel programming is...
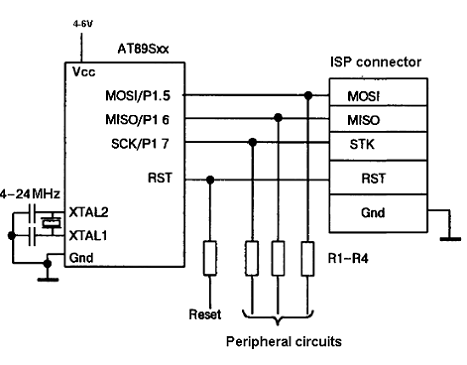
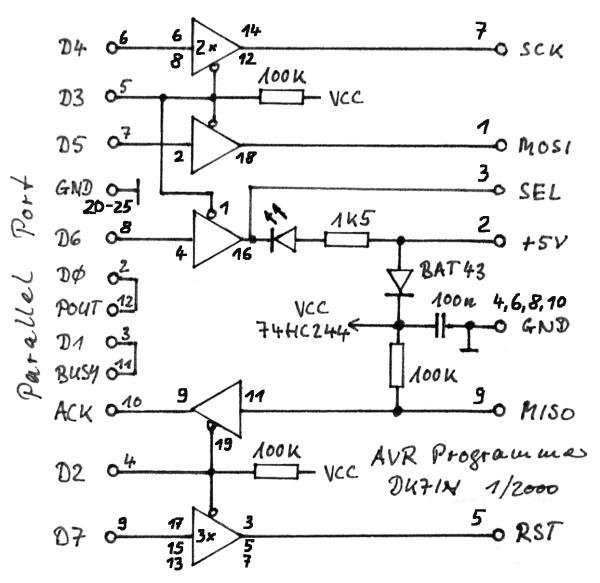
This resource contains step-by-step information for creating an AVR microcontroller programmer, complete with a suitable circuit diagram. This programmer is capable of programming 8051, AT89XX, AT90XXXX, and 8031 family microcontrollers. The AVR microcontroller programmer described is designed to facilitate the...

Laptop computers frequently utilize large-screen LCDs that require both a variable and a negative supply to achieve maximum contrast. This circuit operates from the system's positive battery supply and generates a digitally variable negative voltage to drive the display....
The following circuit illustrates the use of the AD8531 integrated circuit for the automatic control of LCD panel backlighting. Features include the ability to compensate for aging effects. The AD8531 is a precision operational amplifier that is well-suited for applications...
The gap between TTL (Transistor-Transistor Logic) devices and personal computers can be effectively bridged with modern microcontrollers. These microcontrollers not only incorporate a central processing unit (CPU) but also include program and data memory, EEPROM, input/output (I/O) ports, timers,...