
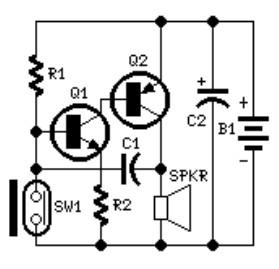
simple mic preamp
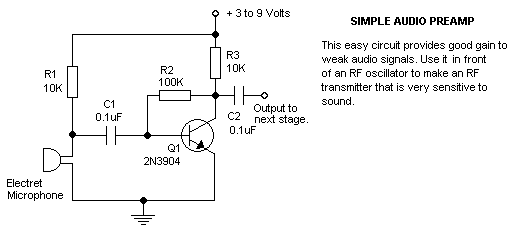
The described circuit is characterized by its simplicity and accessibility, making it an ideal project for beginners or those looking to quickly prototype a concept. The components required for assembly are readily available at local electronics shops, ensuring that the project can be completed without extensive sourcing delays.
Key components of this circuit may include basic electronic elements such as resistors, capacitors, diodes, and transistors, which can be combined to achieve a variety of functions. For instance, if the circuit is intended for a basic LED driver, it would typically consist of a power source, an LED, a current-limiting resistor, and a switch.
The power source could be a battery or a DC power supply, providing the necessary voltage for the LED. The current-limiting resistor is crucial as it prevents excessive current from flowing through the LED, which can lead to damage. The switch allows the user to control the on/off state of the LED, providing a straightforward interface for operation.
In a more complex variation, the circuit might incorporate a microcontroller to enable programmable features, such as varying the brightness of the LED or creating blinking patterns. This would add a layer of complexity while still maintaining the project's accessibility.
Overall, the circuit exemplifies a foundational project in electronics, promoting hands-on learning and reinforcing fundamental concepts in circuit design and component functionality.this is a very easy circuit to build - all parts can be found at the local electronics shop. 🔗 External reference
Related Circuits
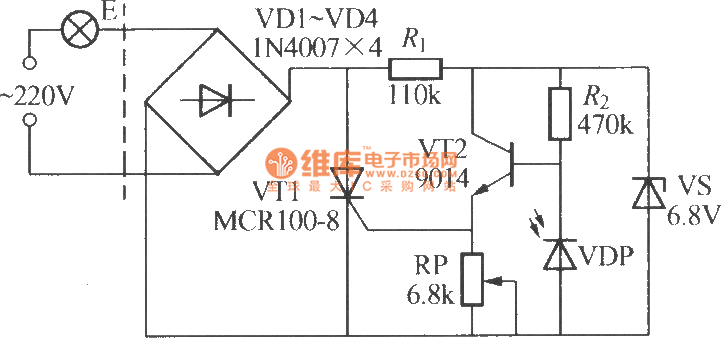
The VDP is a photodiode that exhibits low resistance during the day, approximately 1 kΩ. As a result, transistor VT2 remains off, which keeps thyristor VT1 in the off-state due to the absence of trigger current at the gate,...
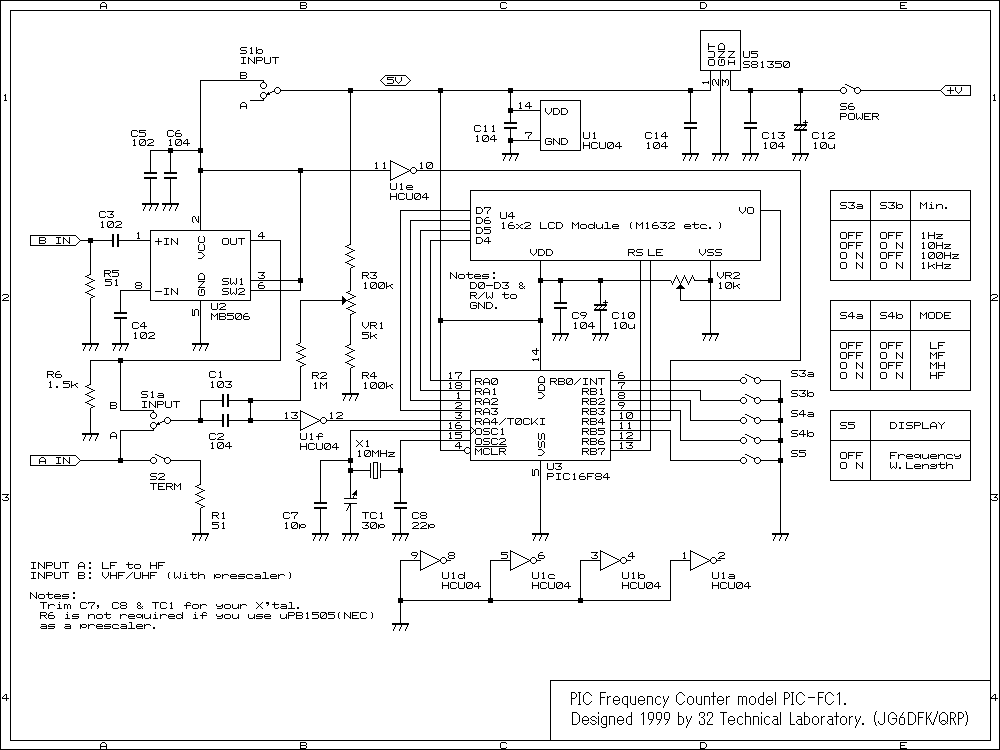
To achieve greater sensitivity, consider using the 74AC04 or 74HC04 in place of the 74HCU04 for component U1. While the 74AC04 and 74HC04 may offer improved performance over the 74HCU04, it is important to note that the frequency response...
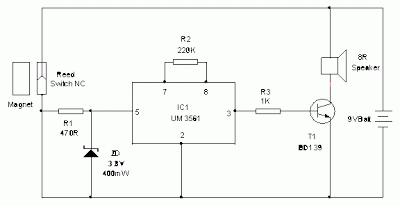
This simple door chime protects the door and emits a loud alarm tone in the event of a theft attempt. The circuit is straightforward and battery-operated. A Normally Closed (NC) reed switch and magnet are utilized to trigger the...
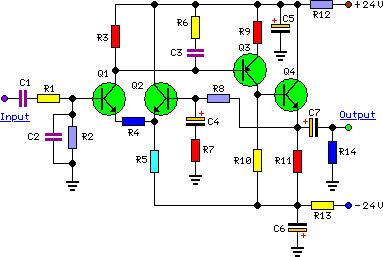
To complement the 60 Watt MOSFET Audio Amplifier, a high-quality preamplifier design was necessary. A discrete component topology, utilizing ±24V supply rails, was chosen, maintaining a minimal transistor count while still achieving low noise, very low distortion, and a...
Connect the serial cable to the serial port. If using a USB to TTL, RS232, or serial converter, plug it into the USB port. Next, short the Tx pin to the Rx pin or the TxD pin to the...
The system involves positioning a small magnet near the stalk switch SW1, which is connected to the hand or garments of the individual carrying the bag via a tiny cable. Due to the compact nature of the circuit, it...
Warning: include(partials/cookie-banner.php): Failed to open stream: Permission denied in /var/www/html/nextgr/view-circuit.php on line 713
Warning: include(): Failed opening 'partials/cookie-banner.php' for inclusion (include_path='.:/usr/share/php') in /var/www/html/nextgr/view-circuit.php on line 713