
Arduino Controlled Pneumatic Servo

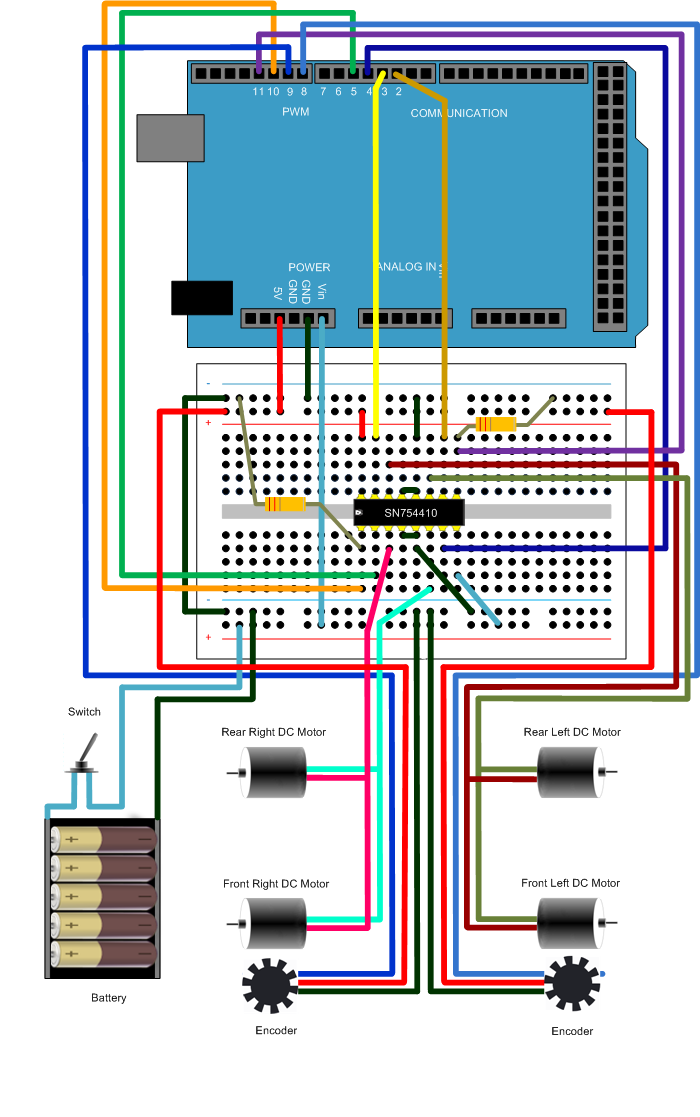
The pneumatic ram control system described above integrates several key components that work together to achieve precise positioning. The Arduino acts as the central controller, processing input from the potentiometers and controlling the solenoid valves based on the feedback received. The use of double-acting pneumatic rams enables movement in both directions, which is essential for applications requiring accurate positioning.
The Clippard mouse valves are selected for their quick response time and low power consumption, making them ideal for this application. The connection of these valves to the Arduino is facilitated through a transistor and diode, which serve to manage the current and protect the Arduino from potential back EMF generated when the valves are activated.
The inclusion of an adjustable flow restrictor is crucial for fine-tuning the pneumatic system's response. This component allows for the regulation of air flow into the ram, which can significantly affect the speed and responsiveness of the system. By adjusting the flow restrictor, the user can mitigate any erratic movements caused by sudden changes in pressure.
The innovative use of a wheel attached to the potentiometer's knob is a clever mechanical solution to track the position of the ram accurately. This method converts linear motion into rotational motion, allowing the potentiometer to provide precise feedback to the Arduino. The spring-loaded string mechanism ensures that the system remains taut, preventing slack that could lead to inaccurate readings.
When designing the wheel, careful consideration must be given to its size in relation to the potentiometer's range of motion. An oversized wheel can result in a loss of resolution, while an undersized one can lead to mechanical failure. The use of birch plywood for the wheel construction provides a balance of strength and weight, ensuring durability while maintaining the necessary sensitivity for accurate position tracking.
Overall, this custom pneumatic ram control system exemplifies an effective blend of electronic and mechanical engineering principles, resulting in a cost-effective solution for precise positioning in pneumatic applications.For an upcoming project I needed a pneumatic ram with a closed loop control system so I could position it accurately. Didn`t have the budget for an off the shelf solution, so I bodged one together with an ardunio, a couple air solenoid valves, and a pair of potentiometers.
How it works is one potentiometer is the target while the other is mounted to the ram. The arduino code compares the two, figures out the direction that the ram needs to move to match them up, it then cycles the solenoid valves on and off accordingly. Once the values match, it turns both valves on, more or less locking the ram in place. The target pot can also be replaced with any analog input. For the rest of the hardware I am using a pair of clippard mouse valves and an arduino UNO. The valves work well, 10ms response time and very low power consumption you need a transistor and diode to hook them up to the Arduino, look up the solenoid tutorial.
The ram is a double acting one. Also It works best if you have an adjustable inline flow restrictor on the incoming air stream. It allows you to fine tune the rate of fill so the servo is less twitchy. The big secret on this was to mount a wheel onto the knob of one potentiometer, this wheel has a string wrapped around it that is tied to the end of the ram. When the ram extends, it pulls the string, spins the pot and tada you now have the rams position. You need a second string with a spring attached to roll the wheel back and keep everything taut. To work out the diameter of the wheel just take your rams stroke and multiply by PI to get your radius.
Keep in mind that your pot might not turn 360 degrees, mine was 270 so factor that into your calculations. Best to make it a bit oversize anyway, worst case is that you lose some resolution if its too large, if its too small the ram will destroy the pot or break the string when it runs out of room.
In this case the wheel is made of birch plywood, with a groove turned into it on the lathe to guide the string. 🔗 External reference
Related Circuits

There are many variations in definitions of what exactly constitutes a robot. Consequently, it can be challenging to compare the number of robots across different countries. To provide a universally acceptable definition, the International Organization for Standardization (ISO) defines...
The advanced credit card, referred to as the "microcontroller super card," incorporates numerous innovative enhancements. The initial step involved verifying the code and subsequently uploading it to the Arduino board. The developed code enabled a counter to increment from...
File exchange, MATLAB Answers, newsgroup access, links, and blogs for the MATLAB and Simulink user community. The MATLAB and Simulink user community is supported through various platforms that facilitate knowledge sharing and collaboration among users. The File Exchange feature allows...
This relay circuit is controlled by nearly any type of infrared remote controller. It operates under the assumption that most remote controllers utilize high-frequency modulated infrared light. By filtering out unmodulated or low-frequency modulated signals, this circuit effectively eliminates...
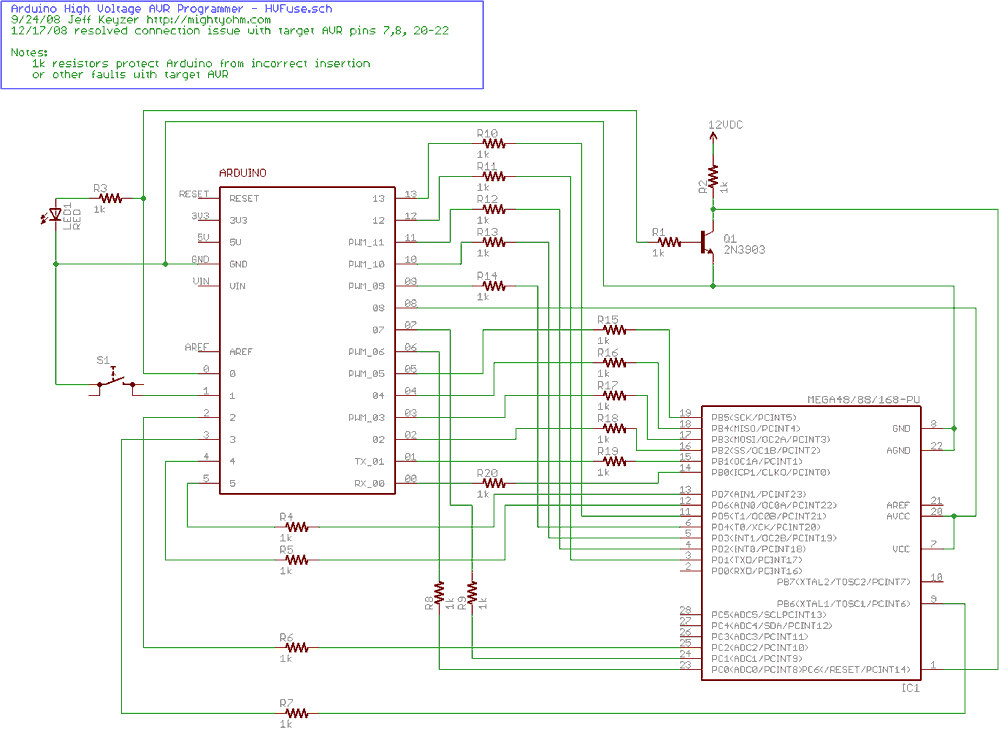
Fortunately, my trusty Arduino came to the rescue. I created an Arduino-based AVR programmer that uses the high voltage programming mode and can fix pesky fuses like RSTDISBL. The Arduino has just enough IO to implement the entire HV...
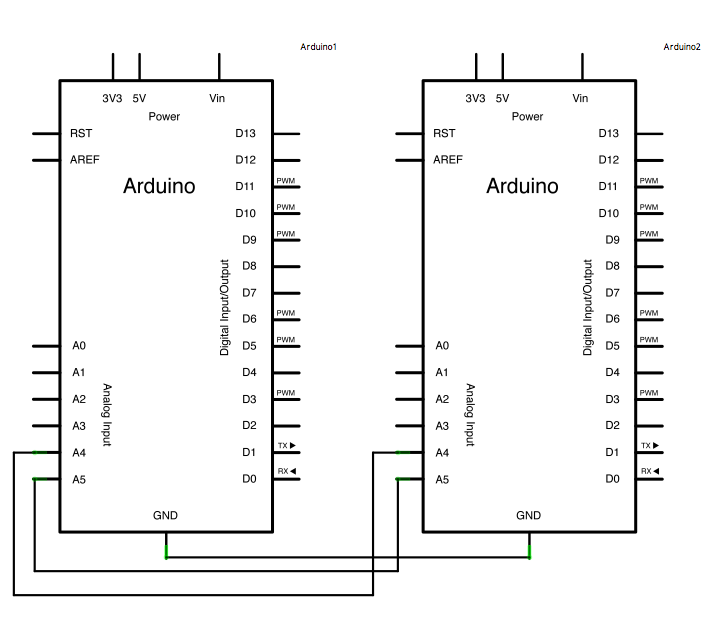
In certain scenarios, it can be beneficial to configure two or more Arduino boards to exchange information with each other. This example demonstrates a Master Reader/Slave Sender setup using the I2C synchronous serial protocol. The first Arduino, designated as...