
arduino intervalometer

The intervalometer is a specialized electronic device designed to automate the process of capturing images at specified intervals, making it particularly useful for time-lapse photography. The core of this intervalometer is an Arduino microcontroller, which serves as the brain of the operation, executing the programmed instructions to control the camera's shutter release.
The circuit typically includes several key components:
1. **Arduino Microcontroller**: This component runs the software that dictates the timing and control logic for the camera. The Arduino is programmed to send signals to the camera at predetermined intervals.
2. **Relay Module or Transistor**: To interface with the camera, a relay or a transistor is used to control the shutter release. The relay acts as an electronic switch that can handle the voltage and current required to trigger the camera's shutter mechanism.
3. **Power Supply**: Depending on the design, the intervalometer may be powered by batteries or an external power source. It is essential to ensure that the power supply matches the requirements of both the Arduino and the relay.
4. **User Interface**: A simple interface, often consisting of buttons and an LCD display, allows the user to set the interval time and the number of shots to be taken. This interface can be designed using push buttons for input and an LCD or LED indicators for feedback.
5. **Camera Connection**: A cable or connector is used to interface the intervalometer with the camera. This connection must be compatible with the Canon 400D's remote shutter release port.
The code utilized in this project is derived from the Intervaluino project, which provides a robust foundation for controlling the timing of the shutter release. Modifications can be made to adjust the timing intervals, number of shots, and other parameters as needed.
Overall, this intervalometer enhances the functionality of the Canon 400D, enabling photographers to create stunning time-lapse sequences with ease. The use of an Arduino platform allows for flexibility and customization, making it a valuable tool for both amateur and professional photographers.So I made a Intervalometer for my Canon 400d camera at last. It`s another one that`s been in the endlessly long pipeline for a while. I based it on the wonderful Arduino and got a bit of code off the person that made the Intervaluino whic can be found here. It was an excersize in.. 🔗 External reference
Related Circuits
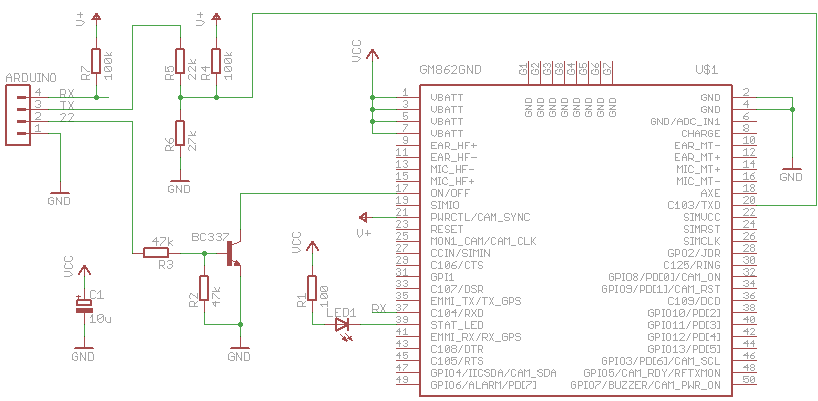
The Arduino can communicate over various networks, including Ethernet, Bluetooth, Wi-Fi, XBEE, and GPRS. A Telit GM862-GPS module, which has GPRS and GPS capabilities accessible via AT commands, has been repurposed for use with the Arduino. The GM862's logic...
The text of the Arduino reference is licensed under a Creative Commons Attribution-ShareAlike 3.0 License. Code samples in the reference are released into the public domain. The Arduino platform is an open-source electronics prototyping environment that enables users to create...
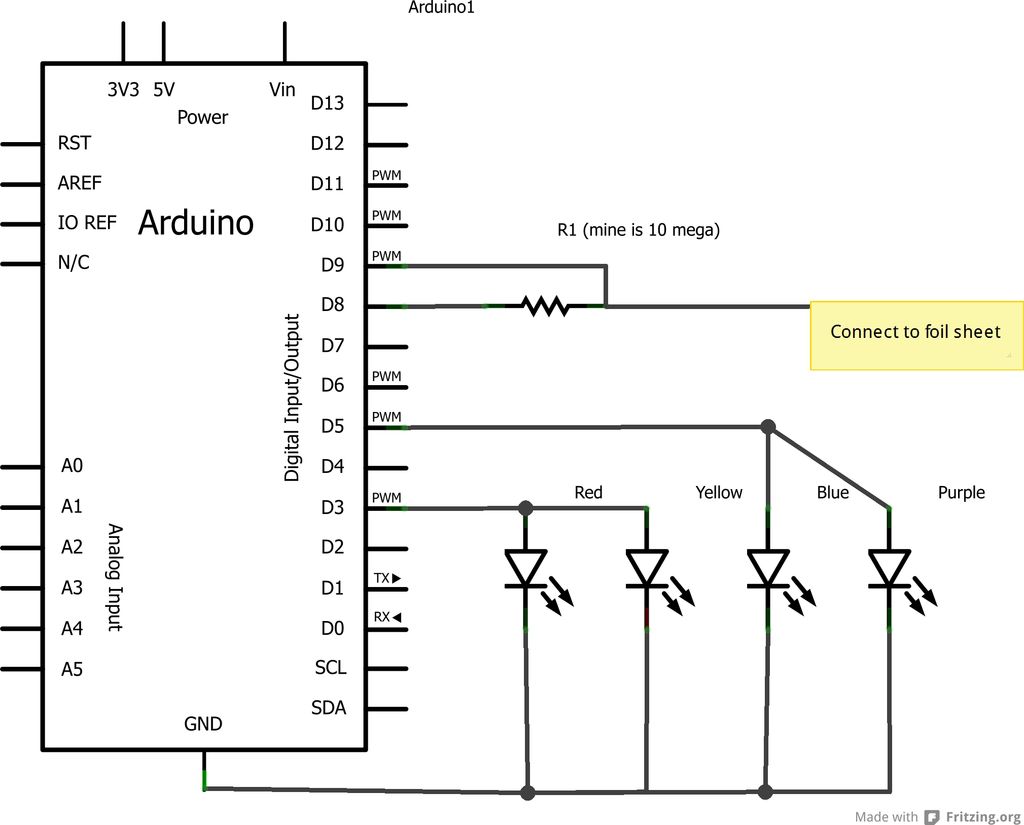
This project is an Arduino-based light control system that is ideal for beginners. It allows the fading of colors or lights by detecting hand movements nearby. The system transitions from a purple-blue hue to a fiery red-orange. The assembly...
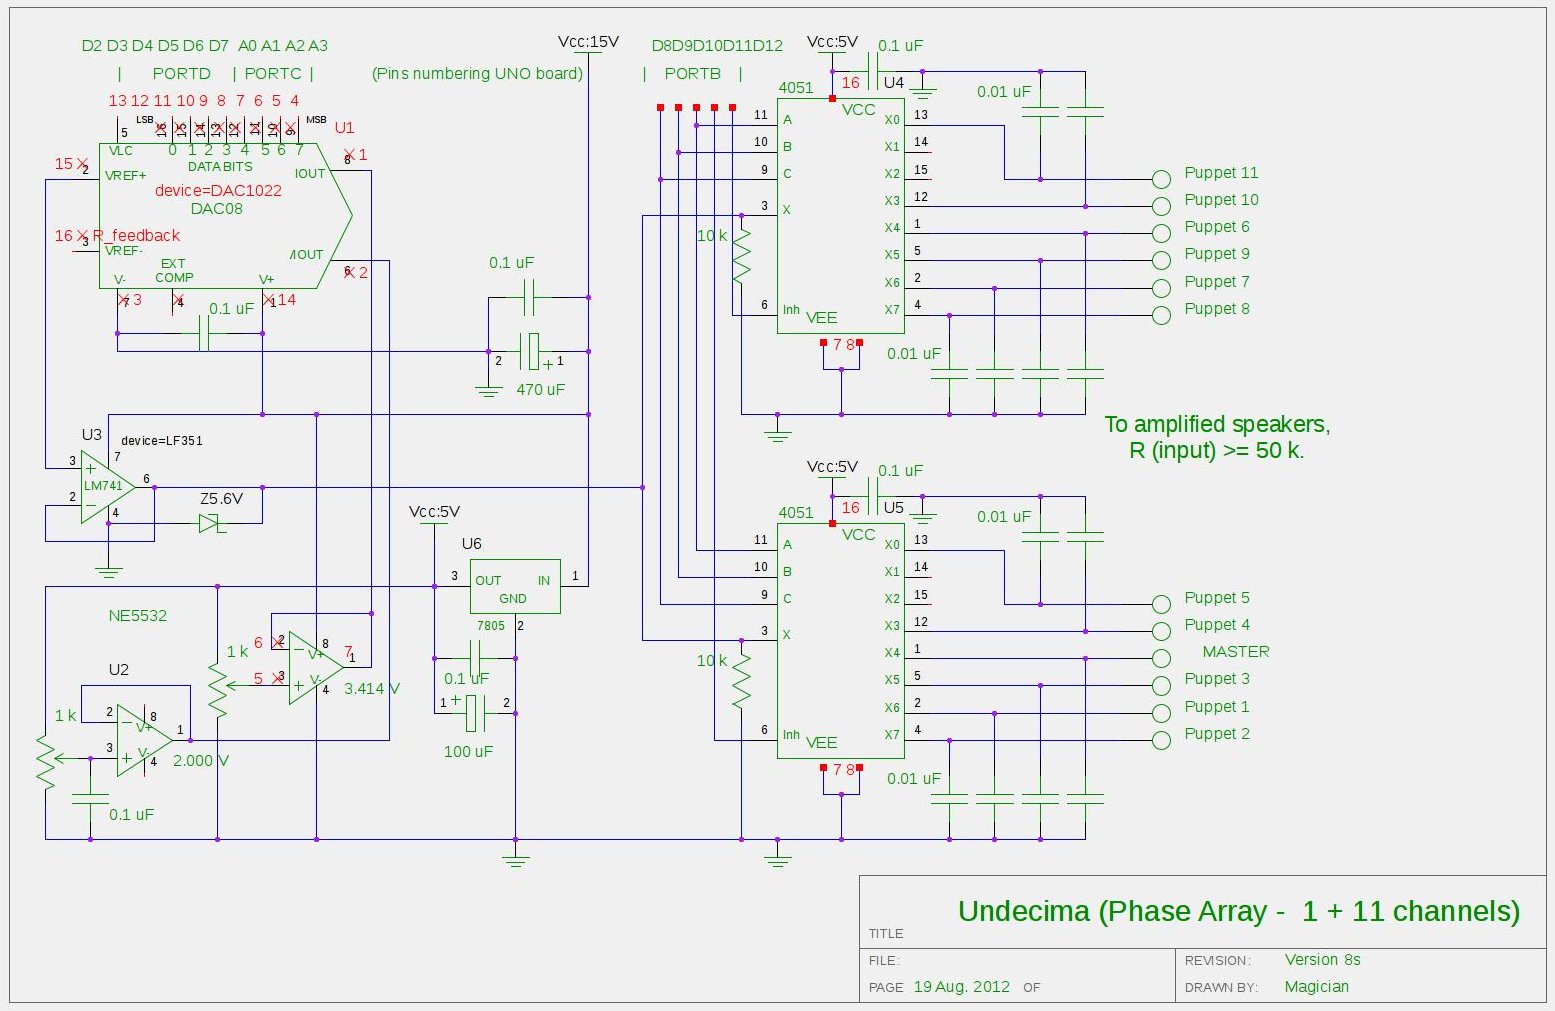
There is a project involving an Arduino that outputs audio signals to USB speakers using 10-bit PWM. Initially, the sound quality produced via PWM was unsatisfactory due to the limited processing speed of the Arduino, which is insufficient for...
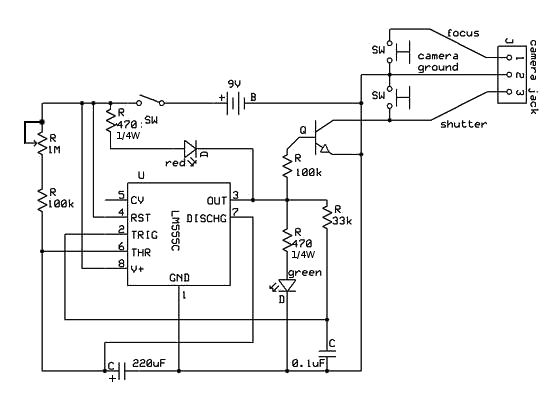
This instructable began with a previous camera hack that involved creating a remote shutter release. A tutorial on the 555 timer was discovered, highlighting its potential applications. The project centers around utilizing the 555 timer integrated circuit (IC) to develop...
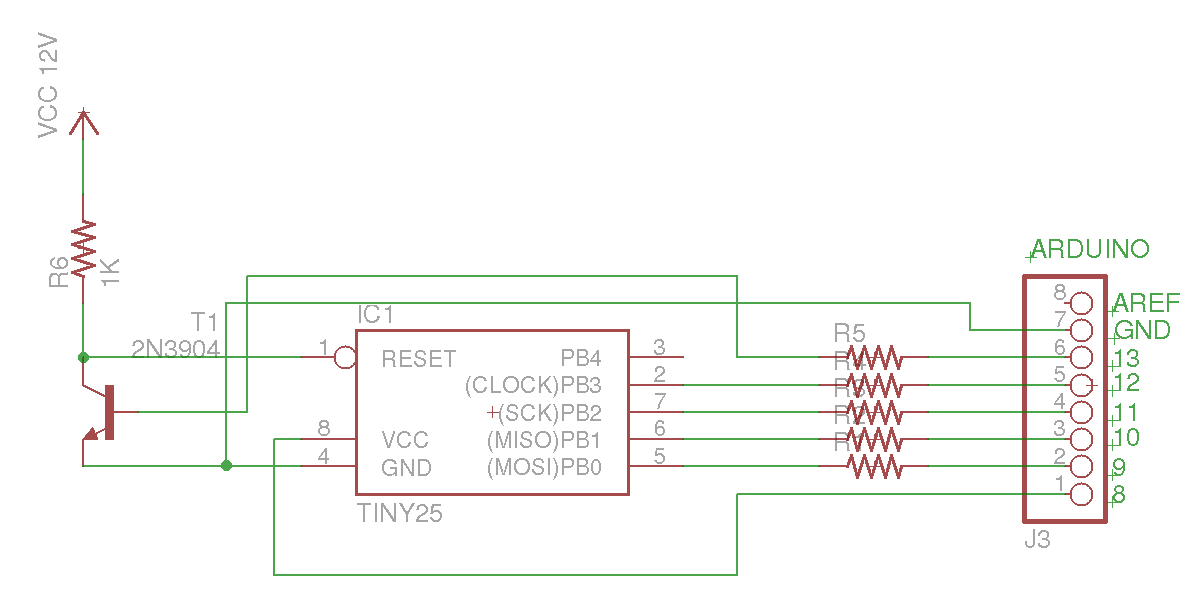
This Arduino sketch is designed to recover ATtiny microcontrollers that have become non-functional due to incorrect fuse settings. It achieves this by placing the affected ATtiny into high-voltage serial programming mode and rewriting the fuses to safe values. The...