
arduino multiplexer shield

The Arduino platform is widely used in various electronics projects due to its versatility and ease of use. However, for applications that require reliability and durability, particularly in environments where connections may be subject to vibration or frequent disconnection, the standard header pins may not suffice.
To enhance the Arduino's functionality, integrating heavy-duty screw terminals can provide a more secure and stable connection for power and signal lines. These terminals allow for the use of thicker gauge wires, which can handle higher currents and reduce the risk of overheating or failure. Additionally, screw terminals facilitate easier maintenance and replacement of components, as they allow for quick disconnection and reconnection without the need for soldering.
Incorporating screw terminals into an Arduino circuit can be achieved by selecting a suitable terminal block that matches the required specifications, such as current rating and number of connections. The terminal block should be mounted securely to the Arduino board or the project enclosure, ensuring that it is easily accessible for wiring. Proper attention must be given to the layout of the circuit to minimize noise and interference, particularly in sensitive applications.
Overall, the use of heavy-duty screw terminals significantly enhances the robustness and reliability of Arduino-based projects, making them more suitable for semi-serious or professional applications.I`m still very excited about using Arduinos in my science projects. However, I recognized pretty early on that I`d have to address several of the Arduino`s shortcomings before I could use it for any semi-serious work. To be more specific, I realized that I`d have to add some heavy duty screw terminals if.. 🔗 External reference
Related Circuits
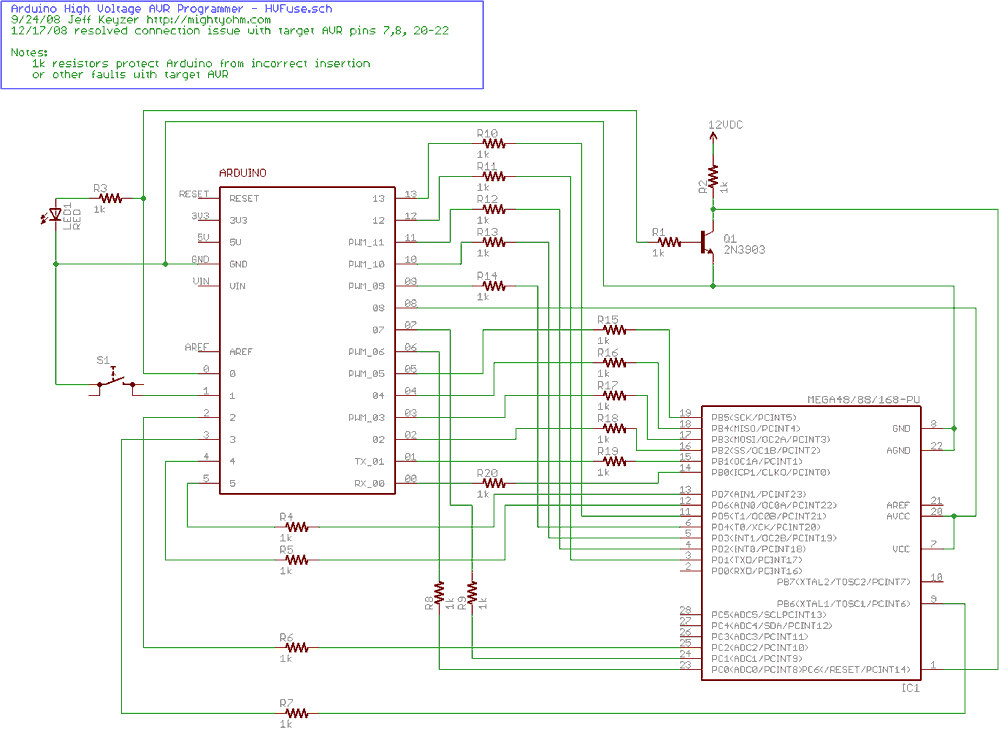
Fortunately, my trusty Arduino came to the rescue. I created an Arduino-based AVR programmer that uses the high voltage programming mode and can fix pesky fuses like RSTDISBL. The Arduino has just enough IO to implement the entire HV...
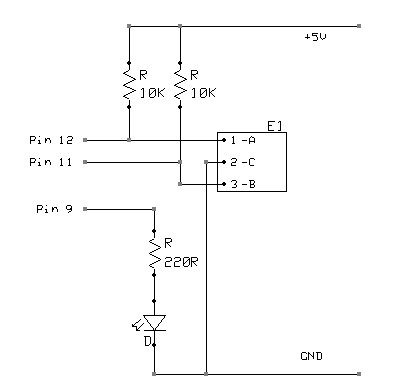
A rotary encoder generates two square wave outputs (A and B) that are 90 degrees out of phase. The number of pulses or steps produced per full rotation varies by model; for instance, the Sparkfun Rotary Encoder has 12...
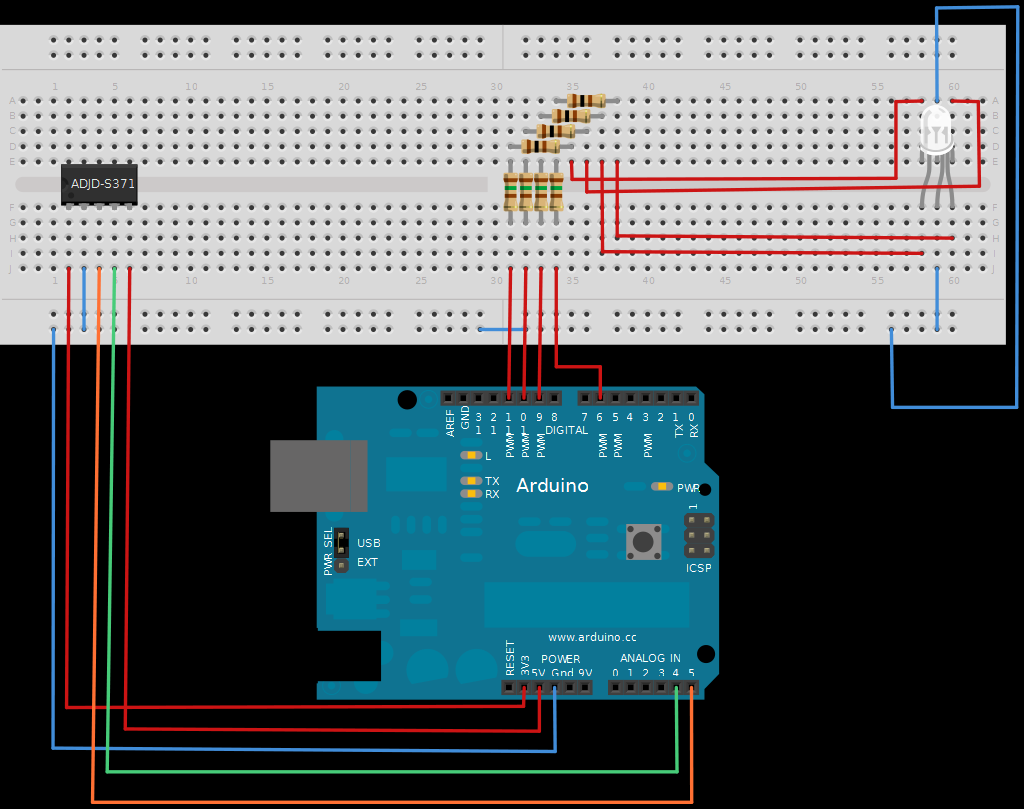
The next board presented is the ADJD-S371 Color Light Sensor Evaluation Board from SparkFun. This board emits light and analyzes the reflected color spectrum. It can be controlled via I2C, while the sleep and xclk pins were not utilized...

To reduce the resonant frequency and obtain useful signals, washers were placed on a bolt along with nuts for experimentation. An oscilloscope with FFT was utilized to adjust the weight at the tip of the film until frequencies around...

The windshield wiper interval circuit described here is compact and notable for utilizing two thyristors instead of a relay. It features only two connections and operates smoothly, even with multistage wiper circuits. The wire connecting the wiper motor to...
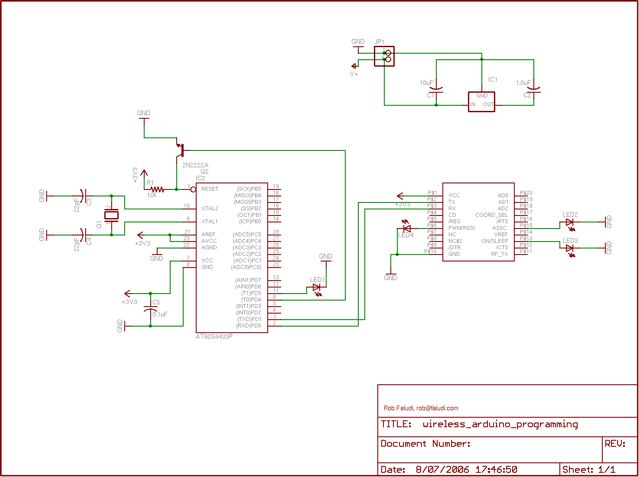
The Arduino system provides a straightforward and open-source approach for programming microcontrollers. Typically, this involves using a serial or USB cable directly connected to the microcontroller project. However, challenges arise when the project is located in inaccessible areas, such...