
Arduino While Loop

The described circuit utilizes a microcontroller, such as an Arduino, to manage the interaction between an analog sensor (photoresistor), a digital input (button), and an output device (LED). The photoresistor is connected to analog pin 0, allowing the microcontroller to read varying resistance values based on light intensity. This input is essential for determining the ambient light conditions.
The LED, connected to pin 9, is controlled through Pulse Width Modulation (PWM) to create a fading effect. The brightness of the LED is adjusted based on the readings from the photoresistor, providing a visual representation of the light levels detected.
The button, connected to digital pin 2, serves as a trigger for the calibration process. When pressed, the program enters a while loop that continuously executes the calibrate() method. This method is responsible for monitoring the analog sensor's output and determining the maximum and minimum values it can produce. These calibration values are crucial for ensuring accurate readings in varying light conditions.
Once the button is released, the program exits the while loop and returns to the main execution flow, where the LED fading continues based on the calibrated values. This approach allows for dynamic adjustment of the LED's brightness in response to real-time changes in light levels, enhancing the interactivity and responsiveness of the circuit.Sometimes you want everything in the program to stop while a given condition is true. You can do this using a while loop. This example shows how to use a while loop to calibrate the value of an analog sensor. In the main loop, the sketch below reads the value of a photoresistor on analog pin 0 and uses it to fade an LED on pin 9. But while a butt on attached to digital pin 2 is pressed, the program runs a method called calibrate() that looks for the highest and lowest values of the analog sensor. When you release the button, the sketch continues with the main loop. 🔗 External reference
Related Circuits

The schematic has been divided into three sections for improved comprehension. The first section illustrates the audio output circuit. This project is designed to output audio. The audio output circuit typically involves several key components that work together to process...
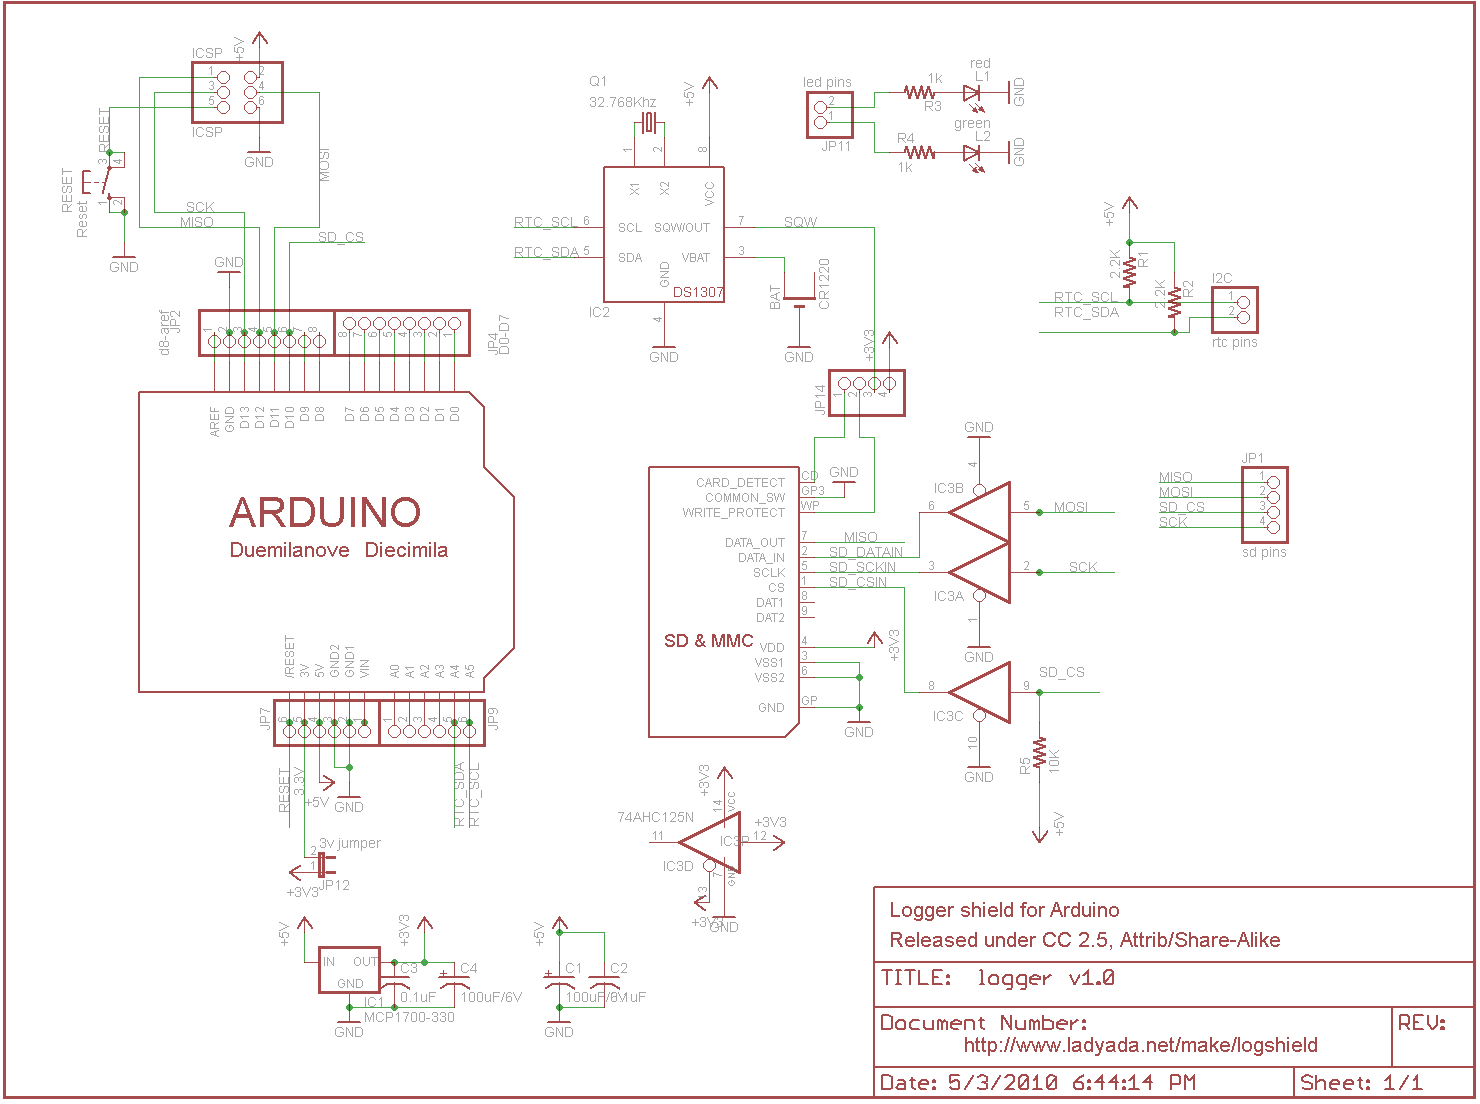
The board features a small power supply that generates 3.3V at 250mA. The built-in 3.3V regulator on the Arduino is not utilized because it is only guaranteed to provide up to 50mA, which may not be sufficient for some...

The L298N driver module incorporates the ST L298N chip, commonly utilized to drive two DC motors with voltage ratings between 3V and 30V. It features a 5V output interface that provides power for 5V single-chip circuitry and supports 3.3V...

Begin constructing the circuit as illustrated in the schematic. To view the schematic in a larger format, click the small "i" icon located in the upper right corner of the image. The schematic serves as a visual representation of the...
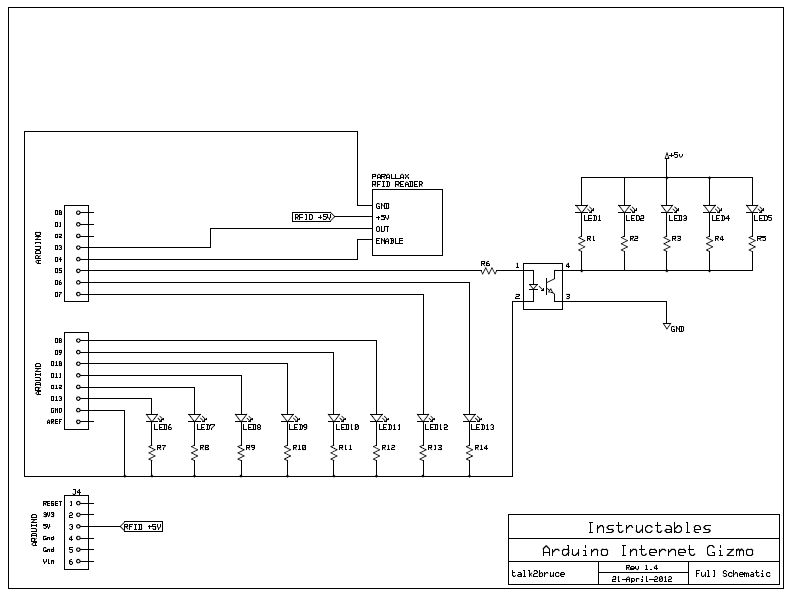
The Arduino Internet Gizmo is a USB, Arduino, and RFID device designed for web browsing. It operates by placing an RFID tag on the device, which reads the tag and transmits the tag number via USB to a program...

The process of creating signals that carry information involves modulating the frequency or phase of a carrier wave. This text will explore how to demodulate these signals to recover the information. While the focus will be on frequency modulation...