
infrared IR Arduino Transmit n Receive
To create a schematic for this project, two Arduino Uno boards will be employed, one acting as the transmitter and the other as the receiver. The transmitter will be connected to a digital IR transmitter module, which will send modulated infrared signals corresponding to the data being transmitted. The receiver will be connected to a digital IR receiver module, which will decode the incoming infrared signals back into digital data.
The connections for the transmitter Arduino will include the following: the digital IR transmitter module's output pin will connect to a designated digital pin on the Arduino (for example, pin 3). The Arduino will be programmed to send the data "1234" when a button is pressed or automatically at intervals. A simple sketch using the Arduino IR library will facilitate the encoding of the data into an IR signal.
For the receiver Arduino, the digital IR receiver module's output pin will connect to another digital pin on the Arduino (for example, pin 2). The Arduino will be programmed to listen for incoming IR signals and decode them using the same IR library. Upon receiving the data, the Arduino will send it to an LCD display connected via I2C or direct pin connections, depending on the setup. The LCD will be configured to display the received data clearly.
Powering both Arduino boards can be done via USB or an external power supply, ensuring that the IR modules are adequately powered for reliable communication. The overall system will allow for straightforward data transmission without the need for complex remote control codes, focusing solely on the transmission of simple numeric data.Using digital IR Receiver Module and digital IR Transmitter Module connected each with different Arduino Uno. How can I transmit data like "1234" to the receiver and display data on LCD This is because most of the example that I found using IR remote code like Sony and RC4.
I just want to send a simple data. 🔗 External reference
Related Circuits
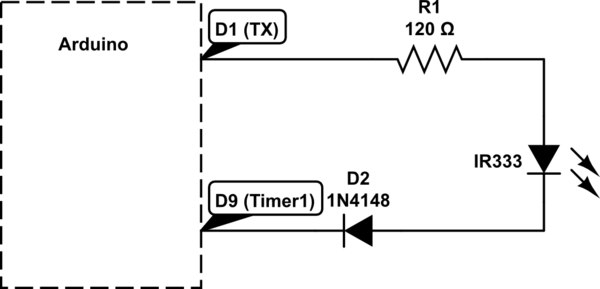
This Atmel integrated circuit operates at a clock frequency of 12 MHz, facilitating communication between an infrared receiver and a personal computer. This setup enables the processing of signals by infrared receiver software, such as Girder. When a valid...
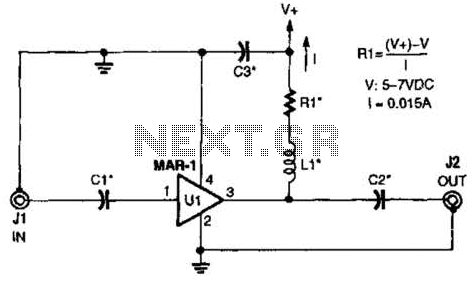
The low-cost Mini-Circuits MAR-X series of chips provides a significant advantage for RF builders, featuring inherent 50-ohm input and output impedances essential for RF systems. An MAR-1-based receiver/scanner preamplifier is illustrated. Capacitors Ci and C2 are chip capacitors, with...

This circuit is designed to generate audio musical notes that can be heard from a distance of up to 10 meters. The circuit consists of two main components: an infrared (IR) music transmitter and an IR music receiver. The...
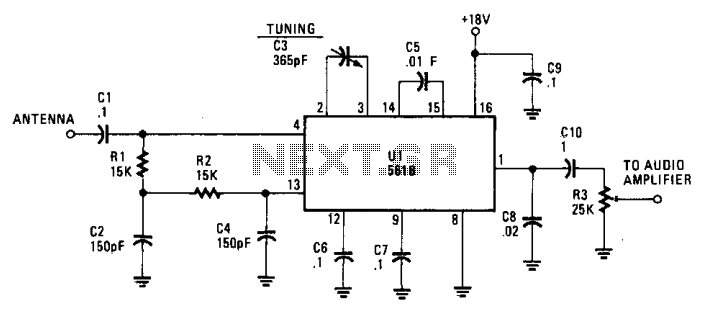
This simple AM circuit utilizes a 561B. It lacks an inductance/capacitance tuning circuit, as the 365 pF capacitor connected between pins 2 and 3 is responsible for all tuning. A good external antenna and a solid ground connection are...
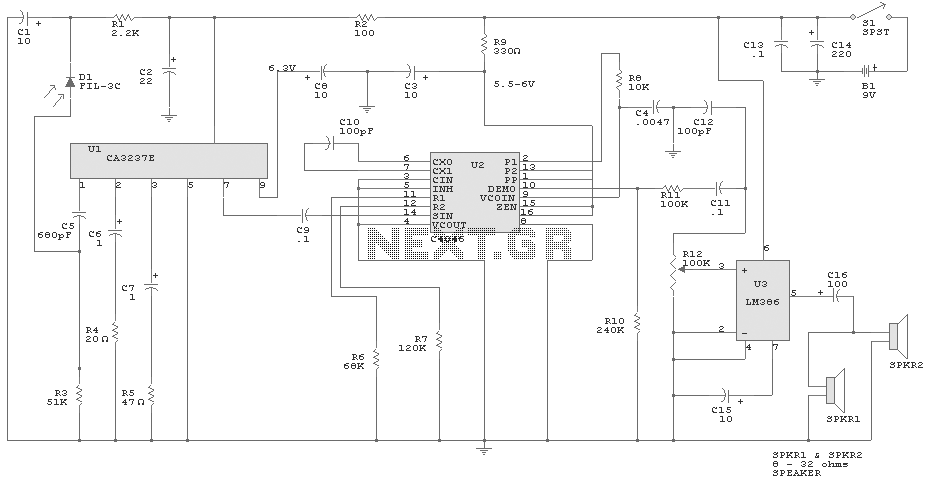
IR detector diode D1 intercepts the IR signal at around 40 kHz and feeds it from U1, a high-gain preamp, to PLL, U2, a 4046 configured to serve as an FM detector. U3 is an audio amplifier that feeds...
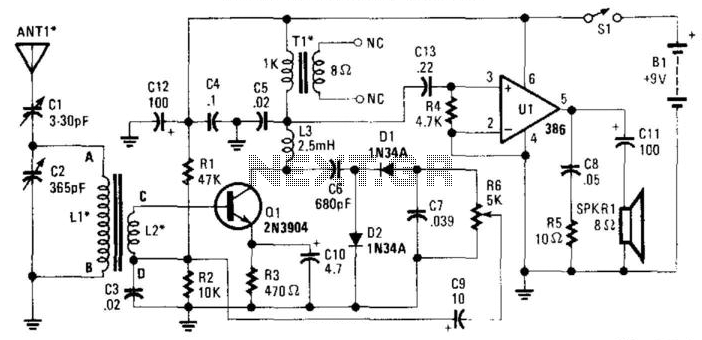
The RF signal is transmitted from the antenna through CI to a tuned circuit consisting of LI and C2. One end of L2 delivers the RF signal to the base of Q1 for amplification, while the other end connects...