
DIY Homemade Kirlian Photographs

The Kirlian effect is a phenomenon where high voltage electrical discharges create a visual representation of the energy field surrounding an object, often referred to as its "aura." To build a Kirlian effect camera, several key components and steps must be considered.
The primary components required are a high-voltage power supply, a transparent conductive surface (such as a glass plate coated with a conductive material), a camera capable of long exposure times, and a suitable grounding mechanism.
1. **High-Voltage Power Supply**: A transformer or a high-voltage power supply capable of generating voltages in the range of 10kV to 30kV is necessary. This power supply should be equipped with safety features to prevent accidental shocks.
2. **Conductive Surface**: The glass plate should be coated with a conductive layer, such as aluminum foil or a thin conductive paint. This layer will allow the electrical discharge to occur when an object is placed on top of it.
3. **Camera Setup**: A digital or film camera must be positioned above the glass plate. If using a digital camera, ensure it has the capability for manual settings to adjust exposure time, as longer exposures will capture the intricate details of the corona discharge.
4. **Grounding**: The system must be grounded properly to ensure safety and to provide a return path for the electrical current. This can be accomplished by connecting the conductive surface to a grounding rod or a grounded electrical outlet.
5. **Photographing Process**: To capture the Kirlian effect, place the object of interest on the conductive surface and activate the high-voltage power supply while triggering the camera to take a long exposure photograph. The electrical discharges will create a colorful aura around the object, which will be recorded by the camera.
Safety precautions must be strictly observed when working with high voltages. It is essential to ensure that all connections are secure and that the working area is clear of any conductive materials that could cause accidental discharges. Proper insulation and protective gear, such as gloves and goggles, should be used to minimize the risk of electrical shock.
By following these guidelines, a Kirlian effect camera can be constructed to explore the fascinating interplay between electricity and the visual representation of energy fields around objects.How to make a simple kirlian effect camera for photographing high voltage corona around objects. Otherwise known as aura photography.. 🔗 External reference
Related Circuits
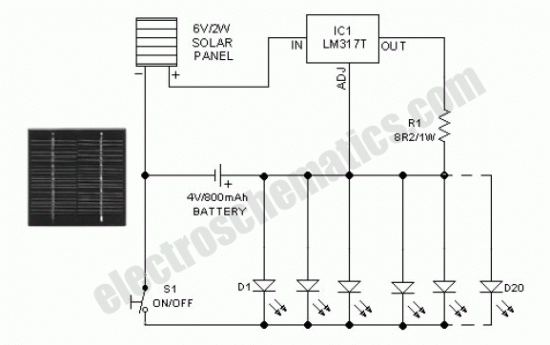
This solar birdhouse light features an economical circuit for a mini solar lighting system. The core component of the circuit is a mini 6V/2W solar panel, which is utilized to charge a 4V/800mAh rechargeable battery. The charging process is...

This project originated from the need for a Li-ion charging circuit that offers more flexibility than typical do-it-yourself circuits while being more affordable than programmable computerized chargers. The primary objective was to design, build, test, and share a charger...
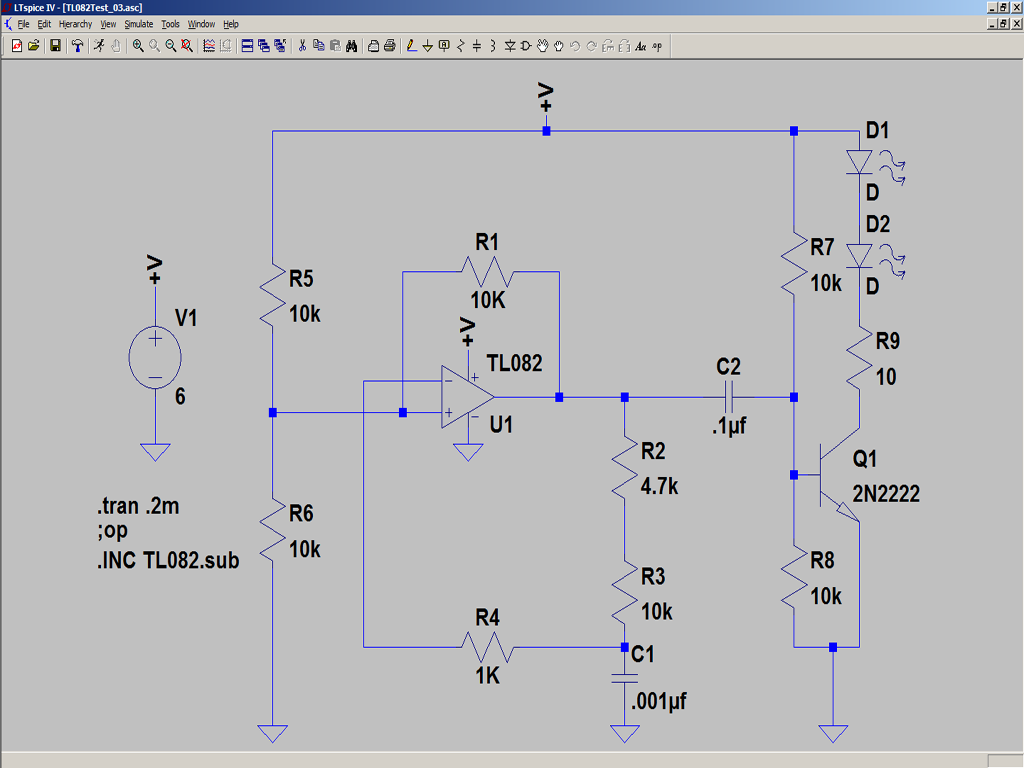
A DIY infrared (IR) jammer was tested on a breadboard last weekend, and the results are being shared. The schematic was accurately recreated on the plugboard, with a small bench power supply set to 6 volts to simulate four...
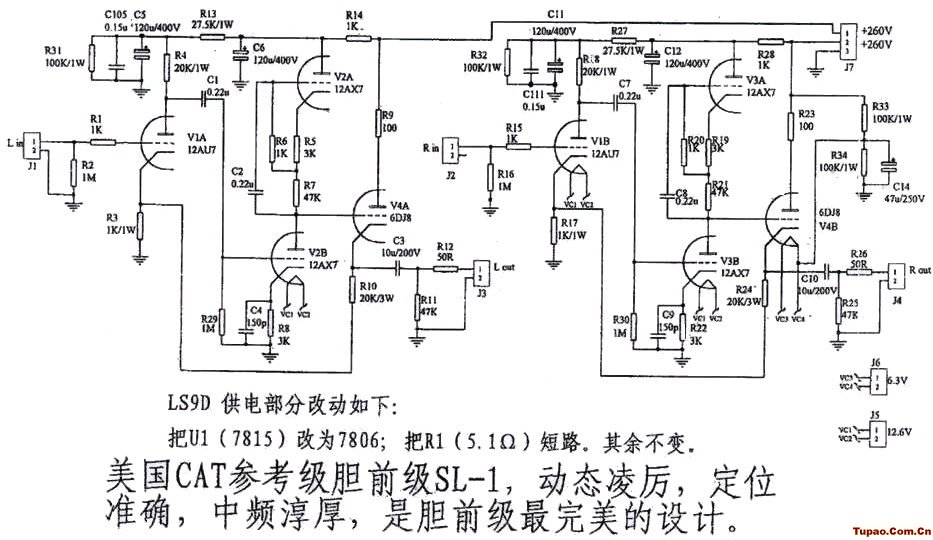
The CAT SL1 preamplifier is constructed based on the provided schematic. It is observed that the gain of this circuit is approximately 26 dB. Additionally, it has been noted that the new SL1 model includes an option. The CAT SL1...
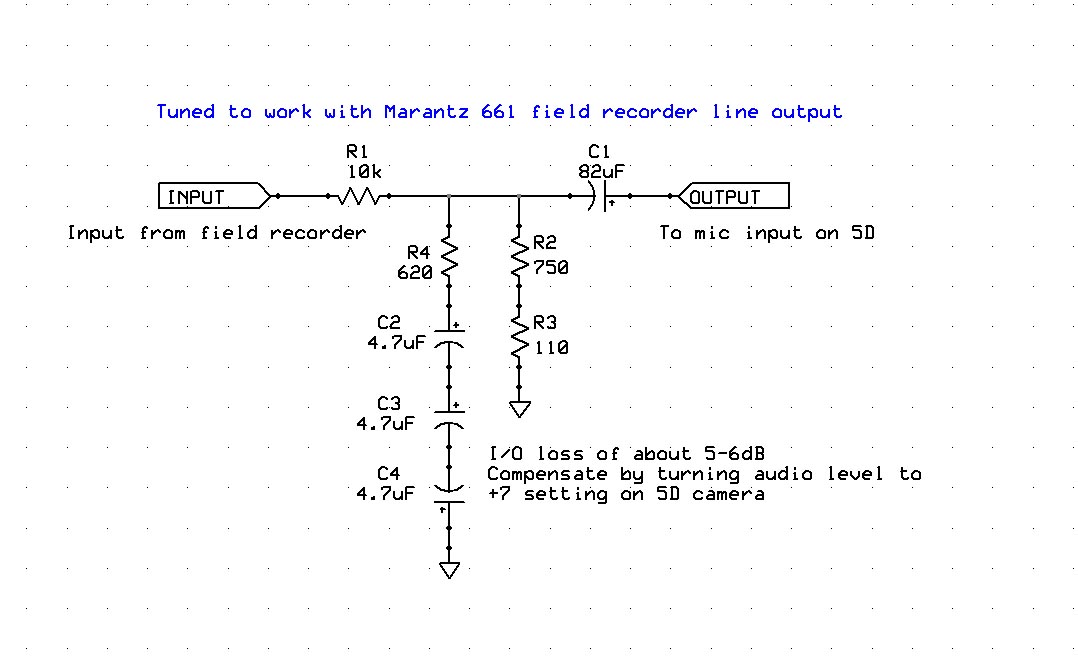
Enhancing the audio quality of the Canon 5D Mark II to achieve usable production audio involves several key steps. The initial phase of this engineering project focuses on data collection, specifically measuring the input frequency response of the 5D....
The current design of a power inverter offers an efficiency of approximately 85% and a power output exceeding 200 watts. This document provides a complete circuit schematic and detailed building procedure for a home-built power inverter. While numerous articles...