
Interfacing LCD with 8051

The integration of an LCD display with the 8051 microcontroller involves a series of steps to ensure proper communication and functionality. The HD44780U controller serves as a bridge between the microcontroller and the LCD, allowing for the display of characters through a parallel interface. The initialization process typically consists of several key commands that set the display mode, cursor settings, and entry mode.
To begin, the LCD must be powered, and a suitable delay is required to allow the controller to stabilize. The initialization sequence usually starts with setting the data length to 8 bits, which is the most common configuration. After sending the appropriate command to set the interface, the display mode can be configured to either 1-line or 2-line operation, with the latter being preferred for most applications.
Following the display mode setup, the cursor settings can be adjusted to determine whether the cursor should be visible or blinking. This is achieved by sending specific command bytes that control the cursor's behavior. Once the display mode and cursor settings are established, the entry mode can be set, which dictates how the cursor moves when new data is written to the display.
After completing the initialization sequence, the 8051 can send data bytes to the LCD for display. Each character is sent as an ASCII value, and the LCD interprets these values to render the corresponding characters on the screen. Additionally, control commands can be sent to clear the display or return the cursor to the home position.
In summary, the successful operation of an LCD display interfaced with an 8051 microcontroller hinges on a well-defined initialization process, adherence to the HD44780U communication protocol, and the proper sequencing of command and data transmission. This foundational understanding is crucial for developers working with LCDs in embedded systems applications.An 8051 program must interact with the outside world using input and output devices that communicate directly with a human being. One of the most common devices attached to an 8051 is an LCD display. Some of the most common LCDs connected to the 8051 are 16x2 and 20x2 displays. This means 16 characters per line by 2 lines and 20 characters per line by 2 lines, respectively. Fortunately, a very popular standard exists which allows us to communicate with the vast majority of LCDs regardless of their manufacturer. The standard is referred to as HD44780U, which refers to the controller chip which receives data from an external source (in this case, the 8051) and communicates directly with the LCD.
I use a standard 16-character by 2-line LCD module, see schematic below. This is the pit fall for beginners. Proper working of LCD depend on the how the LCD is initialized. We have to send few command bytes to initialize the lcd. Simple steps to initialize the LCD 🔗 External reference
Related Circuits
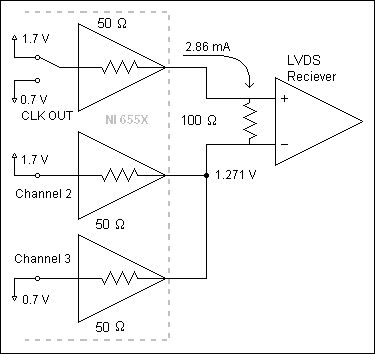
The NI 655X is a versatile high-speed digital product capable of interfacing with various technologies. This application note illustrates how to connect the NI 655X to Low Voltage Differential Signaling (LVDS) devices. LVDS is an emerging differential digital standard...
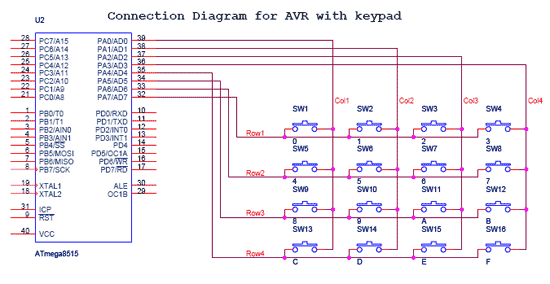
Learn to interface a 4x4 matrix keypad with AVR and 8051 microcontrollers, and program these microcontrollers in C and assembly language for the keypad matrix. The 4x4 matrix keypad is a popular input device used in various electronic applications, allowing...
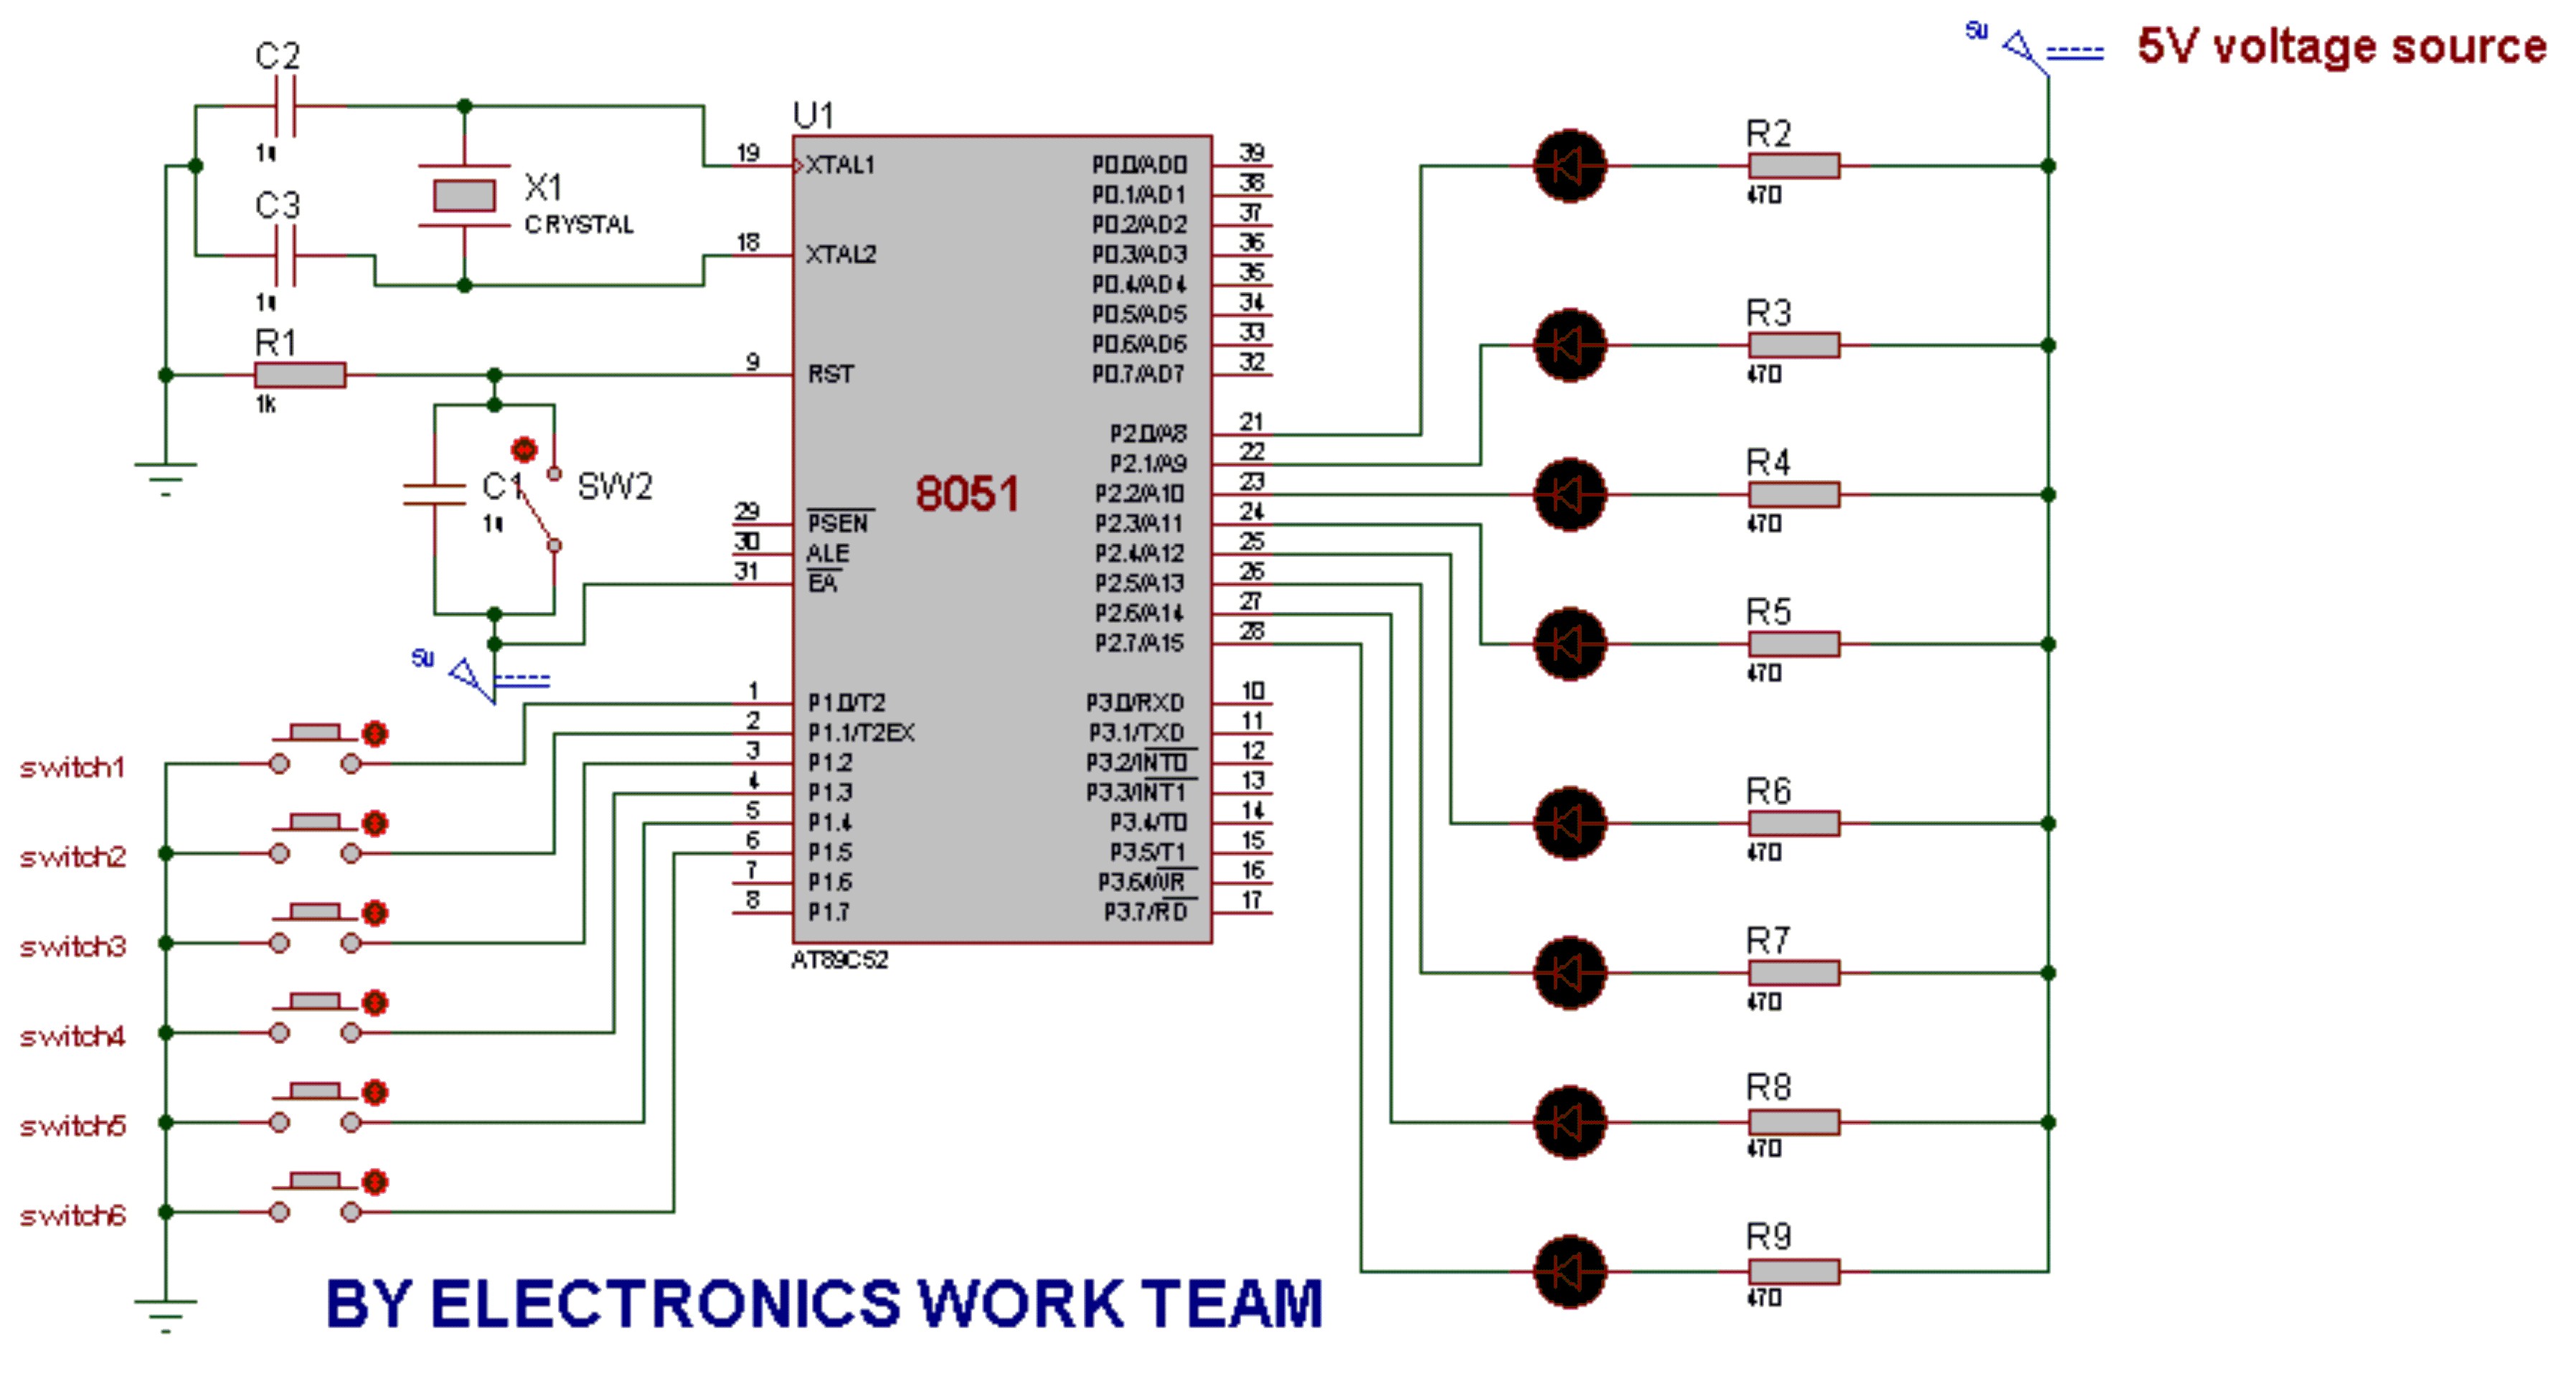
This post discusses the fundamental operation of the 8051 microcontroller using LEDs. The LEDs are connected to the P2 port, while six switches are connected to the P1 port of the 8051. By pressing various switches, the LEDs will...

This Project can be used in home, shops, offices etc. It keeps tracking of both Incoming and Outgoing Calls. It has a built in Caller ID. The incoming and the dialed numbers are displayed on the LCD display. The...
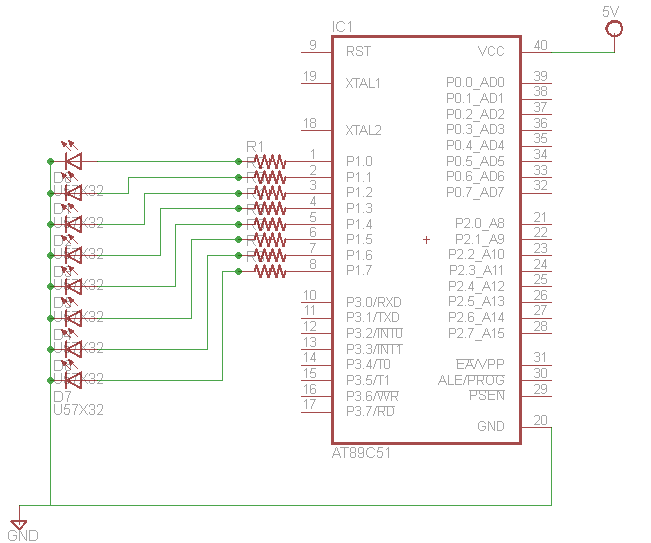
Learn how to interface LEDs with the 8051 Microcontroller. Download free source code and circuit diagram of the P89V51RD2 Microcontroller. Interfacing LEDs with the 8051 microcontroller is a fundamental project that serves as an excellent introduction to microcontroller applications. The...
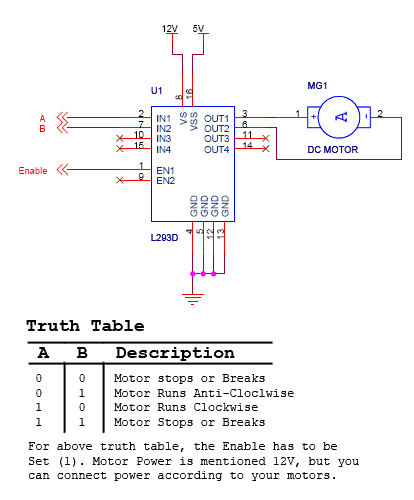
DC motor interfacing with a microcontroller using the L293D H-bridge and a transistor-based H-bridge. DC motor speed control is achieved through PWM. The DC motor is interfaced with 8051, AVR, and PIC microcontrollers. The circuit design for interfacing a DC...