
Simple Soil Moisture Sensor - Arduino Project

This project employs a soil moisture sensor to monitor the moisture content of the soil and activate an LED indicator when the moisture level drops below a predefined threshold. The soil moisture sensor typically consists of two probes that measure the resistance of the soil; drier soil has higher resistance, while wetter soil has lower resistance.
The Arduino Duemilanove microcontroller serves as the central processing unit for this project. It reads the analog output from the soil moisture sensor and determines the moisture level. The microcontroller is programmed using the Arduino IDE, which allows for easy coding and uploading of the program to the board.
The circuit consists of the following components:
1. **Arduino Duemilanove** - The microcontroller that processes the sensor input and controls the LED output.
2. **Soil Moisture Sensor** - This sensor has two metal probes that detect the moisture level in the soil. The analog output pin of the sensor is connected to one of the analog input pins on the Arduino.
3. **LED** - An LED is connected to a digital output pin on the Arduino through a current-limiting resistor to prevent excessive current flow. The LED will illuminate when the moisture level is below the set threshold, indicating that the soil is dry and requires watering.
4. **Resistor** - A resistor is used in series with the LED to limit the current to a safe level, typically around 220Ω to 1kΩ depending on the LED specifications.
5. **Power Supply** - The Arduino can be powered via USB or an external power source, depending on the project requirements.
The program logic involves continuously reading the moisture level from the sensor and comparing it to a predefined threshold value. If the moisture level is below this threshold, the Arduino activates the LED, signaling the need for watering. Conversely, when the moisture level is adequate, the LED remains off.
This simple yet effective project can be expanded by integrating additional features such as an LCD display to show real-time moisture levels, or a relay module to control an automatic watering system.This is a simple arduino project for a soil moisture sensor that will light up a LED at a certain moisture level. It uses Arduino Duemilanove microcontroll.. 🔗 External reference
Related Circuits
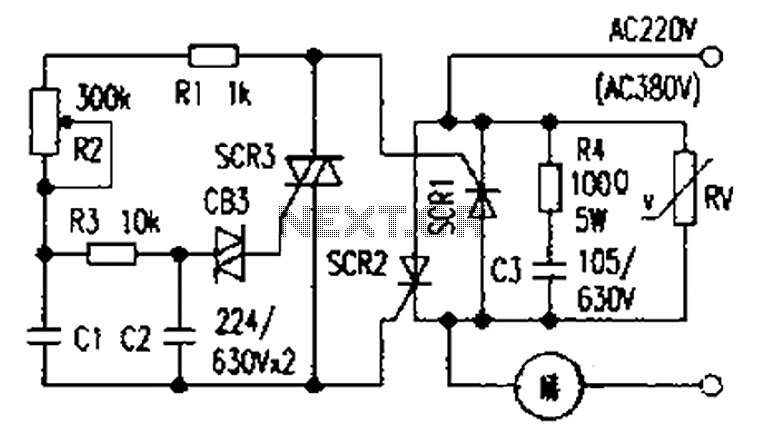
The presentation of a general power thyristor trigger circuit is more complex, and some components are difficult to procure. A successful trigger circuit has been constructed for only a few dollars. This circuit is designed to trigger a thyristor...
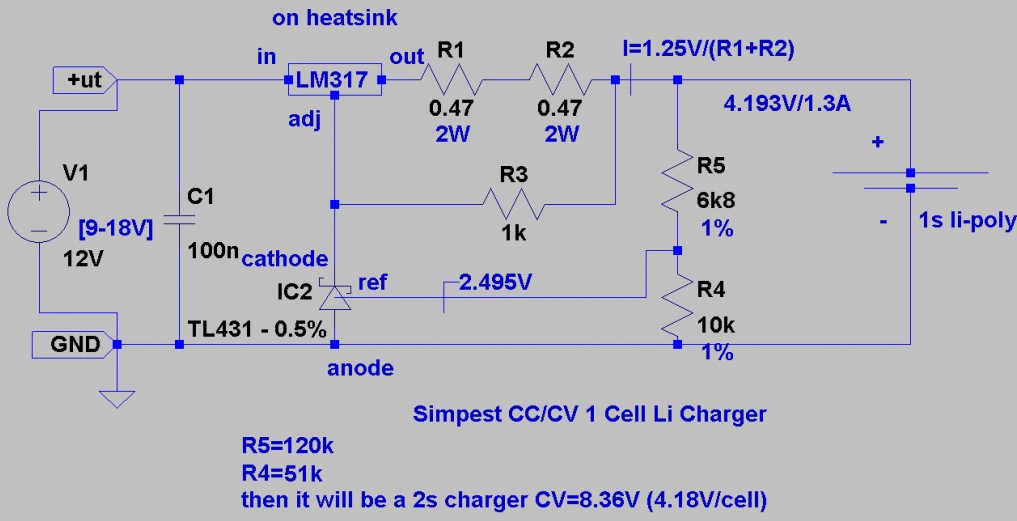
This is a Lithium-ion charger for LiPo batteries. The circuit schematic illustrates the configuration for charging a single 3.7V LiPo battery, but the voltage can be adjusted to charge multiple batteries in series. The LiPo charger establishes a current...
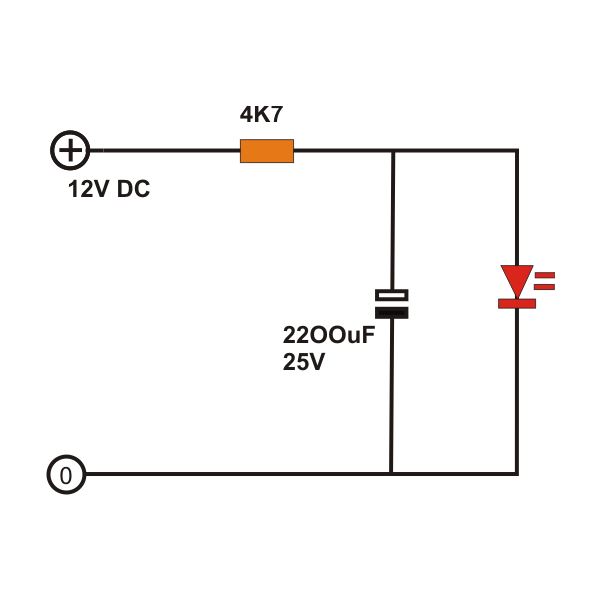
The light fader circuits described here share a common concept of creating a gradual "cool" switch ON and switch OFF effect for connected lamps. This means that each time the lights are activated, the result is a smooth transition...
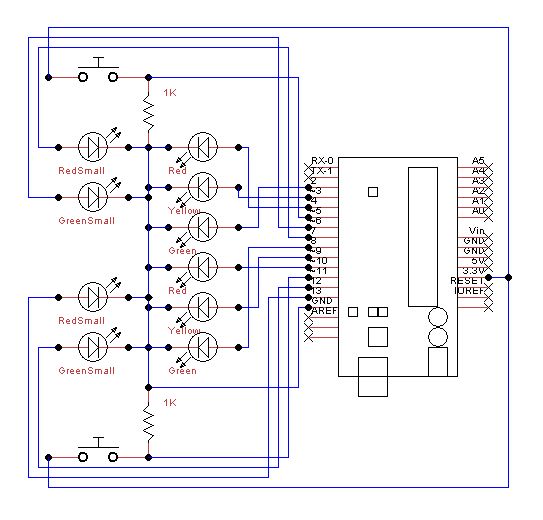
Set up the lights on the breadboard to resemble a traffic light configuration. The red LED should be positioned at the top, followed by the yellow LED, and then the green LED. The small red and green LEDs will...
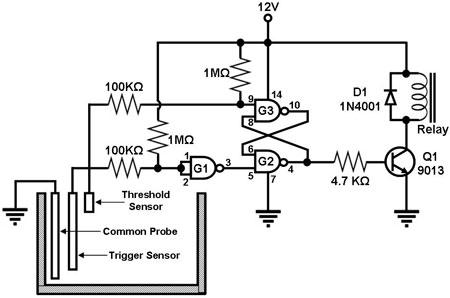
Figure 1 illustrates a circuit designed to monitor the water level in a tank and control a water pump accordingly. The primary component of the circuit is the CD-4011 Quad NAND gate, with three of its gates utilized as...

The HC-06 module is a slave mode serial Bluetooth data link manufactured by CSR. In this project, a mobile phone communicates with the AT89C2051 microcontroller via the HC-06 module. The complexity of the communication has been encapsulated within a...