
Arduino ATmega328 Hardcore

The Arduino 328 board kit provides a comprehensive platform for users to build and program their own microcontroller projects. The breadboard setup facilitates easy access to all components, allowing for modifications and experimentation. The FT232RL USB to Serial breakout board is an integral part of this kit, as it establishes a reliable communication link between the computer and the ATmega328 microcontroller. The inclusion of the 0.1uF capacitor is crucial for enabling the auto-reset feature, which simplifies the upload process by automatically resetting the microcontroller when uploading new code.
Connections are straightforward: the RX and TX pins of the ATmega328 must be connected to the corresponding TX and RX pins on the FT232RL board, ensuring proper data transmission. Additionally, a common ground connection is essential for stable operation. For users with a PC Serial Port or a USB to serial port cable, the circuit can be adapted using two transistors and a few resistors to achieve the necessary signal level adjustments.
The programming process is initiated through the Arduino IDE, which compiles the code and prepares it for upload. Once the compilation is successful, the user must manually reset the board to trigger the bootloader, allowing the new program to be uploaded seamlessly. This kit serves as an excellent introduction to microcontroller programming and hardware interfacing, making it suitable for both beginners and experienced users looking to prototype their ideas.The kit includes the following items (depending on which bootloader chip 16MHz or 8MHz) The kit includes the essential items to create your own Arduino 328 board. Here is a breadboard with all the components mounted and running the demo led flash program You can program the processor directly from the Arduino IDE.
All you need is a TTL serial connection. The FT232RL USB to Serial breakout board is ideal for this. Now that we are using the modified Arduino UNO bootloader, we have also included a 0. 1uF capacitor in the kit which allows for the auto-reset functionality of the UNO boards. This capacitor goes between the DTR pin on the FT232RL USB to Serial board and the Reset pin on the ATmega328. Just connect the ATMega328 RX (pin 2) to TX on the breakout board, the ATMega328 TX (pin 3) to RX on the breakout board, connect the 0V and you are connected If you have a PC Serial Port (or USB to serial port cable) you can use this directly without the need for the breakout board with the addition of two transistors and a few resistors with the following modification.
Next, press the upload button in the Arduino IDE, and wait until you get the successfully compiled message (below). As soon as the message appears, press the reset button on your board to force the bootloader to reset.
🔗 External reference
Related Circuits
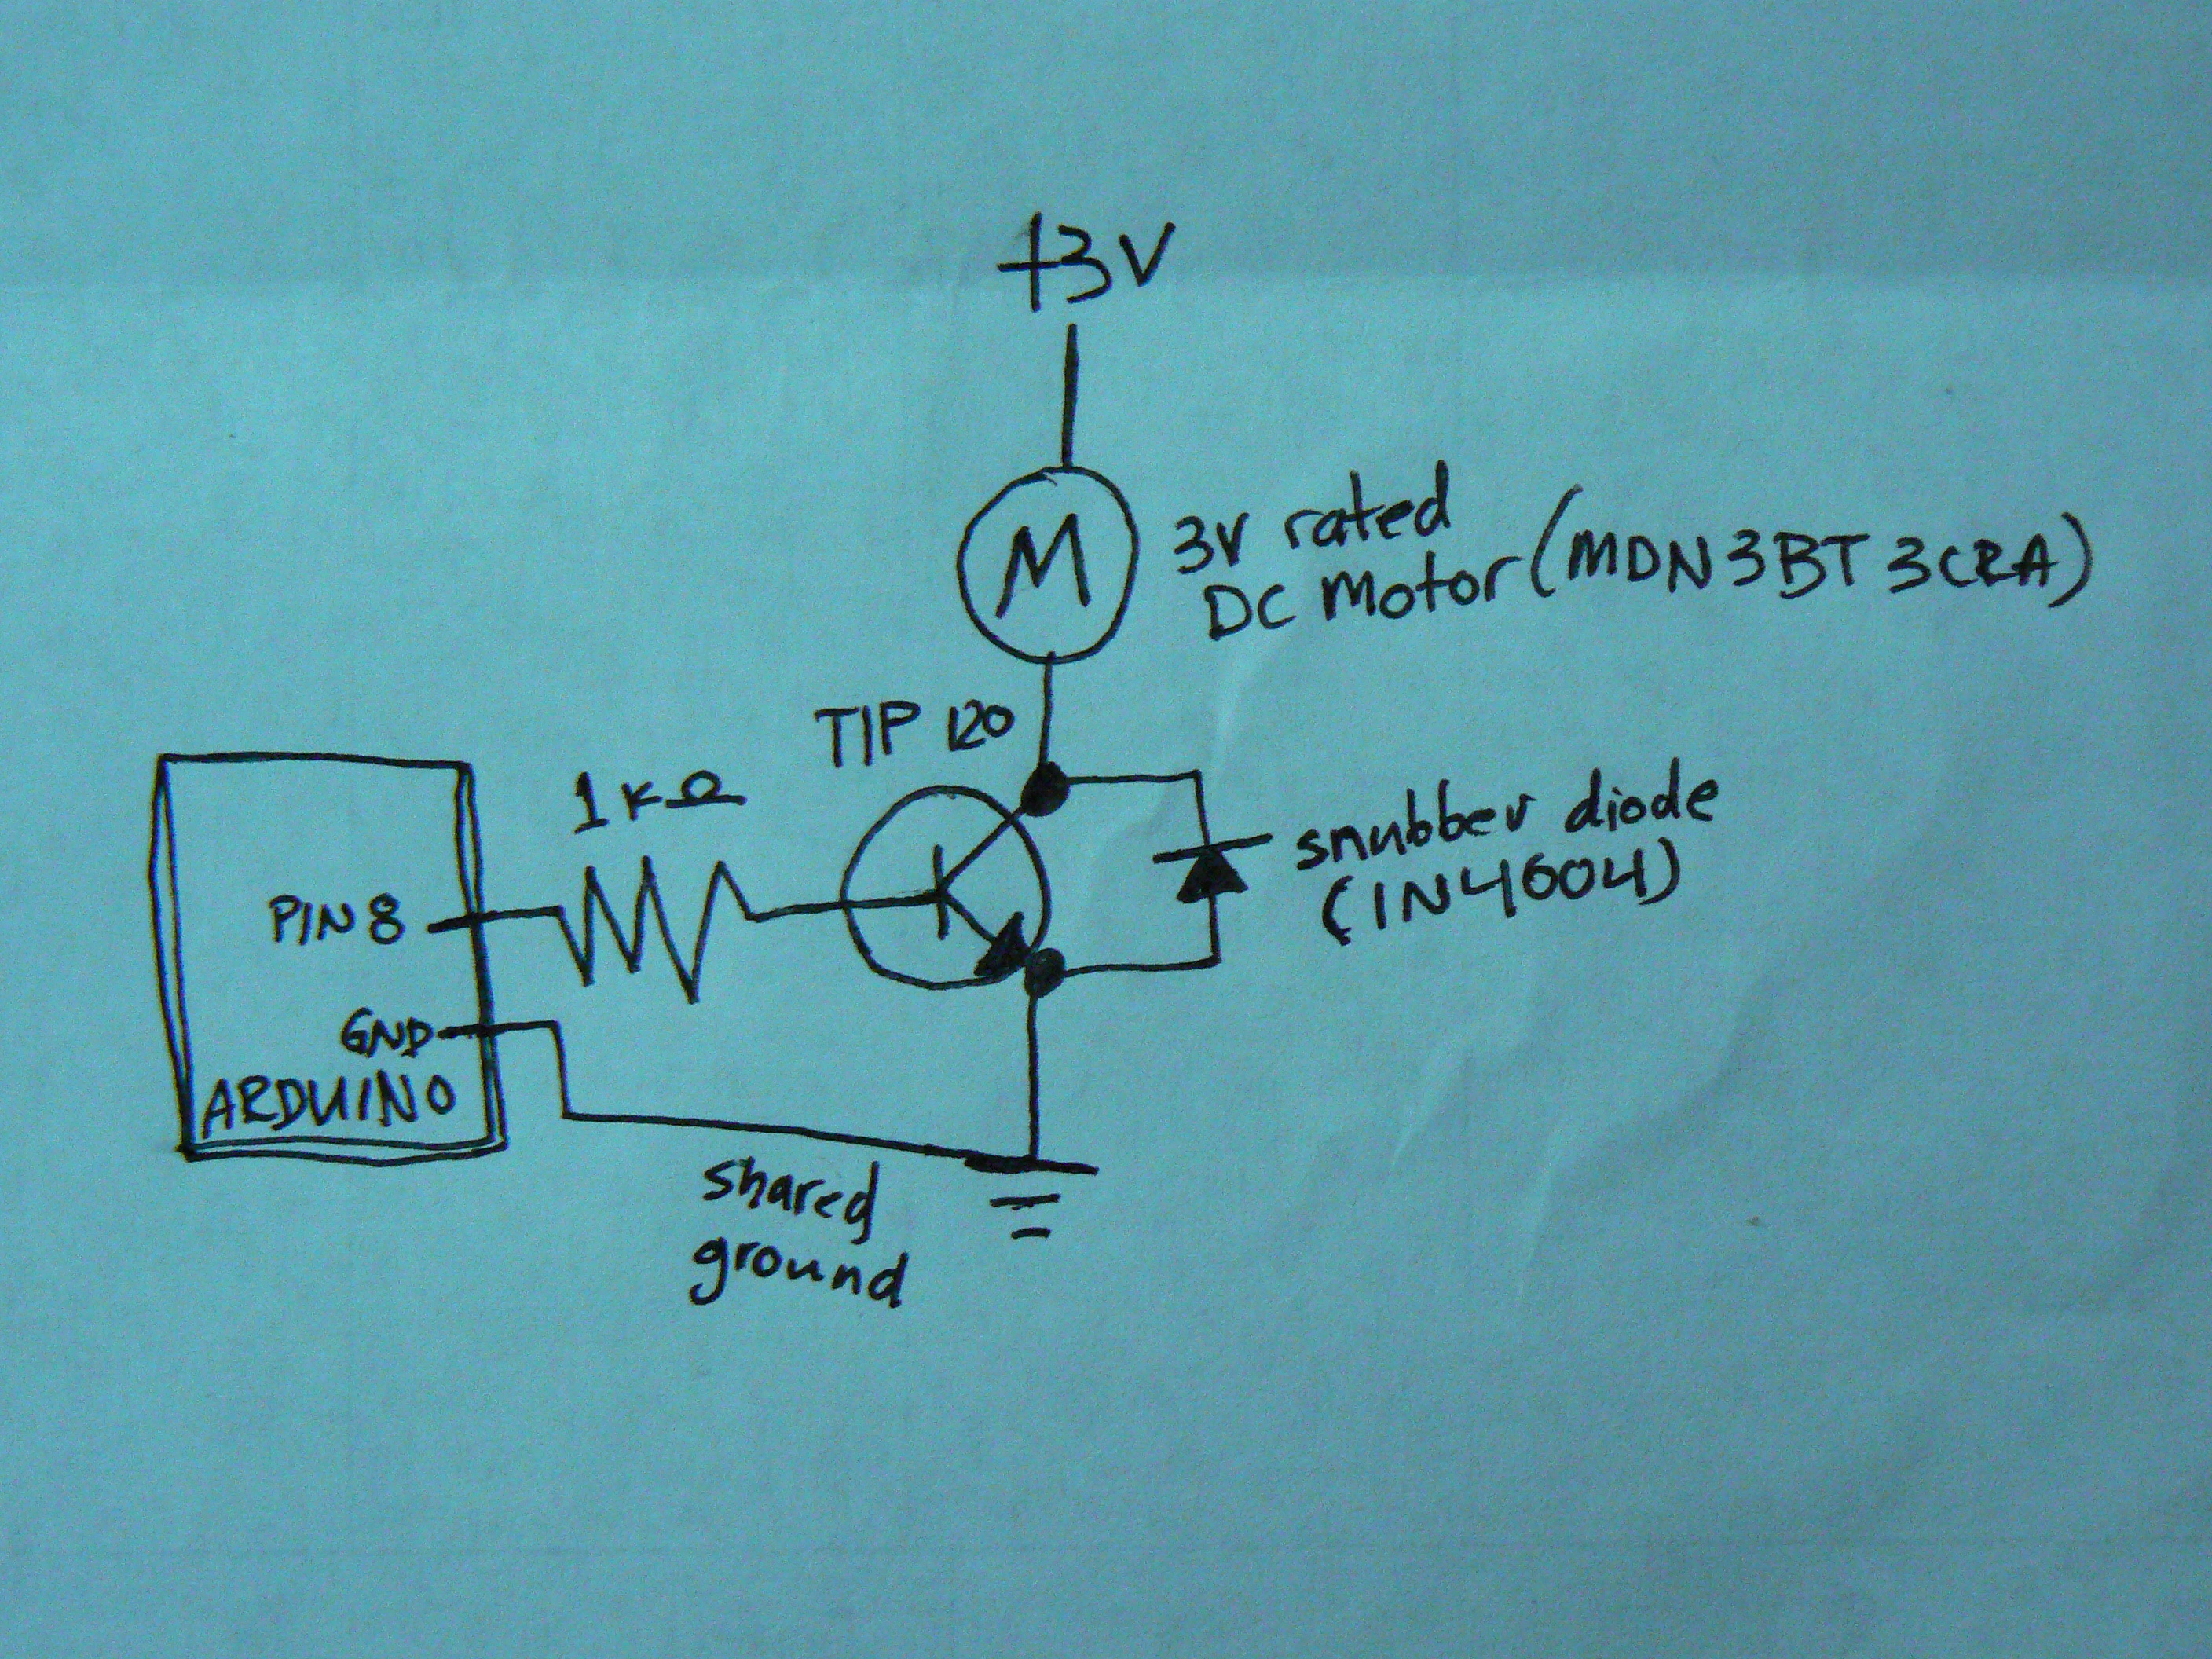
When controlling motors with a microcontroller, the snubber is quite important. This configuration is not commonly seen, as the snubber is typically placed across the motor itself. The general concept is that charge builds up on the motor coil,...
A wooden table features numerous holes of varying diameters designed to accommodate optical fibers. Due to the size of the ceiling lamp (90 cm x 60 cm), it was not feasible to utilize a single bundle of fibers, resulting...
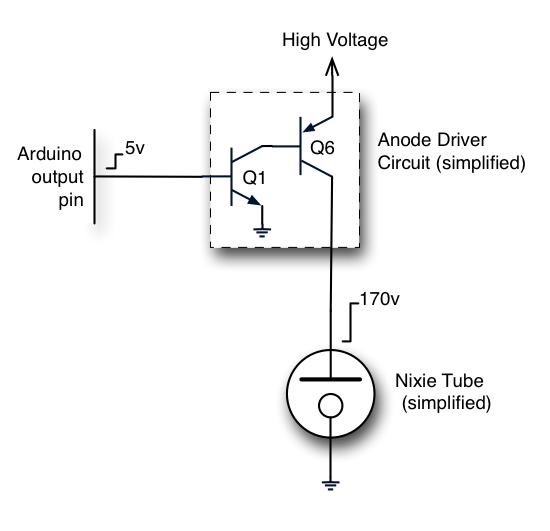
The Nixie tubes being utilized have 10 cathodes shaped like numerals and a screen-like anode. These are vintage Russian IN-12A tubes sourced from a reputable Ukrainian shop on eBay. Other types of Nixies may feature additional cathodes for displaying...
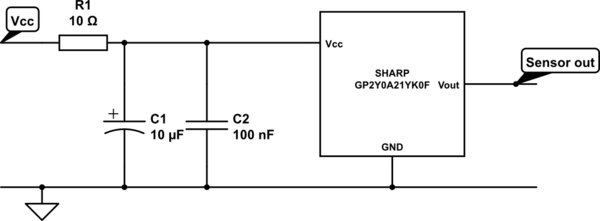
A project involves two distance sensors that signal an Arduino to operate a servo motor when an object comes within range. The system functions correctly; however, the sensors output a consistently high voltage, necessitating a high cutoff voltage in...
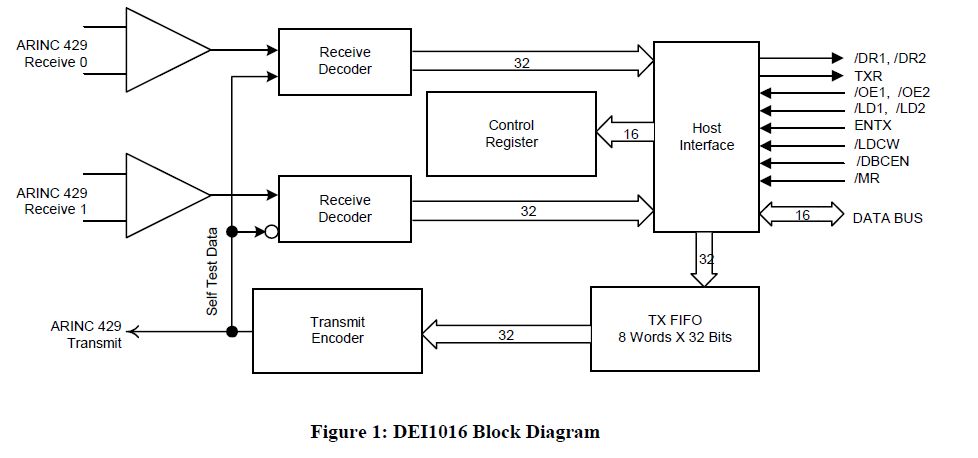
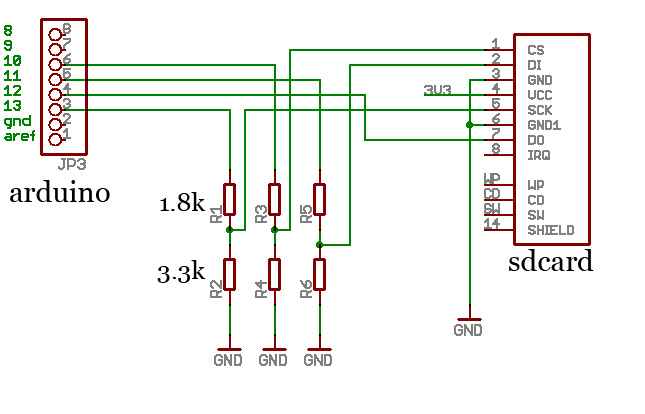
This document outlines the process of interfacing an Arduino with an ARINC 429 transceiver, illustrating the general methodology for connecting an Arduino to electronic circuits that can be applied to individual designs. The ARINC 429 bus is the predominant...
A BASIC preprocessor has been developed using Python, enabling code writing without line numbers and allowing the use of labels. This preprocessor automatically assigns line numbers to the code and converts labels accordingly. An example of its application is...