
Arduino While Loop
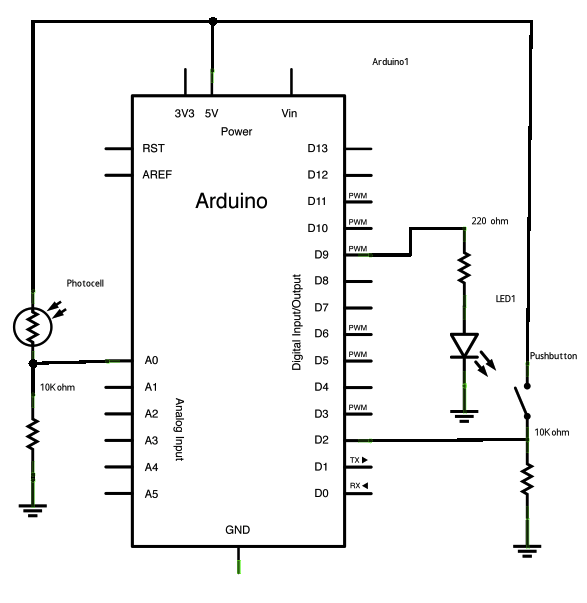
The described circuit utilizes a microcontroller, such as an Arduino, to manage the interaction between an analog sensor (photoresistor), a digital input (button), and an output device (LED). The photoresistor is connected to analog pin 0, allowing the microcontroller to read varying resistance values based on light intensity. This input is essential for determining the ambient light conditions.
The LED, connected to pin 9, is controlled through Pulse Width Modulation (PWM) to create a fading effect. The brightness of the LED is adjusted based on the readings from the photoresistor, providing a visual representation of the light levels detected.
The button, connected to digital pin 2, serves as a trigger for the calibration process. When pressed, the program enters a while loop that continuously executes the calibrate() method. This method is responsible for monitoring the analog sensor's output and determining the maximum and minimum values it can produce. These calibration values are crucial for ensuring accurate readings in varying light conditions.
Once the button is released, the program exits the while loop and returns to the main execution flow, where the LED fading continues based on the calibrated values. This approach allows for dynamic adjustment of the LED's brightness in response to real-time changes in light levels, enhancing the interactivity and responsiveness of the circuit.Sometimes you want everything in the program to stop while a given condition is true. You can do this using a while loop. This example shows how to use a while loop to calibrate the value of an analog sensor. In the main loop, the sketch below reads the value of a photoresistor on analog pin 0 and uses it to fade an LED on pin 9. But while a butt on attached to digital pin 2 is pressed, the program runs a method called calibrate() that looks for the highest and lowest values of the analog sensor. When you release the button, the sketch continues with the main loop. 🔗 External reference
Related Circuits
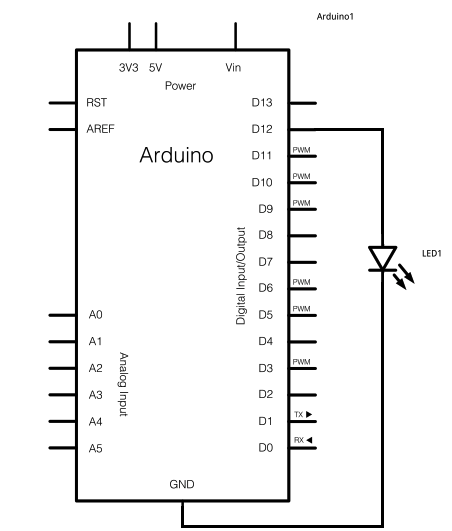
The schematic for this project consists of adding a single 5mm LED to one digital output port on the Arduino. The main components in the schematic include the Arduino Uno, a 5mm LED, and a USB cable. The left...

The capability to control lights and fans wirelessly has transitioned from an expensive luxury to widely accessible consumer solutions. Nevertheless, creating a custom solution remains an engaging project for hobbyists and tinkerers. RobotGrrl has developed user-friendly libraries aimed at...

The kit includes essential items to create your own Arduino 328 board, with components mounted on a breadboard running a demo LED flash program. The processor can be programmed directly from the Arduino IDE using a TTL serial connection....
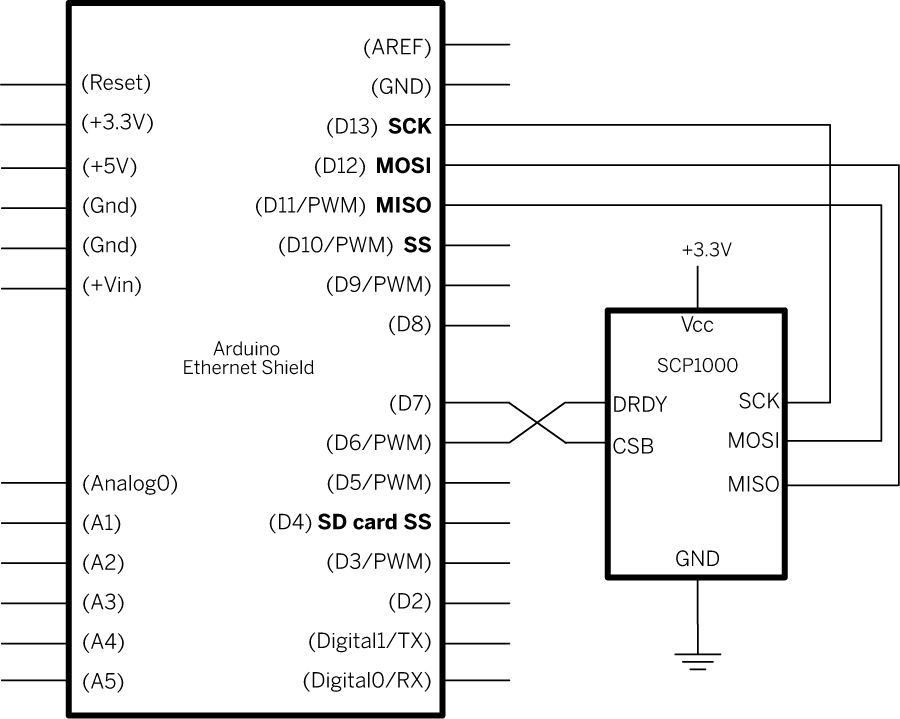
This example demonstrates how to utilize SPI communication to read data from an SCP1000 Barometric Pressure sensor and subsequently transmit that data to the web using an Arduino and Ethernet Shield combination as a simple web server. By employing...
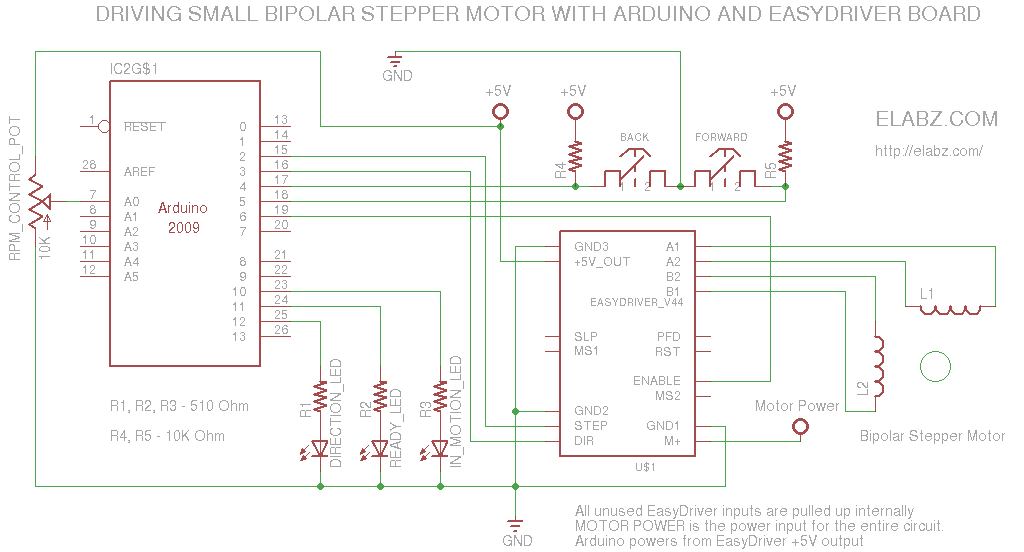
A simple circuit designed for testing bipolar stepper motors or for manual positioning using stepper motors. Schematics, Arduino sketch, and video are available. This circuit serves as a versatile tool for both testing and controlling bipolar stepper motors, which are...
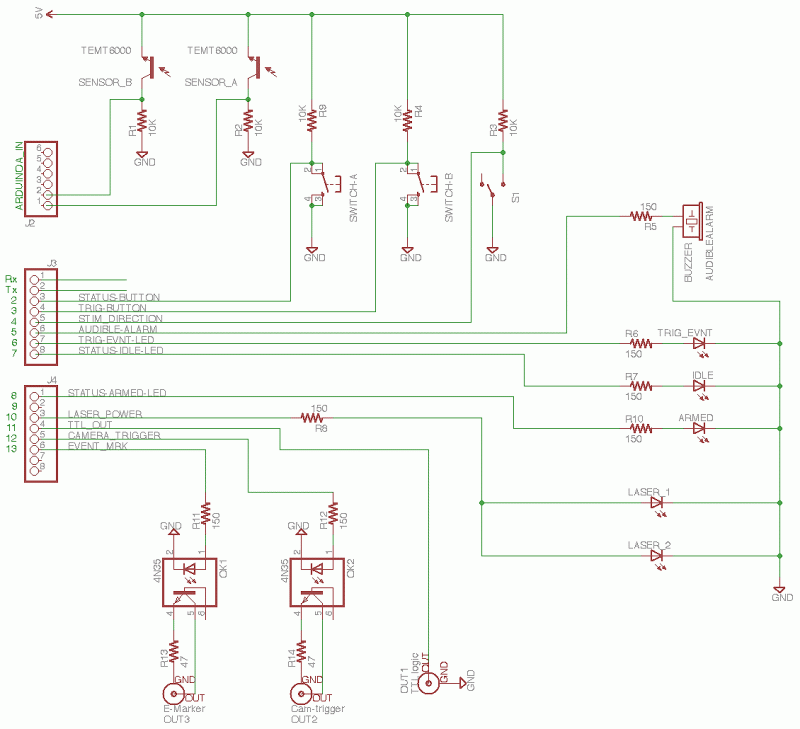
The core of the circuit features an Arduino microprocessor, represented by the header pins on the left side of the circuit schematic. Two analog inputs, labeled 0 and 1, are connected to the emitter sides of TEMT6000 ambient light...