
DIY Water Softener System
To address the challenges posed by hard water, particularly the issues arising from elevated levels of calcium salts, a DIY water softener can be constructed. This device aims to reduce the hardness of water, improving its quality for household use.
The basic principle of a DIY water softener involves the use of ion exchange, where calcium and magnesium ions in the water are replaced with sodium ions. The construction of such a system typically requires a few essential components: a container for the water, a resin bed filled with sodium ion-exchange resin, and a means to backwash the resin when it becomes saturated with calcium and magnesium ions.
The container can be made from PVC or any non-corrosive material that can withstand water pressure. The ion-exchange resin is usually available in granular form and must be placed in the container to allow water to flow through it. As water passes through the resin bed, the calcium and magnesium ions are attracted to the resin, while sodium ions are released into the water.
To maintain the effectiveness of the water softener, periodic regeneration of the resin is necessary. This can be accomplished by flushing the resin with a sodium chloride (salt) solution, which recharges the resin by replacing the calcium and magnesium ions with sodium ions again.
In addition to the primary components, it is advisable to include a flow meter to monitor water usage and an inlet and outlet system to facilitate easy connection to the household plumbing. A bypass valve can also be integrated to allow for water bypassing the softener when necessary.
Overall, this DIY water softener project provides a cost-effective solution to mitigate the effects of hard water, enhancing the longevity of plumbing fixtures and improving the efficiency of household appliances.Hard water has a high concentration of minerals, and of these calcium salts are the most troublesome. But there is a solution coming in form of a cheap diy.. 🔗 External reference
Related Circuits
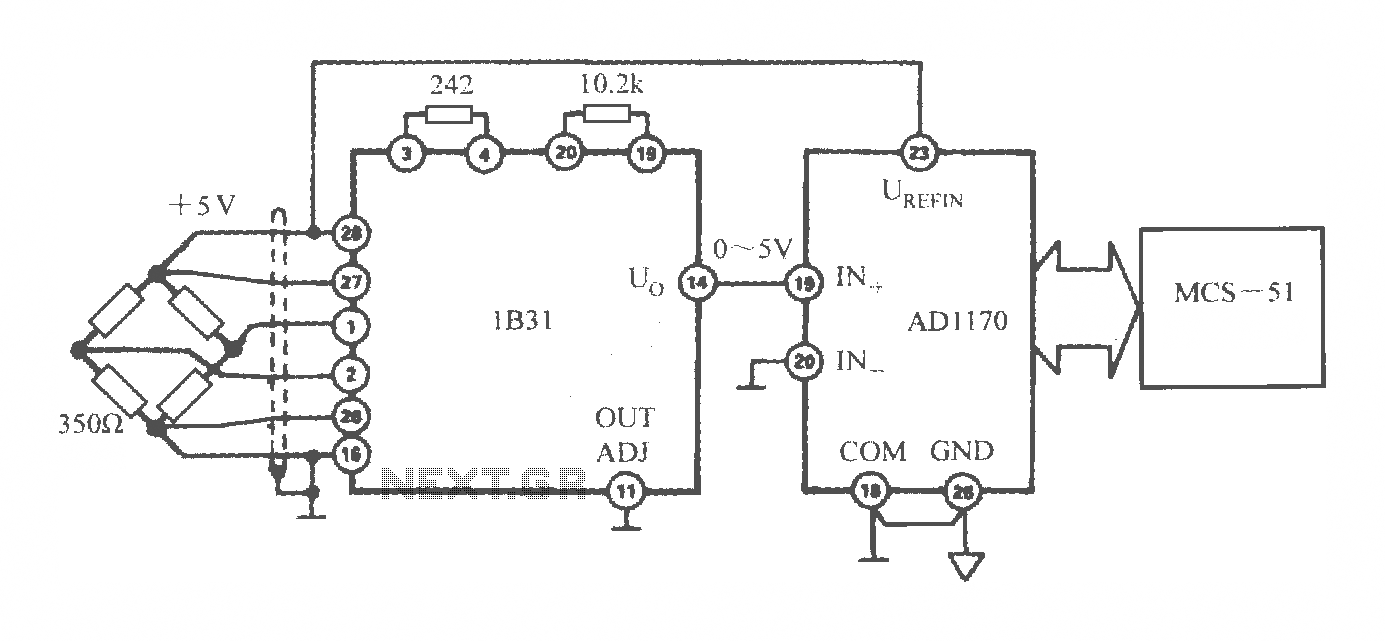
The pressure transmitter circuit data acquisition system utilizes the 1B31, an 18-bit A/D converter (AD1170), and an MCS-51 microcontroller. The configuration, as depicted in the accompanying diagram, features a full-scale output voltage of 10 mV from the pressure transmitter...
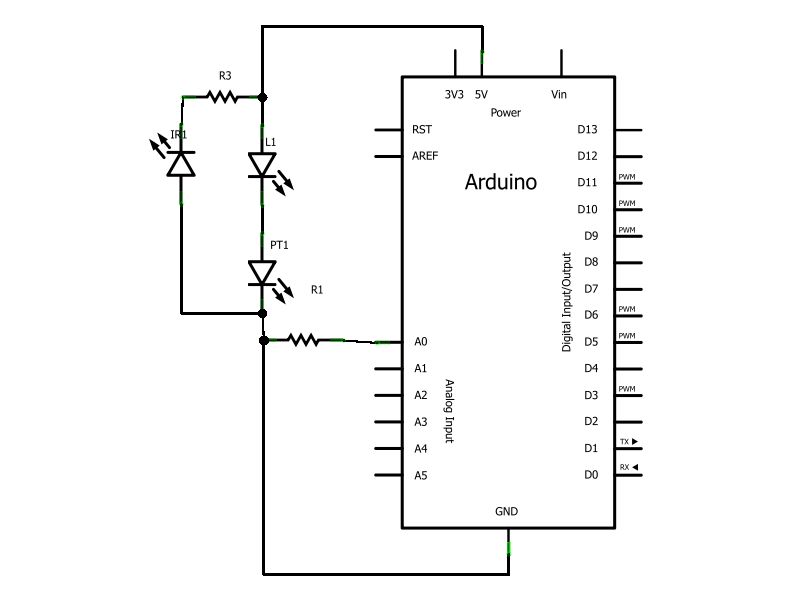
Have you ever wanted to create a line-following robot but found infrared sensors too expensive? If you are located in the UK and have access to a Maplin store nearby, you can purchase infrared transmitters and receivers for just...
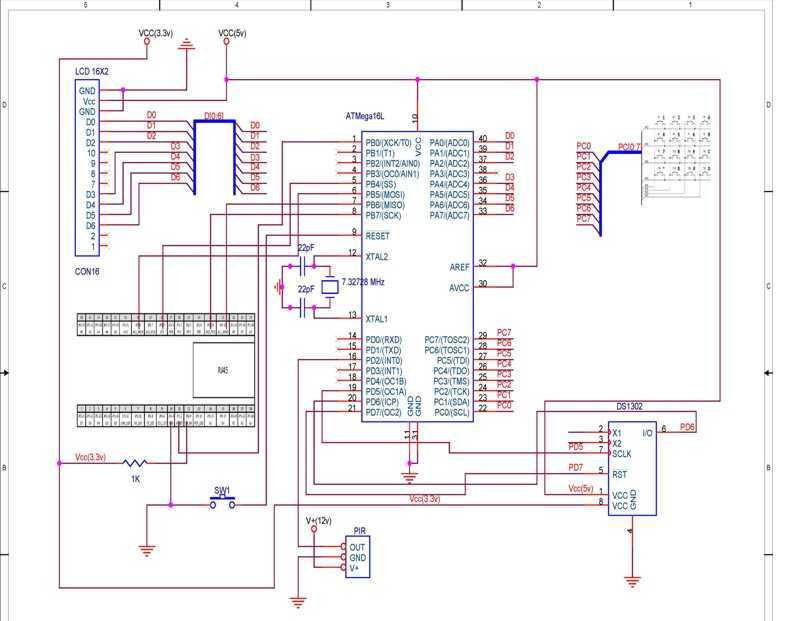
TCP based security system using the Ethernet module offered within the contest, an ATmega16L microcontroller, a PIR as a sensor and few other peripheral devices, which is specially targeted for homes and small business owners. I have used through...
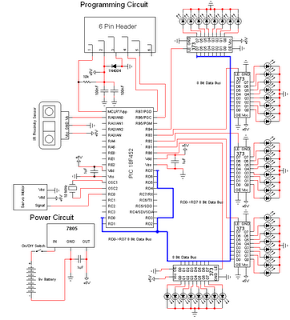
The personal radar system utilizes the PIC microcontroller PIC18F452 as a hobby project. The attached circuit diagram of the radar may appear simple; however, careful analysis of the PIC18F452 radar circuit is necessary to prevent damage. This personal radar...

This document describes a Rife Beam-Ray system designed and constructed using the latest information available about Royal Rife's actual frequencies. The system employs a novel method for generating the proper modulation frequency for the 3.1 MHz carrier and outlines...
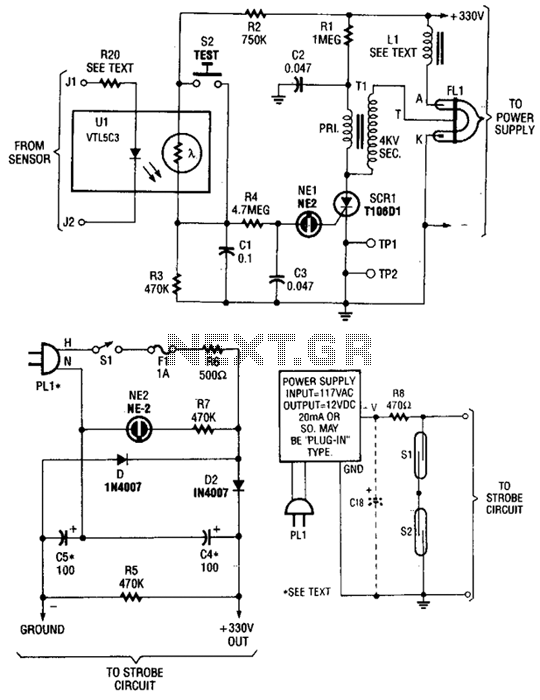
The circuit is activated by an LED/photoresistor isolator (U1), which combines a light-dependent resistor (LDR) and an LED in a single package. This device was selected for its high isolation characteristic of 2000 V, which is essential since the...