
Guitar Loop with Arduino
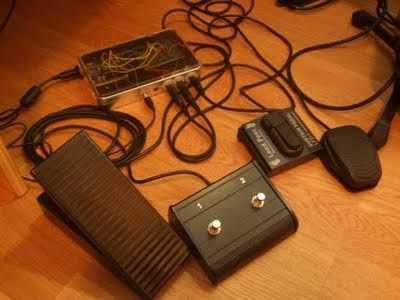
To construct a guitar looper using an Arduino board, the project requires several key components and a systematic approach to wiring and programming. The primary components include the Arduino board (e.g., Arduino Uno), a breadboard, various guitar pedals, a power supply, and the necessary cables for connections.
The schematic will typically involve connecting the output of the guitar to the input of the first pedal in the chain, with subsequent pedals connected in series. The output from the last pedal will then be routed to the Arduino's analog or digital input pins. The Arduino can be programmed to interpret the signals from the pedals, which can be used to control playback and recording functions in the Pure Data software.
For the control interface, the Arduino can be equipped with buttons or footswitches that correspond to various functions of the looper, such as record, play, stop, and overdub. Each of these controls can be connected to digital input pins on the Arduino, with pull-down resistors used to ensure stable readings. The Arduino code will need to implement debouncing for the buttons to avoid multiple triggers from a single press.
The communication between the Arduino and Pure Data can be established using a serial connection, allowing for real-time control of audio processing parameters based on the pedal inputs. This setup enables the creation of complex audio loops and effects, making it a versatile tool for live performances and studio work.
In summary, the guitar looper project with an Arduino board integrates hardware and software components to create an interactive and customizable audio processing system, suitable for musicians looking to enhance their performance capabilities.Build a Guitar Looper with an Arduino board. Here is how to produce pedalboard for electric guitar. The idea is to connect pedals to the Arduino, and to use them to control a software of sound processing in Pure Data. Here I show you the example of a looper, but one can be also made a rack of effects without problem. 🔗 External reference
Related Circuits
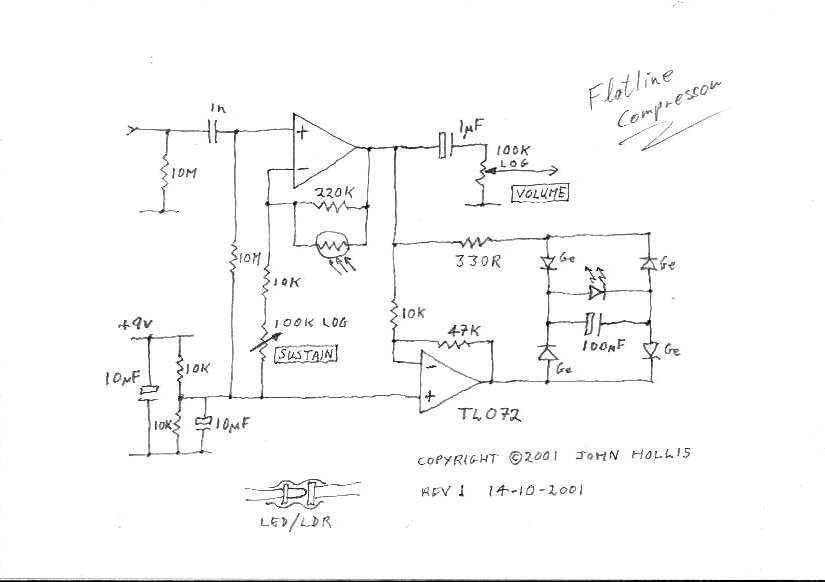
This circuit is a simple, low noise guitar compressor. The described circuit functions as a low-noise compressor specifically designed for guitar applications. It aims to reduce the dynamic range of the guitar signal, thereby allowing for a more consistent output...
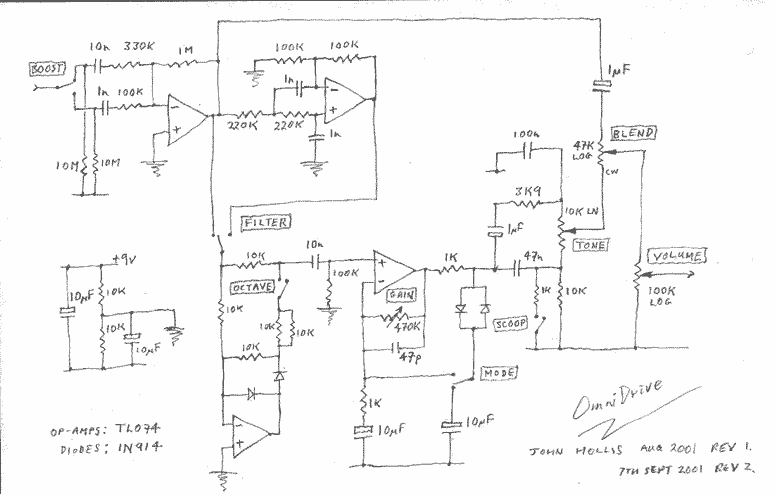
This is a versatile distortion pedal. Think of it as analogue modelling, using analogue circuitry to model a wide range of analogue distortion devices. It includes the main elements found in the majority of distortion boxes. The unit comprises...
Government data sets available online are often sourced from major metropolitan areas or infrastructural centers. With an easy-to-follow introduction to new software and technologies, the urban sensor kit allows anyone to obtain location-specific information and share it with a...
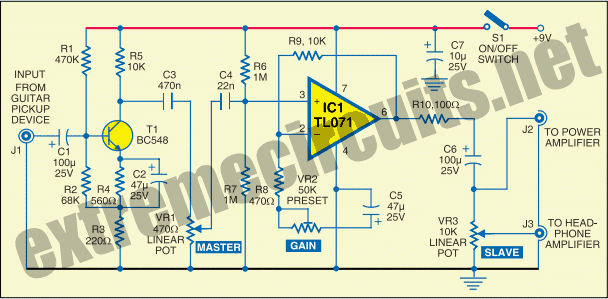
The circuit diagram of a guitar preamplifier is designed to accept any standard guitar pickup and features two signal outputs. A typical example of a pickup attached to a guitar headstock is illustrated. The pickup device consists of a...
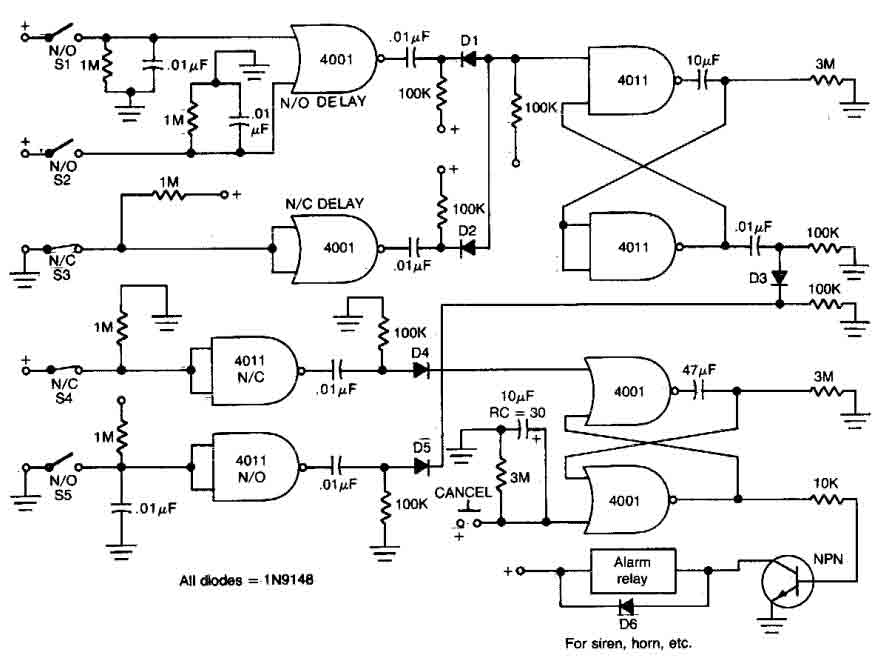
This circuit features open and closed loop contacts (switches 1, 2, 3) that activate the alarm, which remains activated for 5 to 10 minutes. The triggering delay for entrance and exit is set to 27 seconds. Additionally, this simple...
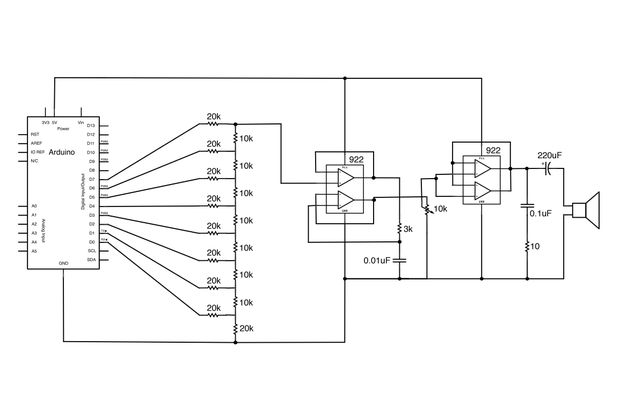
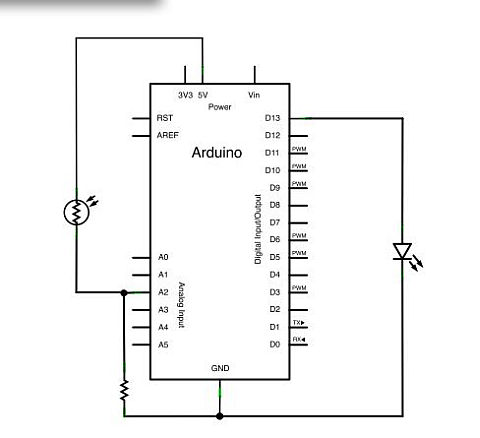
Generate sound or output analog voltages with an Arduino. This guide will demonstrate how to set up a basic digital-to-analog converter. To create a digital-to-analog converter (DAC) using an Arduino, one can utilize the Pulse Width Modulation (PWM) feature available...