
lf352 Programming the AVR microcontroller with GCC libc 1.0.4

The AVR 8-Bit RISC microcontroller architecture is designed for efficiency, integrating various essential components that streamline the development of embedded systems. The microcontroller's architecture includes a Harvard architecture with separate instruction and data memories, allowing simultaneous access and enhancing processing speed. The inclusion of EEPROM and RAM facilitates data storage and manipulation, while the built-in Analog to Digital Converter (ADC) allows for analog signal processing, making it suitable for sensor applications.
The digital input and output lines provide flexibility in interfacing with various peripherals, enabling the design of complex systems. The timers incorporated into the microcontroller can be utilized for precise timing operations, pulse-width modulation (PWM), and event counting, which is crucial for real-time applications. The UART for RS-232 communication allows for straightforward serial communication with other devices, making it a versatile choice for many projects.
The GCC AVR development environment is critical for programming the ATmega8 microcontroller. The installation process outlined includes extracting the necessary packages, configuring them for the AVR target, and ensuring they are installed in a dedicated directory to avoid conflicts with other development tools. The use of the uisp programmer simplifies the process of uploading firmware to the microcontroller, allowing for efficient testing and iteration during development.
For projects requiring precise timing or specific communication protocols, external components such as crystals can be integrated into the circuit. The ability to modify fuse bits provides flexibility in selecting the appropriate oscillator configuration, enabling designers to tailor the microcontroller's operation to meet specific project requirements. Overall, the AVR 8-Bit RISC microcontroller offers a robust platform for developing a wide range of embedded applications, supported by a rich ecosystem of development tools and resources.The AVR 8-Bit RISC microcontroller from Atmel is a very common microcontroller. This microcontroller is one chip with EEPROM, Ram, Analog to Digital converter, a lot of digital input and output lines, timers, UART for RS 232 communication and many other things. I wrote already in March 2002 an article about the same subject. A lot of things have c hanged in the avr-libc development and the AT90S4433 microcontroller which I used in 2002 is no longer manufactured by Atmel. This is therefore an update of the March 2002 article. I will use libc-1. 0. 4 and the ATmega8 microcontroller. Many people where interested in microcontroller programming after the article which I wrote in 2002. However this first step to get the development environment up and running is the hardest. If something does not work then you have absolutely no clue where the fault is. Programmer cable wrong Circuit faulty Installation incorrect Parallelport disabled in bios Kernel modules for ppdev compiled wrong There can be a lot of reasons why things don`t work.
To make the entrance to the exciting world of microcontrollers easier shop. tuxgraphics. org offers now a bootable CD with a manual and the programmer hardware. All you need to do then is boot from this CD and everything is up and running. No software installation is required and nothing is modified on your local computer. Even I use such a CD now for a while because the hardware I build often survives several generations of kernels and software installations on my PC. If I want later on to update some microcontroller software then I do not have to worry if the development environment on my Linux PC is still working.
I just boot from the CD and it is up and running. Independent of this CD I will explain the installation of the GCC avr development environment in the following paragraphs. If you have the CD from tuxgraphics then continue with chapter "A small test project". We will install all the programs to /usr/local/avr. This is to keep the program separate from your normal Linux C compiler. Create this directory with the command: The binutils package provides all the low-level utilities needed for building object files.
It includes an AVR assembler (avr-as), linker (avr-ld), library handling tools (avr-ranlib, avr-ar), programs to generate object files loadable to the microcontroller`s EEPROM (avr-objcopy), disassembler (avr-objdump) and utilities such as avr-strip and avr-size. tar jxvf binutils-2. 15. tar. bz2 cd binutils-2. 15/ mkdir obj-avr cd obj-avr. /configure -target=avr -prefix=/usr/local/avr -disable-nls make # as root: make install tar jxvf gcc-core-3.
4. 2. tar. bz2 cd gcc-3. 4. 2 mkdir obj-avr cd obj-avr. /configure -target=avr -prefix=/usr/local/avr -disable-nls -enable-language=c make # as root: make install The uisp programmer for Linux is a very good programmer. It can be used directly from within a Makefile. You just add a "make load" rule and you can compile and load the software in one go. This circuit can also be used as a simple test environment for more complex hardware. You can easily test load software and attach sensors or measurement equipment. You need the parts listed in the table below. Although it is a very common microcontroller it might not be available in every local radio shop but bigger distributors for electronic components like ( (germany), (france), digikey.
com (US, CA), etc. have it in store). You have probably noticed that we do not need a crystal. This is because the ATmega8 has now a build-in oscilator. This oscilator can be used when accurate timing is not an issue. However if you want to build precise measurement equipment or you want to use the UART/RS232 interface then you will need a crystal. Which type of oscilator is used can be defined via fuse bits which you can modify with the programmer.
By default (factory setting) the internal 1Mhz oscilator is active. That is: you do not need to rem 🔗 External reference
Related Circuits
This instrument requires two precision components: A precision capacitor and a precision inductor. You only need to start with one precision component, either the reference capacitor or the reference inductor, and using this meter, you can select or adjust...

A digital clock can be constructed using a PIC microcontroller, DS1307 real-time clock (RTC), and a 16x2 LCD display. The DS1307 RTC operates in either 24-hour or 12-hour mode with an AM/PM indicator. It adjusts automatically for months with...
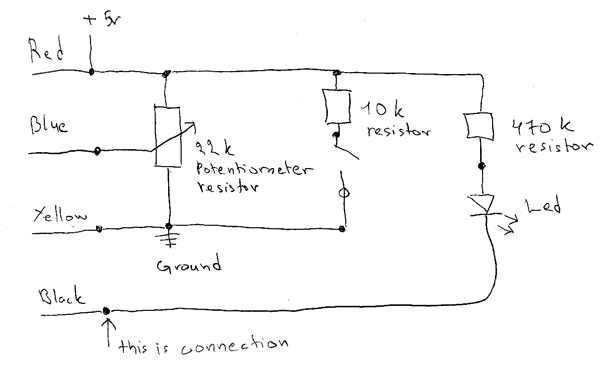
The circuit consists of a 10 kΩ resistor, a 470 kΩ resistor, a potentiometer, and an LED. This circuit is intended for learning Arduino programming in class. The circuit utilizes a combination of resistors and an LED to create...
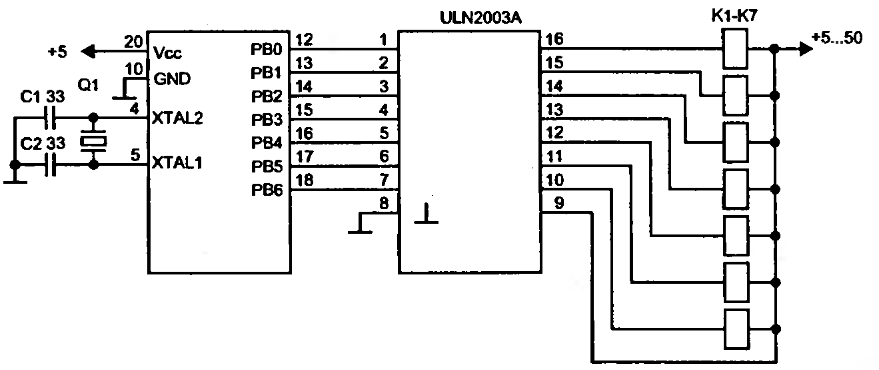
To drive a relay, a current greater than 20mA is required, which cannot be supplied by a single microcontroller pin. Therefore, a relay cannot be connected directly to a microcontroller pin. Instead, a simple amplifier circuit consisting of a...

This project has been set aside for several years. It was initially intended for programming old 8051 microcontrollers, which have since become obsolete. The project was recently revisited due to the need for a programmer for the Atmel Xmega...
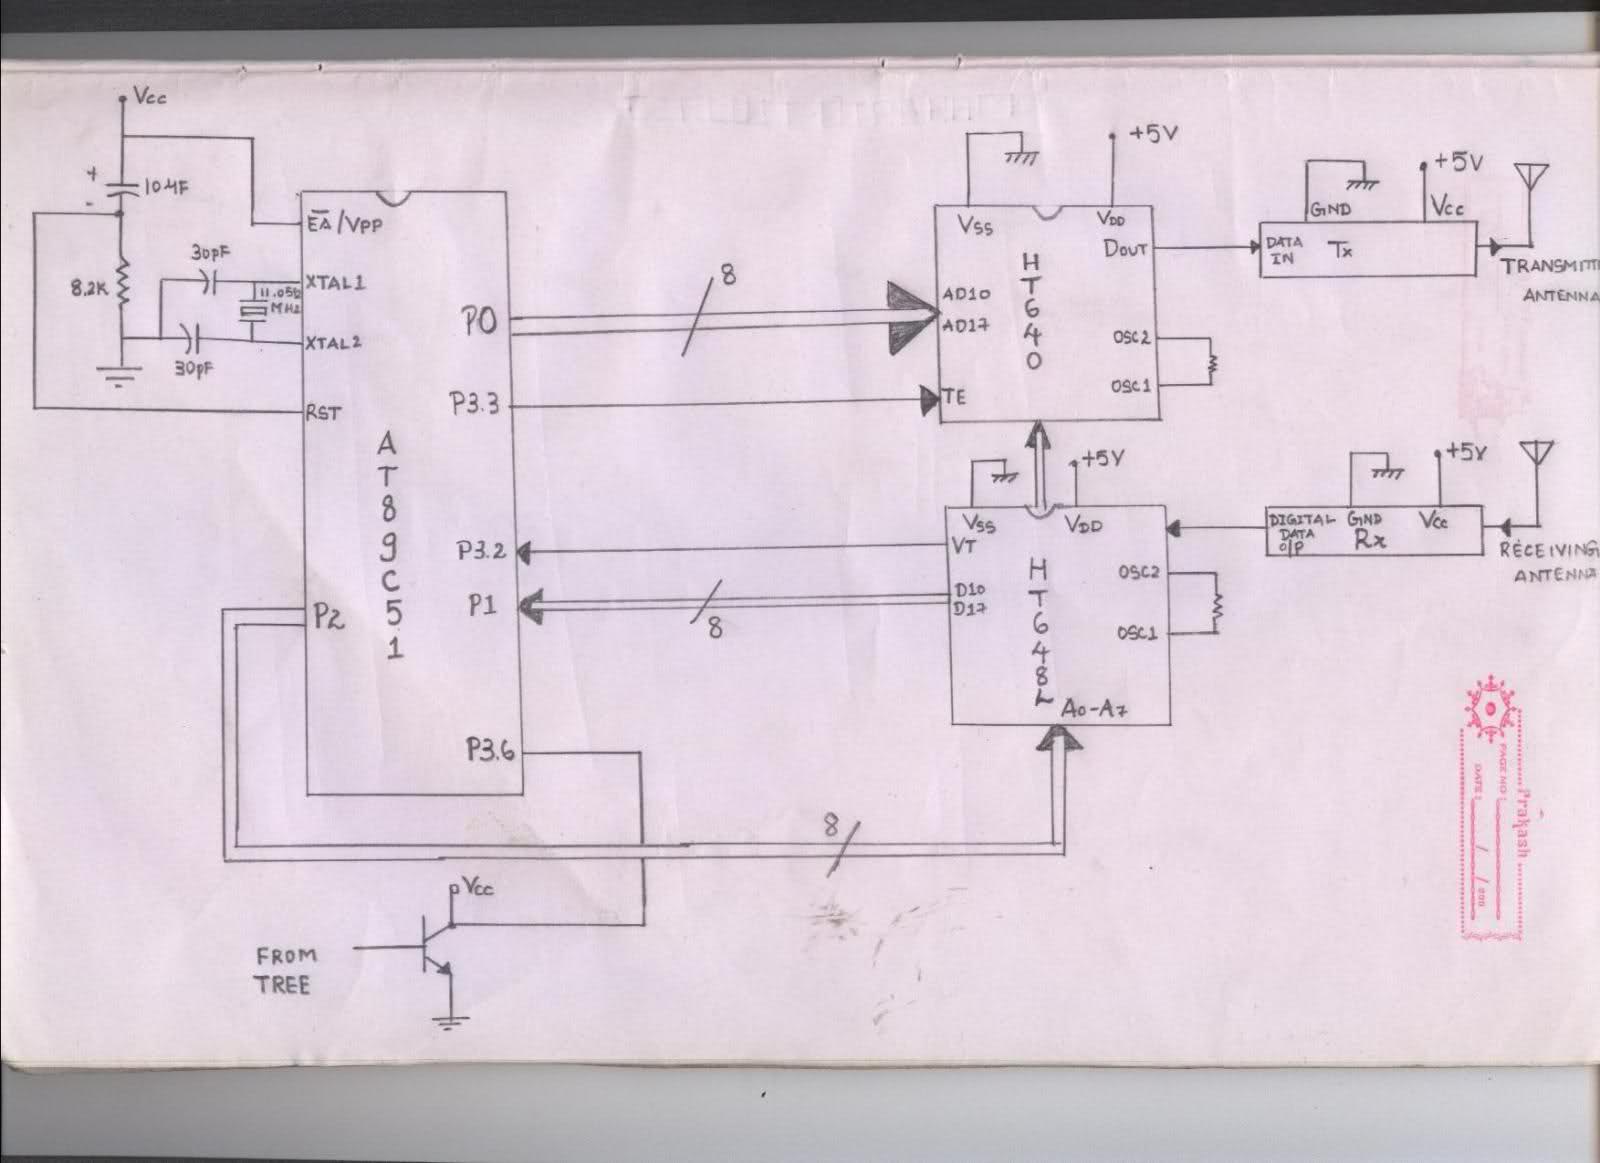
The issue arises when connecting the 8051 microcontroller to the HT640 encoder; the data sent is not received at the receiver. However, when the connections to the 8051 are removed, the transmission functions perfectly. This indicates that manual RF...