
Load Cell with an Arduino
The program includes initial readings from two known loads to calibrate the system. The code captures readings every 500 milliseconds and calculates the load based on the predefined values. The linear response of the load cell allows for interpolation between the known loads to determine additional values. After uploading the code to the Arduino board, the user can monitor the serial output to verify the accuracy of the load readings. For precise measurements, the load must be applied directly at the center of the sensor. While testing with the air-clamping cylinders, which function like pistons, the approach should yield accurate results. However, difficulties have arisen when balancing larger weights on a bolt centered over the sensor, potentially compromising measurement accuracy. Future calibration methods will be explored to enhance the reliability of the readings.
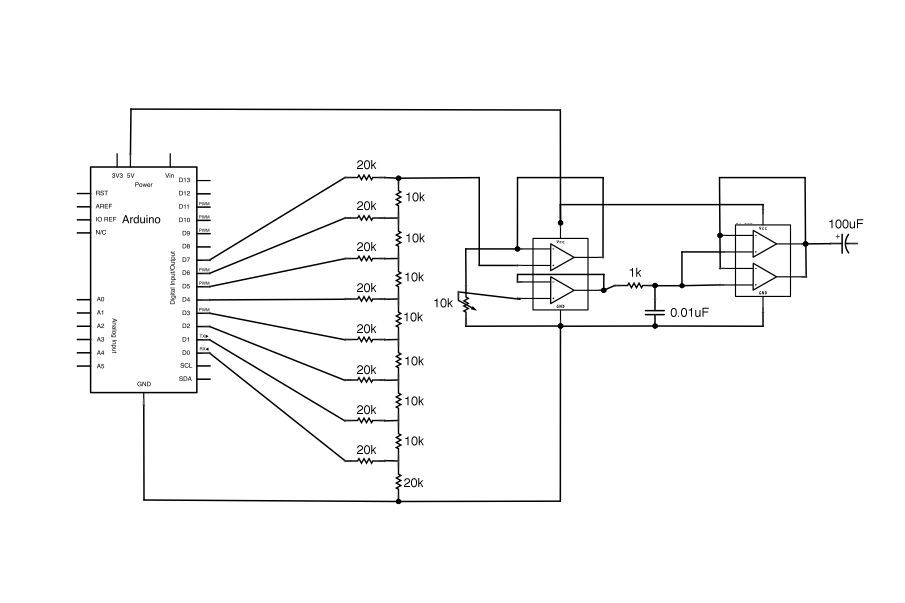
The system utilizes a robust configuration of components to achieve the desired functionality. The eight air-clamping cylinders, when actuated, apply a force directly to the glass, which is critical for the sealing process. The FX 1901 Compression Load Cell captures the force applied by these cylinders. Load cells function by measuring the deformation of strain gauges when subjected to a load, translating this deformation into a voltage change. The INA125 instrumentation amplifier is essential for amplifying the small voltage changes from the load cell, ensuring that the readings are within a usable range for the Arduino.
The Arduino platform provides an accessible interface for data acquisition and processing. By utilizing the analog input capabilities of the Arduino, real-time monitoring of the load cell's output can be achieved. The provided code employs linear interpolation based on two known reference points to calculate the load accurately. This method is efficient for applications requiring quick adjustments and real-time feedback.
Calibration is a critical aspect of ensuring measurement accuracy. The initial setup allows for the input of two known weights, which serve as reference points for the load calculations. It is imperative to ensure that these weights are applied precisely at the center of the load cell to avoid errors in measurement. The challenges encountered with balancing larger weights indicate the need for a more stable calibration setup, possibly involving fixtures or supports to secure the test loads directly above the load cell.
Overall, this system represents a practical solution for measuring the force exerted by air-clamping cylinders in a glass sealing application. By integrating the load cell, instrumentation amplifier, and Arduino, the design facilitates effective monitoring and control of the sealing process, with further refinements anticipated to enhance measurement precision.We built a system that uses eight air-clamping cylinders (McMaster-Carr 62185K64) to push down on a piece of glass to seal it to a sidewall. A number of times, the glass has cracked. So, this project is an attempt to come up with an inexpensive way of measuring how many pounds of force the cylinders are exerting.
The sensor that we want to use is a load cell (an arrangement of strain gauges). The specific load cell that we`re using is the FX 1901 Compression Load Cell. We bought ours from Mouser for $30. Load cells only make a very small change in voltage, so you have to use an instrumentation amplifier to increase the voltage to something we can use. The specific instrumentation amplifier that we`re using is the Burr-Brown INA125 Instrumentation Amplifier.
This also came from Mouser and cost just under $6. The fastest way to hook everything together and see if it would work was to use an Arduino board and use the computer for readout. These boards can be purchased for around $30. Once everything is hooked up, we just needed to write a program that would read analog pin 0 on the arduino, since that`s where we hooked up the output of the amplifier.
// Arduino with load cell // Put two known loads on the sensor and take readings. Put those values // here. float aReading = 192. 0; float aLoad = 15. 0; // lbs. float bReading = 344. 0; float bLoad = 24. 3; // lbs. long time = 0; int interval = 500; // Take a reading every 500 ms void setup() { Serial. begin(9600); } void loop() { float newReading = analogRead(0); // Calculate load based on A and B readings above float load = (bLoad - aLoad)/(bReading - aReading) * (newReading - aReading) + aLoad; // millis returns the number of milliseconds since the board started the current program if(millis() > time + interval) { Serial. print("Reading: "); Serial. print(newReading, 1); // 1 decimal place Serial. print(" Load: "); Serial. println(load, 1); // 1 decimal place, println adds a carriage return time = millis(); } } Since the response of the load cell is linear, once we`ve set up two loads (the a and b in our code), we can just then interpolate to get a new value.
Load the above code, open the serial monitor and take measurements of two known loads. Edit the values of aReading, aLoad, bReading and bLoad with those values. Reload the code to the arduino board and retest your known loads. The load should show properly. Next, try an unknown load. The load needs to be applied to the tip in the middle of the sensor for accuracy. This will not be a problem when we`re testing the cylinders since they are basically a piston coming down. However, our test loads have been some large weights. Trying to balance them on the top of a bolt centered over the sensor has been difficult and has made our test readings probably not as accurate as they could be.
A better way of calibrating will be the next step. 🔗 External reference
Related Circuits
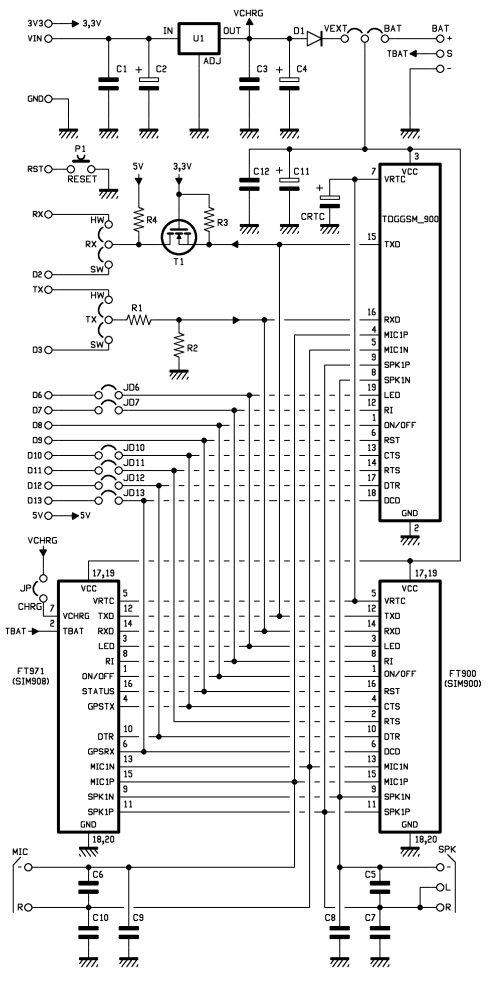
This shield for Arduino is designed based on the GSM/GPRS SIM900 module or the GSM/GPRS & GPS SIM908 module, enabling voice calls and data connections via GPRS. The supply circuit utilizes a simple LM7805 voltage regulator. To operate, it...
This Arduino-powered vocal effects box pitch shifts and distorts incoming audio signals to produce a wide variety of vocal effects. This project is an experiment with real-time digital signal processing using Arduino. It samples an incoming microphone signal at...
The text of the Arduino reference is licensed under a Creative Commons Attribution-ShareAlike 3.0 License. Code samples in the reference are released into the public domain. The Arduino platform is an open-source electronics prototyping environment that enables users to create...
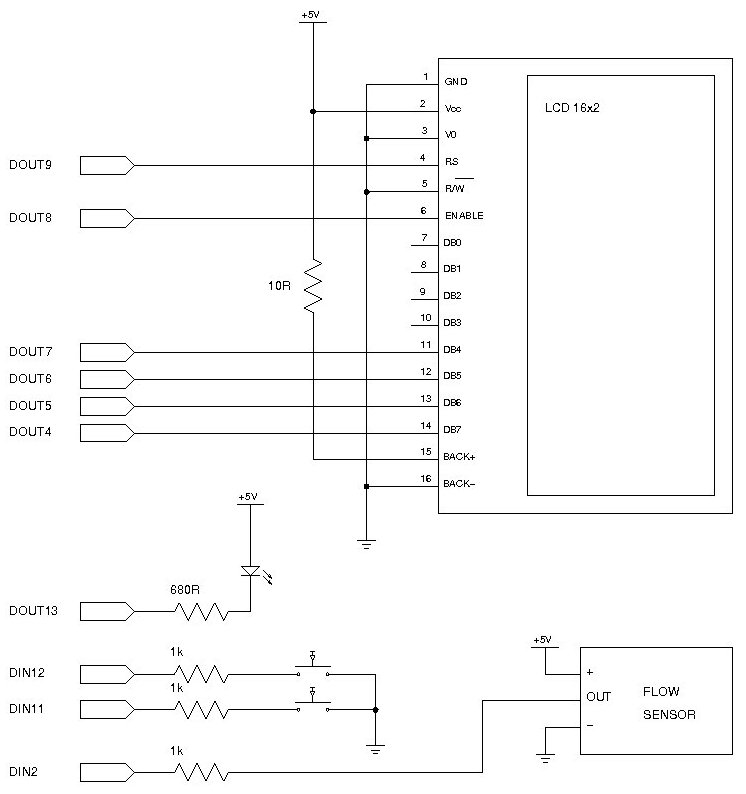
Measuring the consumption of a resource that has units by volume can be more challenging than it appears. Resources such as water, gas, and electricity are typically measured using gauges that determine either the instantaneous flow rate or the...
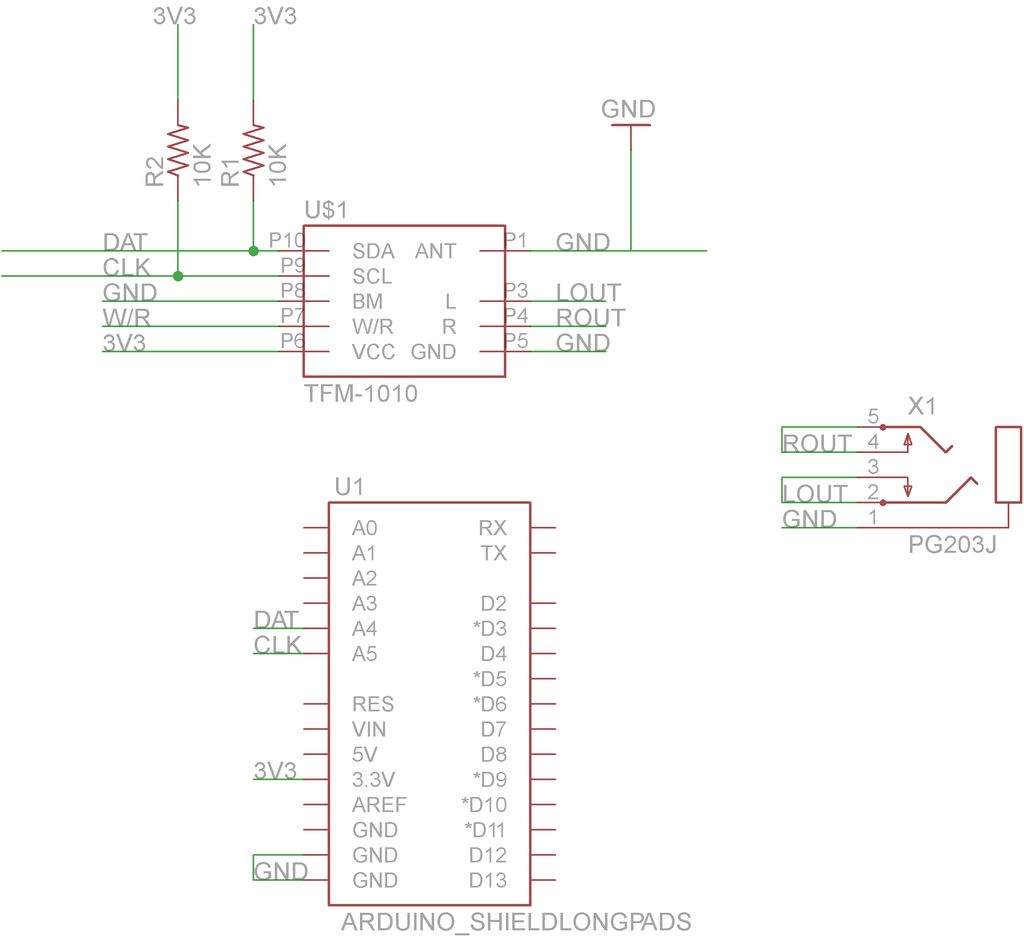
This guide will demonstrate how to construct a custom FM radio receiver shield compatible with an Arduino board. The radio chip utilized in this project is the AR1010, which can be sourced from Sparkfun or Electrokit. Code for initializing...
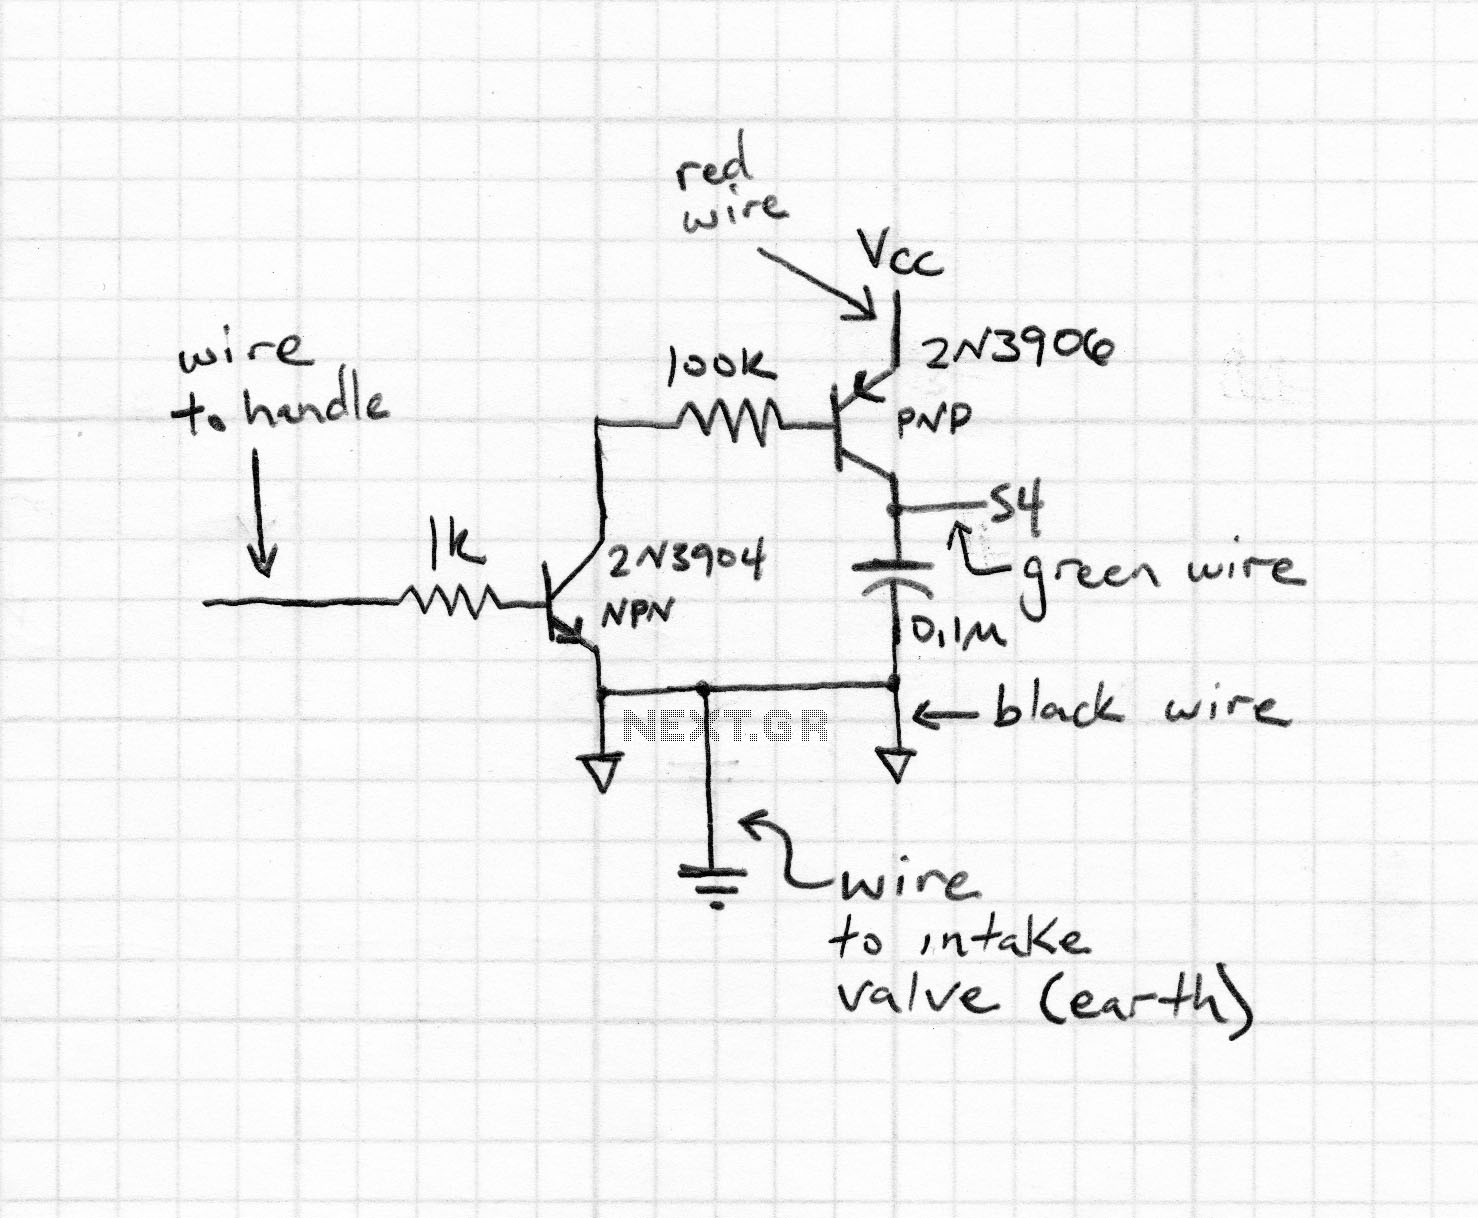
Instructions are provided to convert a tester into a basic analog display for monitoring CPU load on a Linux system, controlled via a serial port. Two variants of the display can be built using either an AA Duracell battery...