
Temperature Displayed on 4 Digit 7 segment using Arduino
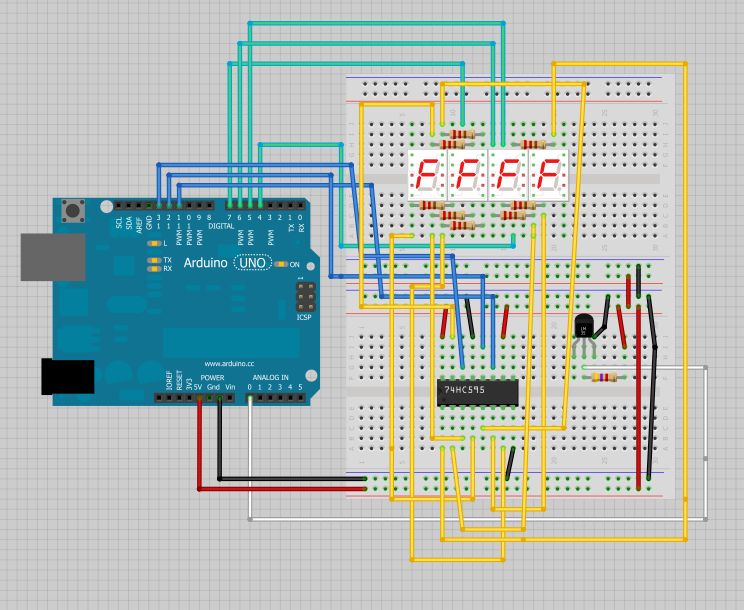
7-segment displays are widely used in electronic devices for visual representation of numerical information. They consist of seven individual segments that can be illuminated in various combinations to display digits from 0 to 9. Each segment is typically an LED or an LCD segment, arranged in a figure-eight pattern. The segments are labeled from 'a' to 'g', with an optional eighth segment for a decimal point.
To integrate a 7-segment display into a project, a microcontroller or microprocessor is commonly used to control the segments. The microcontroller sends signals to the display, turning specific segments on or off to form the desired numeral. This can be accomplished using a variety of communication protocols, including direct GPIO (General Purpose Input/Output) control or through dedicated driver ICs like the MAX7219 or TM1637, which simplify the control of multiple displays.
The schematic for a basic 7-segment display circuit typically includes the following components:
1. **Microcontroller**: Acts as the control unit, processing inputs and sending outputs to the display.
2. **Resistors**: Current-limiting resistors are used in series with each segment to prevent excessive current from damaging the LEDs.
3. **Transistors (if needed)**: In cases where higher current is required, transistors can be used to drive the segments, allowing the microcontroller to control larger loads.
4. **Power Supply**: A suitable power source is necessary to supply the required voltage and current for the display and associated components.
In practice, wiring a 7-segment display involves connecting each segment to the microcontroller through the resistors, ensuring that the common anode or common cathode configuration of the display is respected. The microcontroller firmware will include a lookup table or function to convert numerical inputs into the corresponding segment states, facilitating the display of numbers.
Overall, 7-segment displays offer a versatile solution for numeric output in various electronic applications, making them a valuable component for future projects.But the idea is to apply this code to other projects with 7 segment displays that I might do later. if you want to learn a bit more of 7 segment displays you can read more at this post I`ve made. 🔗 External reference
Related Circuits
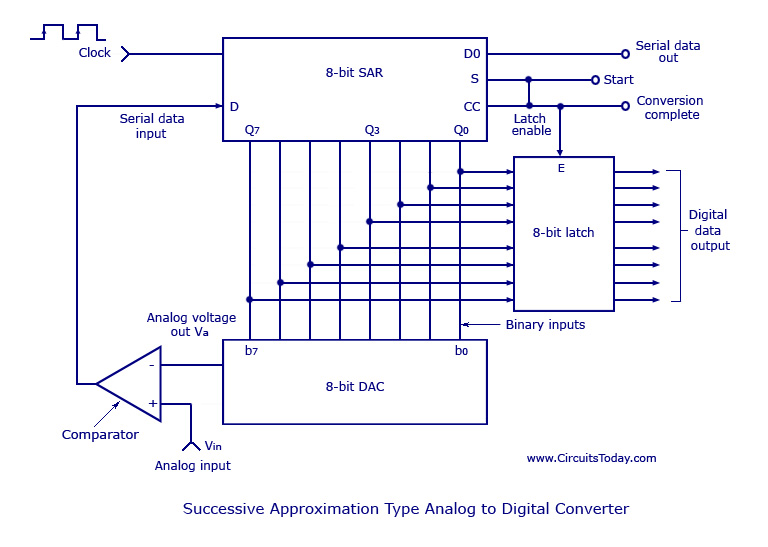
Analog to Digital Converters - Successive Approximation Type Analog to Digital Converter, working, circuit diagram. The Successive Approximation Register (SAR) Analog to Digital Converter (ADC) is a widely used type of ADC that converts an analog signal into a digital...
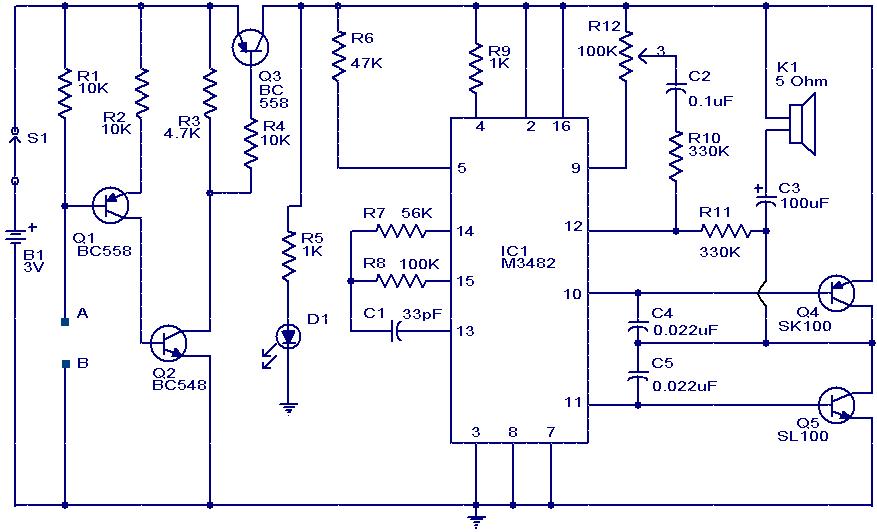
This circuit is a simple musical alarm that generates a tone when water or another conductive liquid touches the two sensor wires provided. It utilizes four transistors and a melody generator integrated circuit (IC) M3482. When water bridges the...
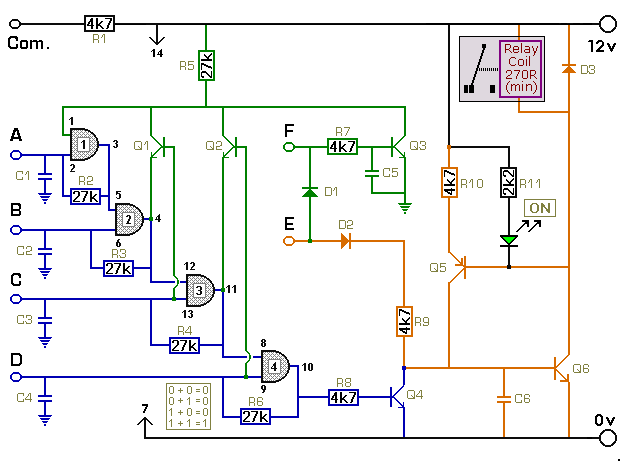
The key connected to "E" is used to energize the relay, while the four keys connected to A, B, C, and D are used to de-energize it. All other keys on the keypad are connected to "F". When "E"...
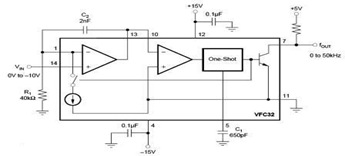
The circuit diagram of a voltage-to-frequency (V/F) converter is presented, designed to handle negative input voltage. It employs the VFC32 voltage-to-frequency converter, which is commonly utilized in various applications. The V/F converter circuit is essential in converting an analog voltage...
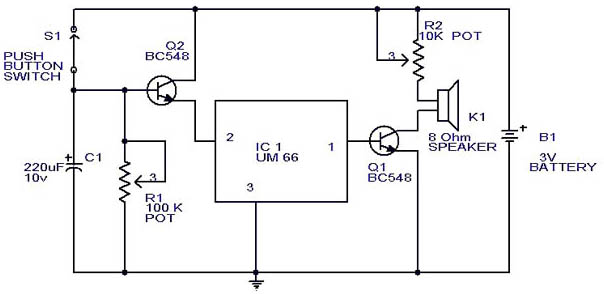
This circuit is a slight modification of a previous design. In the earlier version, the switch needed to be held down for the entire duration of the music playback. In this updated circuit, pressing the push button once charges...

The circuit diagram depicts a simple and effective subwoofer filter designed to operate from a 12V DC supply. This circuit is particularly useful in car subwoofer applications. It functions as a low-pass filter with an adjustable pass frequency ranging...