
ultrasound How do I drive an ultrasonic transducer with an Arduino
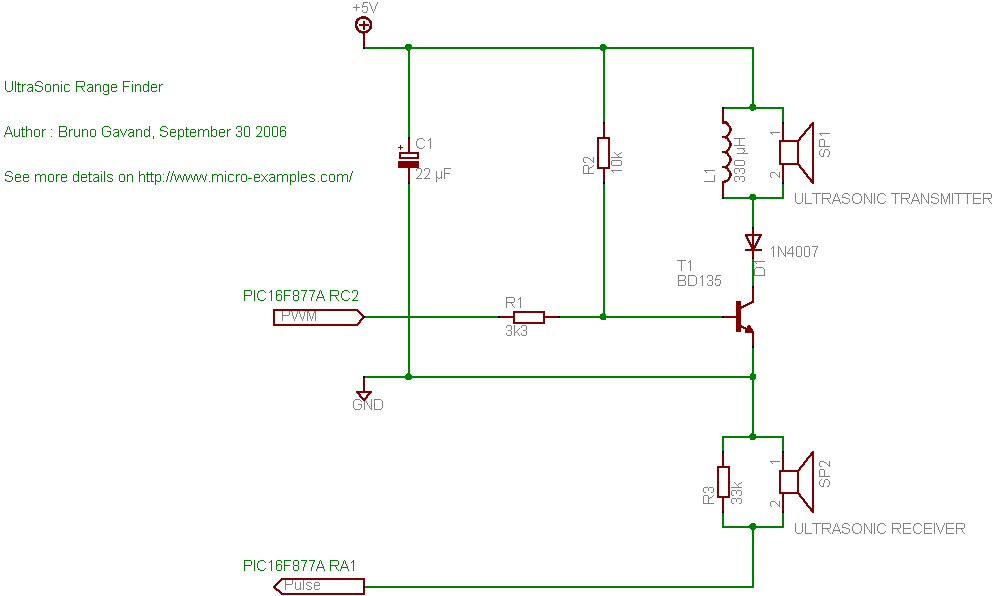
The proposed cat deterrent system employs an Arduino microcontroller to manage the operation and functionality of the device. The core of the system involves detecting the presence of cats using sensors, which could include passive infrared (PIR) sensors or ultrasonic distance sensors. Once a cat is detected, the Arduino triggers an ultrasonic transducer to emit a high-frequency sound that is unpleasant to cats but generally inaudible to humans.
The ultrasonic transducer, typically operating at frequencies ranging from 20 kHz to 40 kHz, produces the sound waves that deter the cats from entering a designated area. The selection of the transducer must consider factors such as the effective range and sound pressure level to ensure adequate coverage of the intended area.
Power for the system can be supplied through a standard AC to DC power adapter or batteries, depending on the desired portability and installation requirements. The schematic would include connections for the power supply, the Arduino, the sensors, and the ultrasonic transducer.
The Arduino can be programmed to adjust the frequency and duration of the ultrasonic sound based on the distance of the detected cat, allowing for a more tailored deterrent effect. Additional features such as LED indicators or a manual activation switch can also be integrated into the design for enhanced usability.
In summary, the cat deterrent system combines detection technology with ultrasonic sound generation, all controlled by an Arduino, to create an effective solution for keeping cats away from specific areas.A cat deterrent with an Arduino, something akin to this. I have figured out detection, and now realize that I need to use an ultrasonic transducer to produce the `blast` that I need. 🔗 External reference
Related Circuits
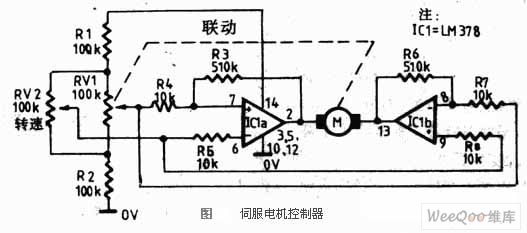
The servo motor is a type of traditional motor that serves as the execution component in automated devices. Its most significant characteristic is its controllability; when a control signal is applied, the servo motor rotates, with its speed being...
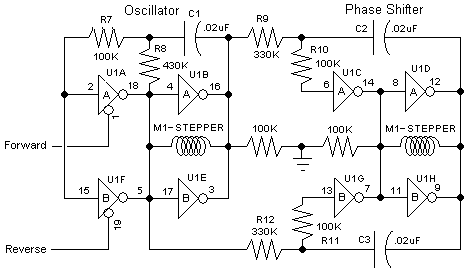
The 74AC240 stepper driver works by alternately enabling each half of the buffer. Only one half can be enabled at a time. Let’s assume that the top half of the driver is enabled. U1A & U1B along with R8,...
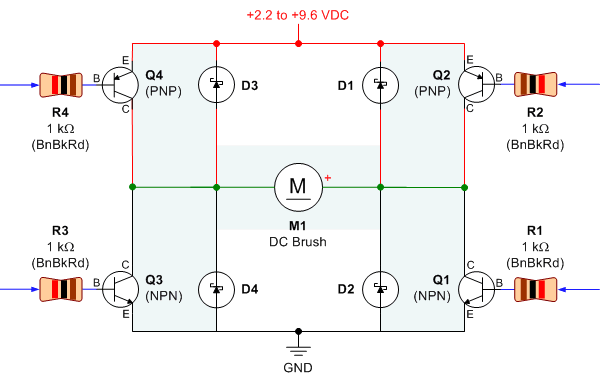
Control a small DC motor using an H-bridge with an Arduino Uno. The objective is to enable the motor to rotate in different directions based on left and right key presses on a keyboard. The provided code includes the...
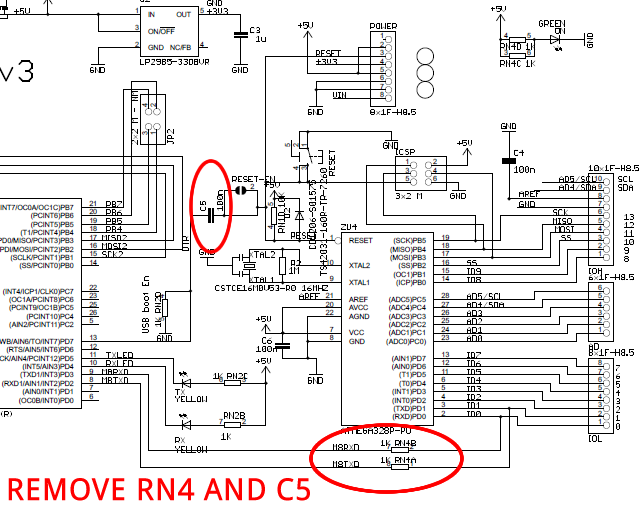
The Arduino Uno is a simple modification that bypasses the USB circuitry, allowing the device to be programmed using a serial port. The Arduino Uno is a widely used microcontroller board based on the ATmega328P microcontroller. It is designed to...

The design of a PAR 38 LED spotlight focuses on delivering practical LED lighting systems that meet performance expectations by reducing power consumption, extending lifespan, and enhancing overall efficiency. The PAR 38 LED spotlight is a widely used lighting solution...
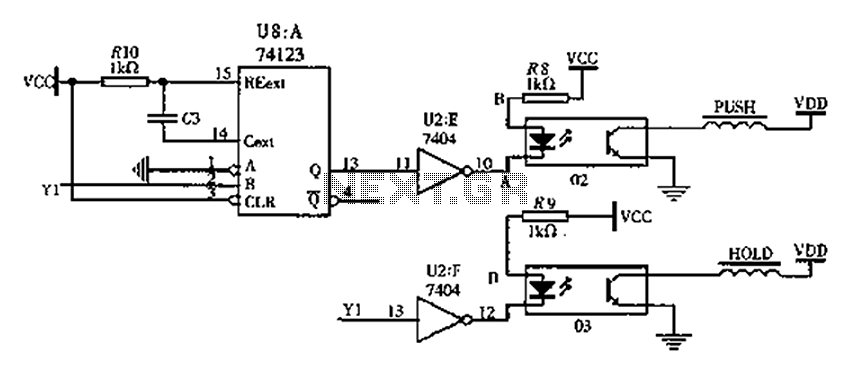
The FIG switching solenoid driver circuit utilizes the 74123 device chip (U8) and solid-state relays (02, 03). The switching electromagnet coil is referred to as the PUSH coil, while the HOL is maintained at a power supply voltage (VDD)...