
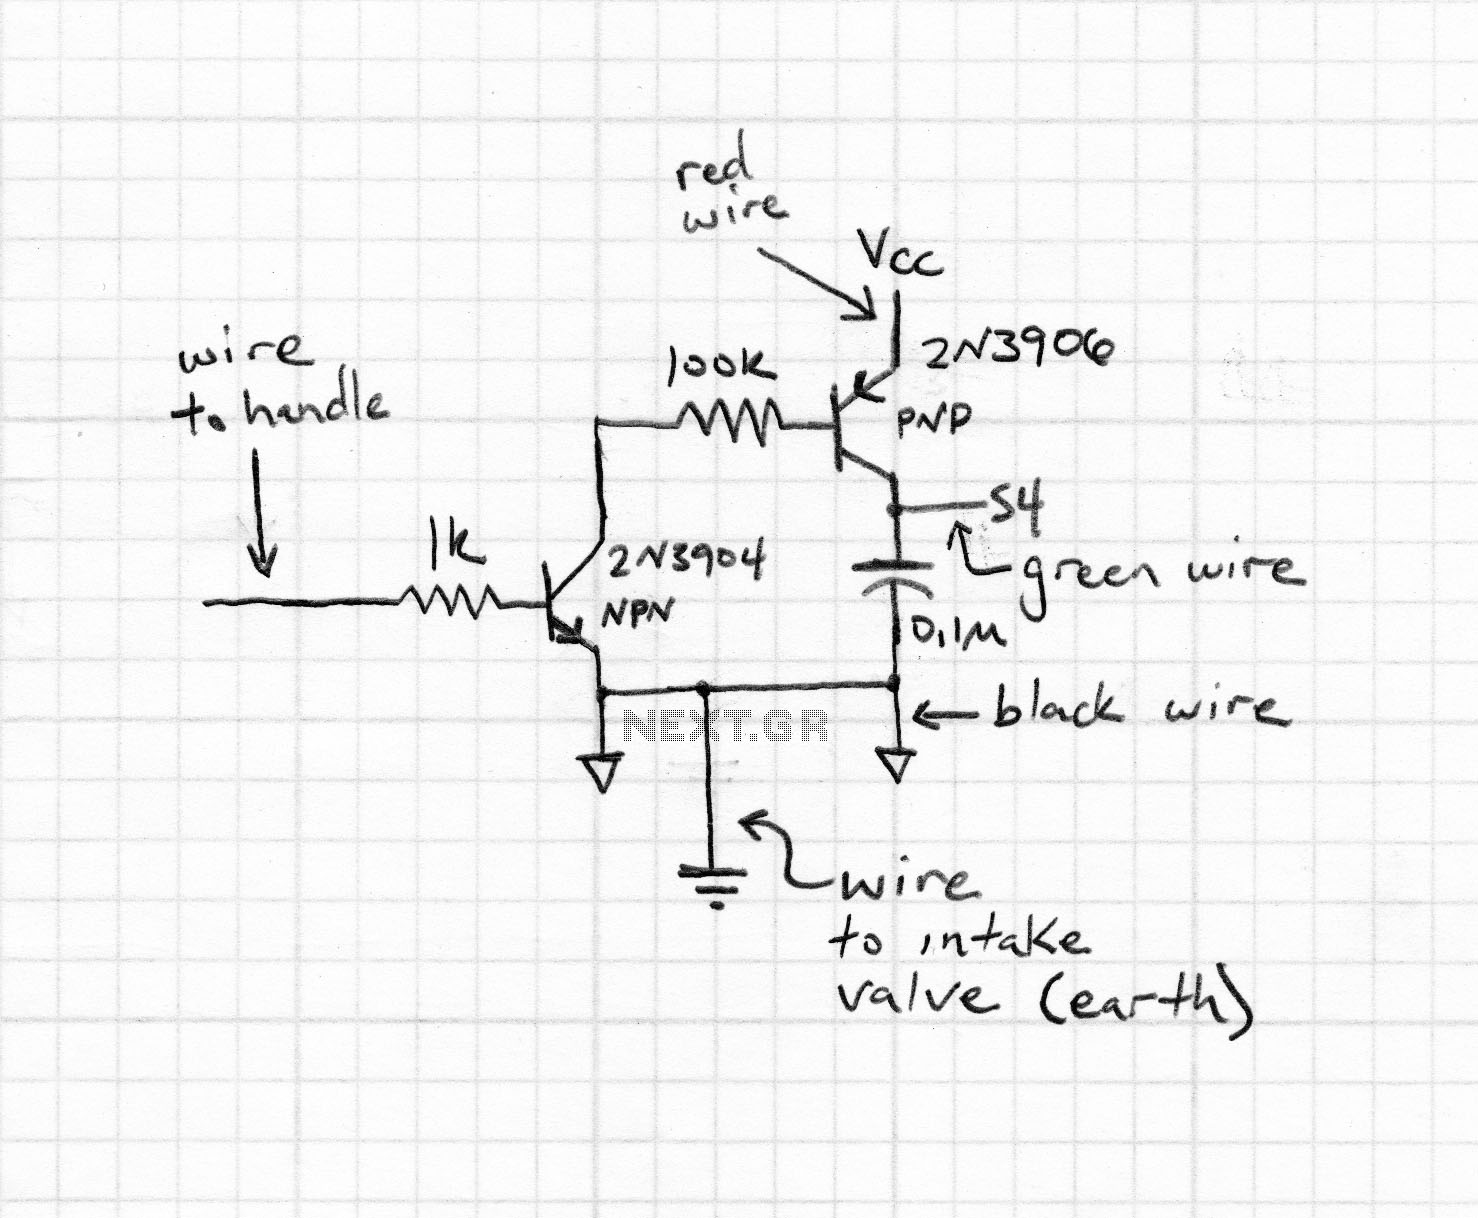
controlling a dc motor with an arduino uno
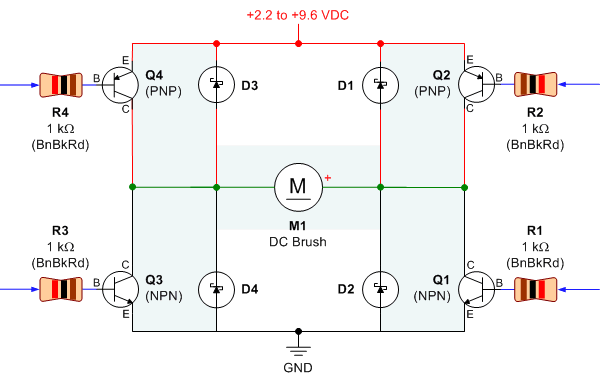
The circuit utilizes an H-bridge configuration to control the direction of a small DC motor. The H-bridge is composed of four transistors (or MOSFETs) that allow for the application of voltage across the motor terminals in either direction, enabling forward and reverse rotation. The Arduino Uno serves as the control unit, interfacing with the H-bridge through digital output pins.
In this setup, four output pins from the Arduino are designated for controlling the H-bridge: resistor1, resistor2, resistor3, and resistor4. The Arduino is programmed to listen for serial input, which corresponds to keyboard commands. The ASCII values for the keyboard inputs are utilized to determine the direction of the motor. Specifically, the left arrow key corresponds to the value 37, the up arrow to 38, the right arrow to 39, and the down arrow to 40.
The setup function initializes the serial communication at a baud rate of 9600 and configures the output pins accordingly. The loop function continuously checks for available serial input. When a key is pressed, the Arduino reads the incoming byte and compares it to the predefined ASCII values. If the left arrow key is pressed (ASCII value 37), the program sets the output pins to HIGH to activate the H-bridge, allowing the motor to rotate in one direction.
To enhance the functionality, additional conditions can be implemented for the right arrow key (ASCII value 39) to reverse the motor's direction. Furthermore, it is advisable to include error handling to manage unexpected inputs and ensure the system operates smoothly. The code may also be expanded to include features such as speed control through PWM signals, allowing for variable motor speeds based on additional keyboard inputs.Control a small DC motor through this H-bridge with an Arduino Uno, but I have never programmed one of these controllers before. I need the motor to rotate in different directions when I press left and right on a keyboard. So far I have this code: // Right Motor /* Adjust these values for your servo and setup, if necessary */ int re
sistor1 = 3; int resistor2 = 5; int resistor3 = 6; int resistor4 = 10; int moveServo; void setup() { Serial. begin(9600); pinMode(resistor1, OUTPUT); // Set servo pin as an output pin pinMode(resistor2, OUTPUT); pinMode(resistor3, OUTPUT); pinMode(resistor4, OUTPUT); } void loop() { // Wait for serial input if (Serial.
available() > 0) { // Read the incoming byte: moveServo = Serial. read(); // ASCII left = 37, up = 38, right = 39, down = 40 if (moveServo = 37) { digitalWrite(resistor4, HIGH); digitalWrite(resistor1, HIGH); } } 🔗 External reference
Related Circuits

This design is based on one published by Milan Lulic in the German magazine elektroModell. Mr. Lulic's design is for surface mount technology (SMT) construction, whereas mine uses standard off-the-shelf components, and is therefore better suited to construction by...
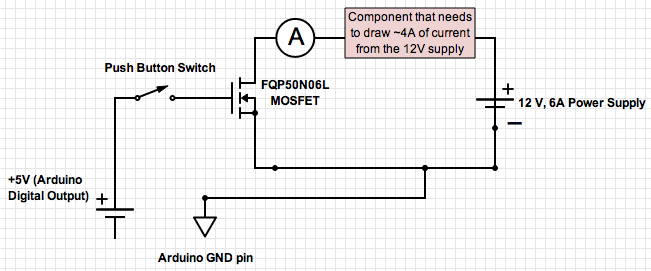
If the ground of the Arduino is disconnected from the negative terminal of the power supply, current flows through the MOSFET, even when the switch is not closed. In an electronic circuit involving an Arduino and a MOSFET, maintaining a...
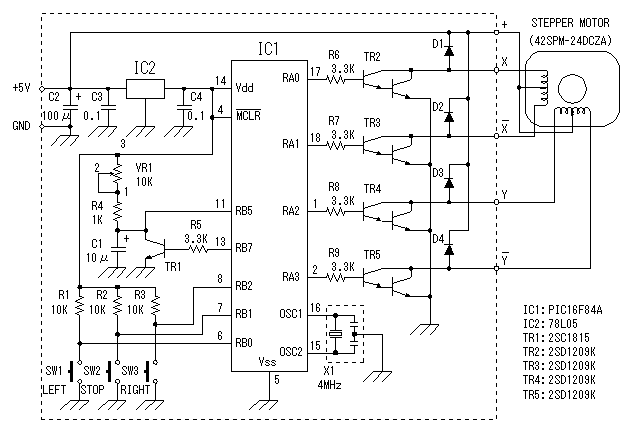
The following circuit illustrates a stepper motor controller. This circuit is based on the PIC16F84A integrated circuit. Features: a transistor is utilized to drive the motor. The stepper motor controller circuit employs the PIC16F84A microcontroller, which serves as the central...
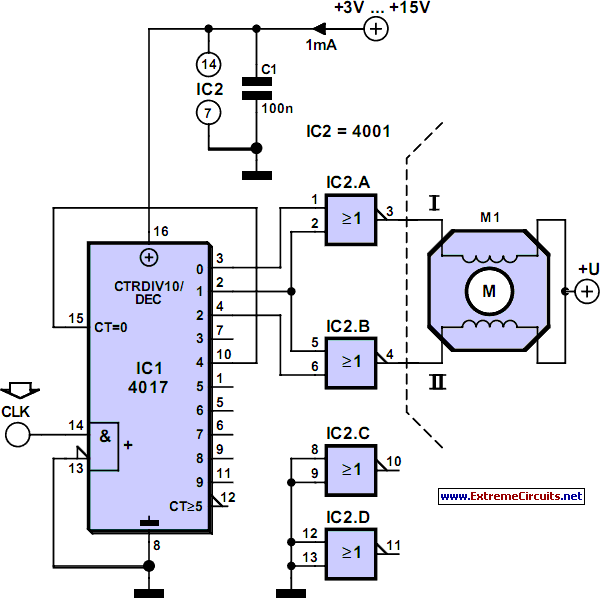
Stepper motors are a recurring topic of interest. This circuit converts a clock signal from a square wave generator into signals that have a 90-degree phase difference, which are necessary for driving the stepper motor windings. The trade-off for...
The large servos shown alongside a Nokia 3310 mobile phone provide a reference for scale. The servo arms measure 12 cm in length, making them suitable for lifting a bank of solar panels. The local Model Aerodrome in Seaside...
This section of code outlines the main sequence of operation for the sequencer. A for loop is utilized to determine which step the sequencer is operating in. Within this loop, an address is generated using the assignByteToPins() function, which...