
electret Mic preamp

The creation of a DIY projector involves several key components and considerations that are essential for successful implementation. A basic projector design typically includes a light source, an optical lens system, a display medium, and a housing structure to assemble these components securely.
The light source can be an LED or a high-intensity lamp, which provides the illumination necessary for projecting an image. The choice of light source affects the brightness and efficiency of the projector.
Next, an optical lens system is crucial for focusing and enlarging the image. This system often consists of multiple lenses arranged in a specific configuration to ensure that the projected image is clear and sharp. The focal length and diameter of the lenses must be chosen based on the desired projection size and distance.
The display medium can be an LCD panel, DLP chip, or other types of screens that can be illuminated by the light source. The resolution and size of the display medium will influence the overall quality of the projected image.
Finally, the housing structure must be designed to accommodate all components while allowing for adequate heat dissipation and airflow. This structure should also include adjustable mounts for the lens and display medium to facilitate alignment and focus adjustments.
In addition to these components, it is important to consider the electrical circuitry required to power the light source and control the display. A basic circuit may include a power supply, switches, and potentially a microcontroller for advanced features such as remote control or image processing.
Overall, designing and building a DIY projector requires careful planning and understanding of both optical and electronic principles. Continued study and experimentation will enhance knowledge and skills in electronics, leading to more successful projects in the future.Hi to all I`m new in the forum or better I have used it some ago to make a diy projector!I do not know electronics so much (I`m reading books and.. 🔗 External reference
Related Circuits
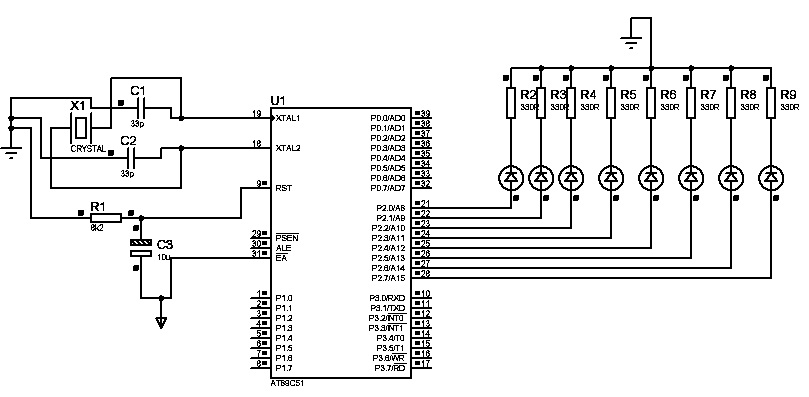
The first "Hello World!" project preferred for microcontrollers is LED blinking. An ATMEL 89C51 (40-pins DIP) microcontroller, based on the 8051 architecture, is used, which is ideal for first-time learning of MCU chips. The program is very simple and...
Many of today's appliances feature displays and buttons. Instead of relying on motors and gears, numerous household items now incorporate embedded microcontrollers. This exploration focuses on how to experiment with microcontrollers at home. Microcontrollers serve as the central processing units...
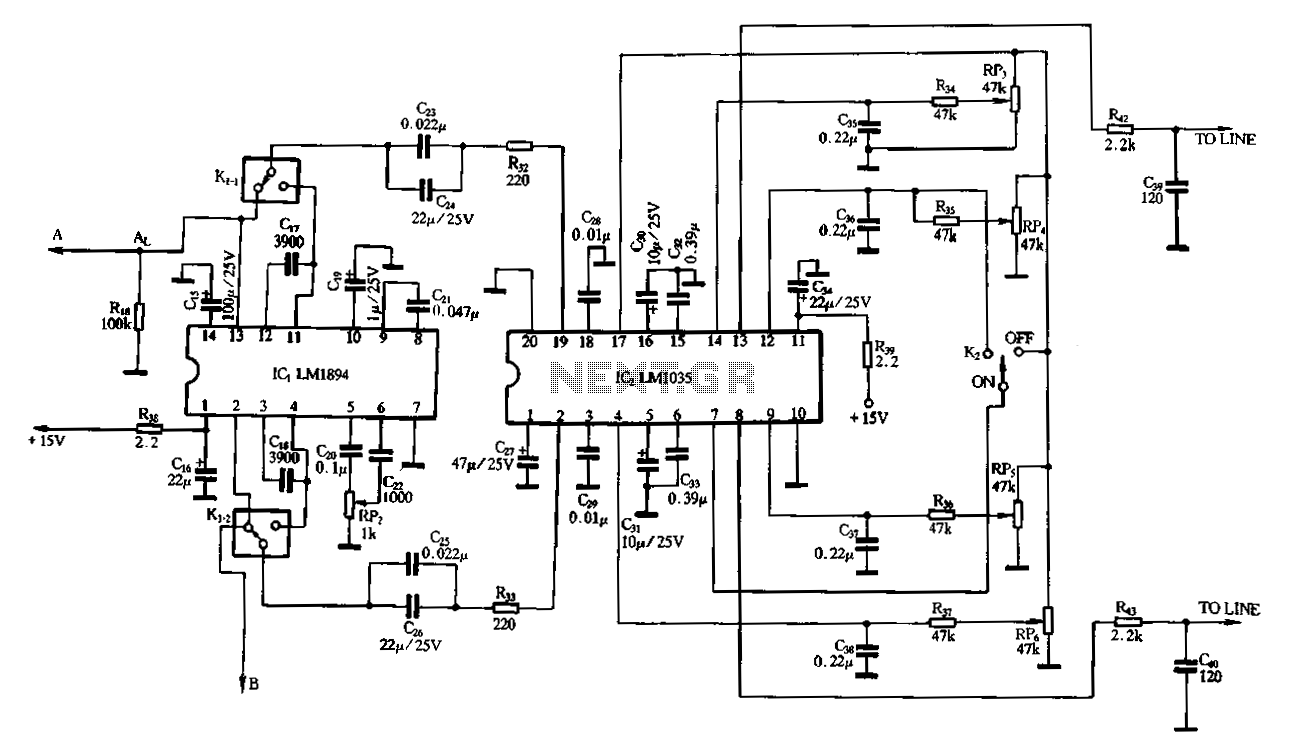
A dynamic noise reduction circuit and a DC volume and tone balance control circuit, which are applied to the input stage and the discharge line between the amplifier. The described circuit configuration incorporates two primary functions: dynamic noise reduction and...
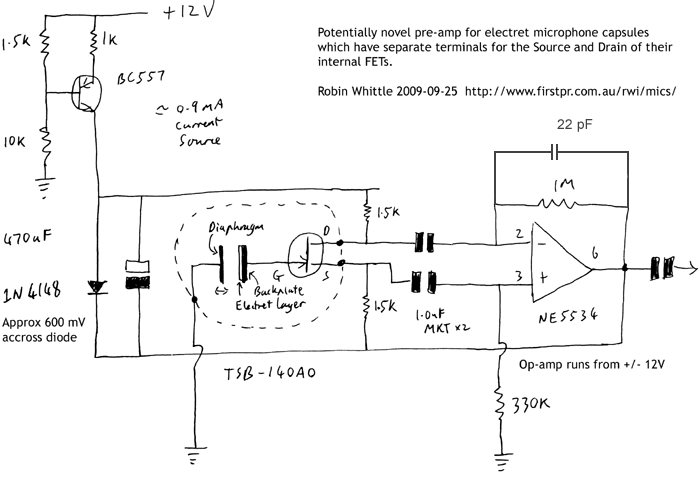
This circuit may be of interest to individuals designing preamplifiers for electret and externally polarized condenser microphones that lack an internal FET. If the noise from a single FET is a limiting factor, utilizing two or four FETs in...
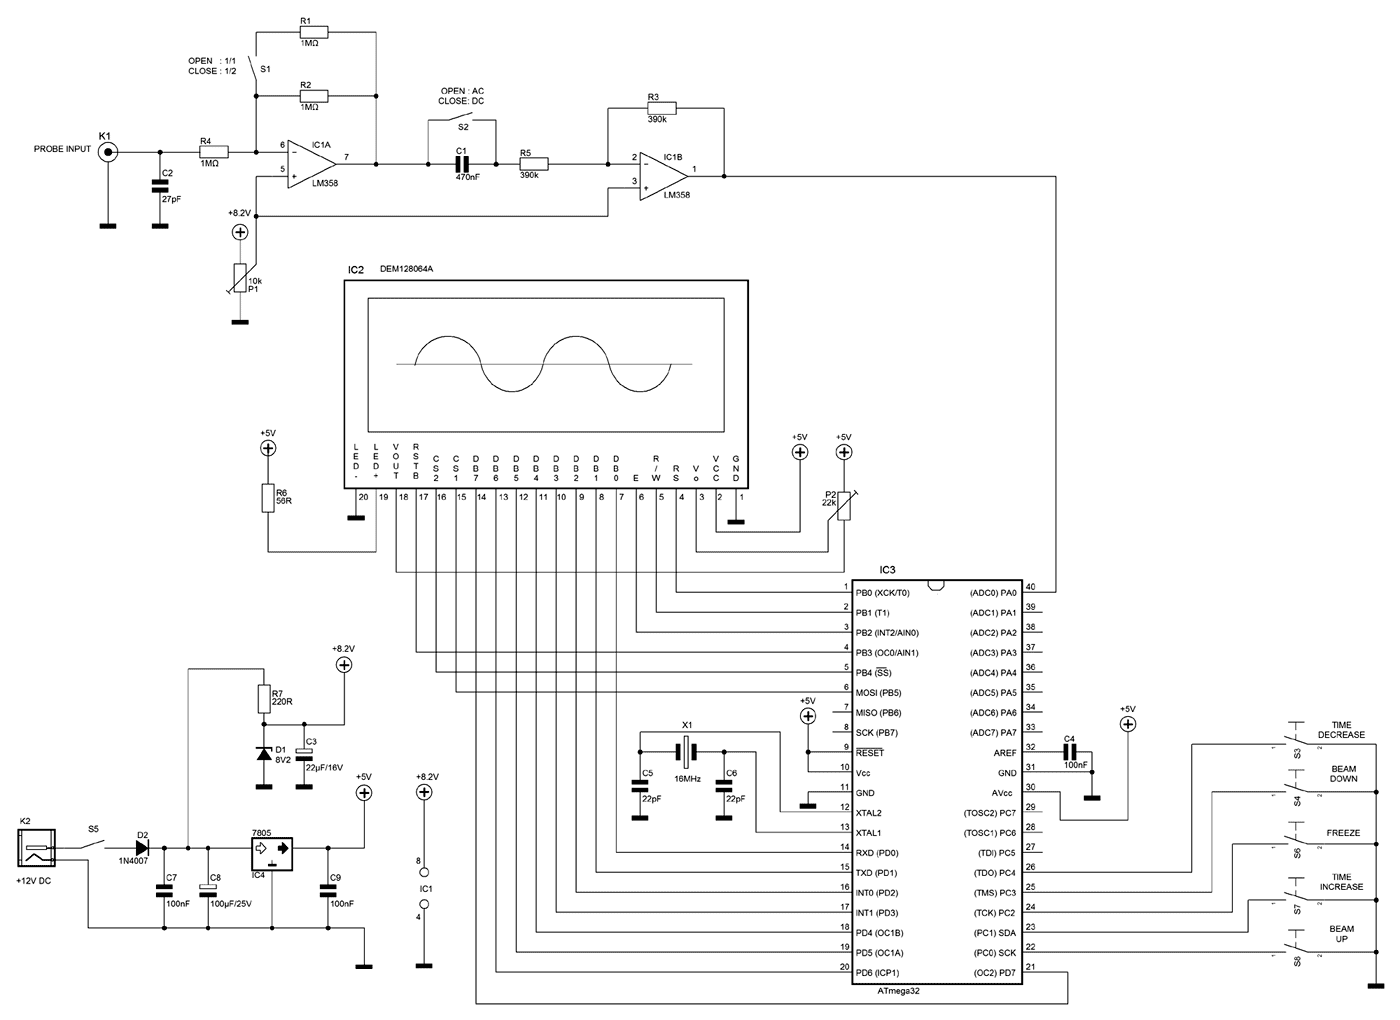
A few months ago as I was surfing on the net, I saw an oscilloscope based on PIC18F2550 microcontroller and a KS0108 controller based graphical LCD. That was Steven Cholewiak's web site. I had never seen before so amazing...
This circuit allows the use of an inexpensive loudspeaker as a microphone. Sound waves that reach the speaker cone cause fluctuations in the voice coil. The movement of the voice coil within the speaker's magnetic field generates a small...