Infrared IR Illuminator DIY

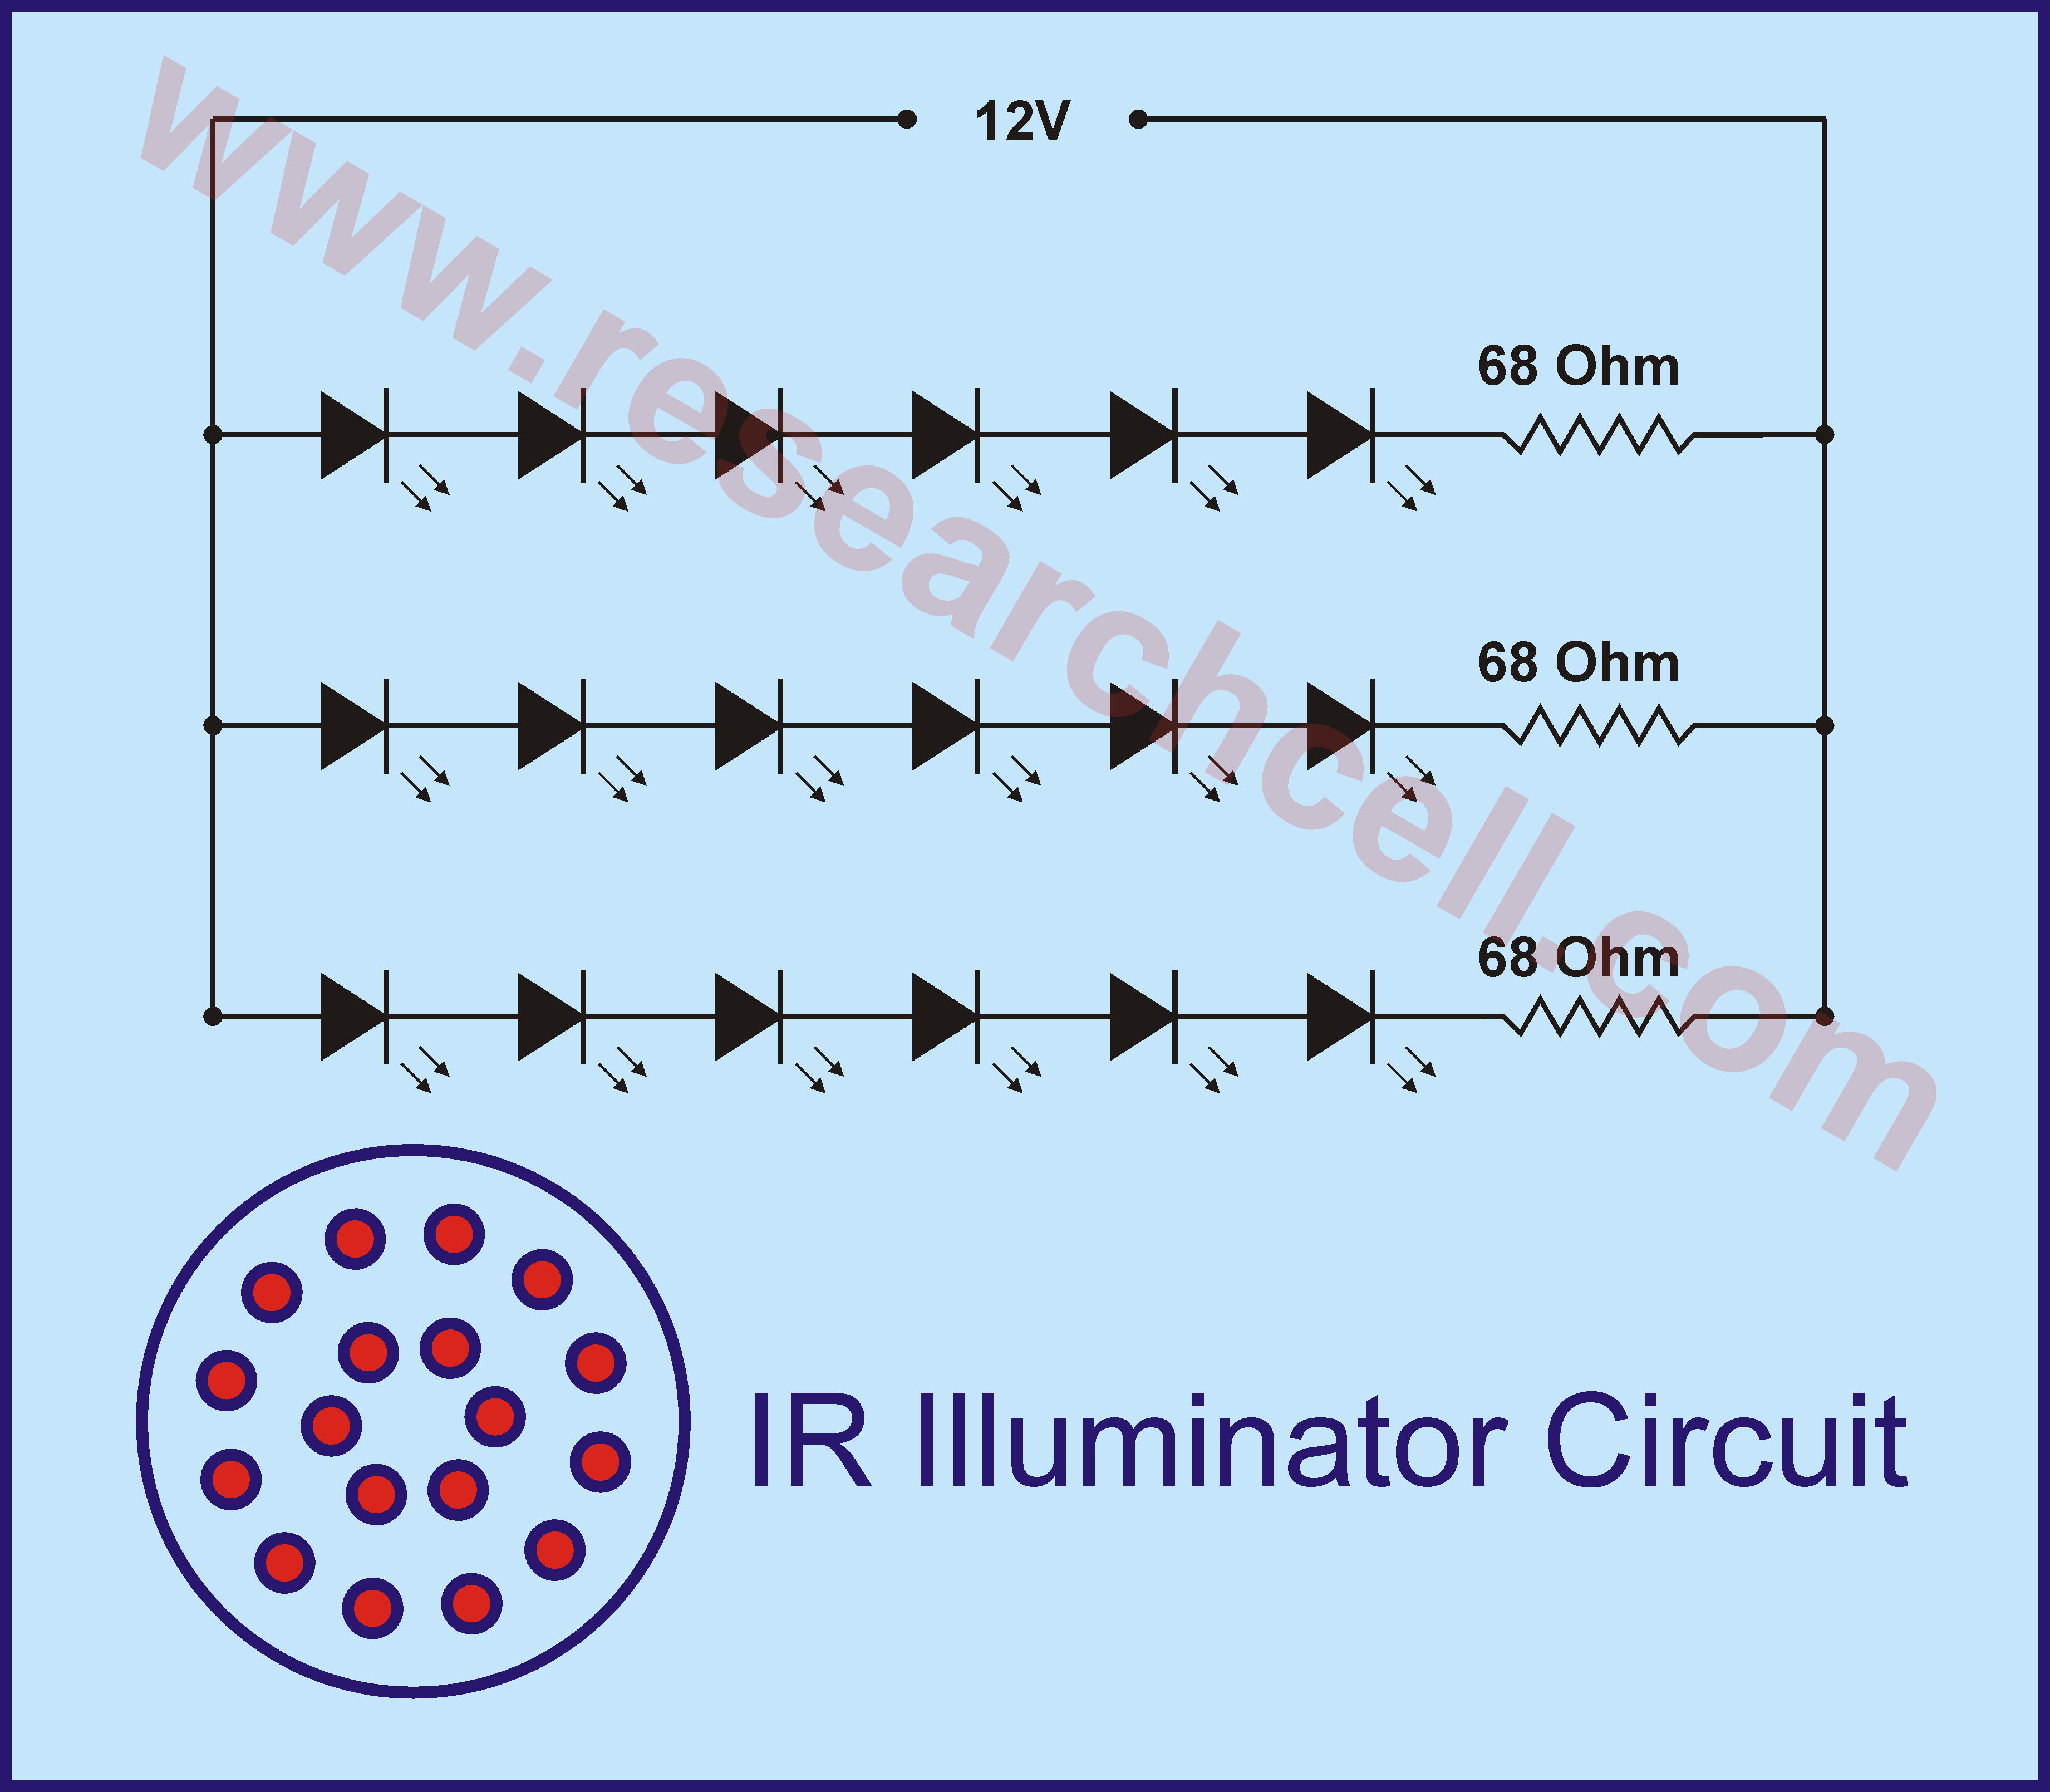
An infrared illuminator can be constructed at home with minimal effort, requiring only basic knowledge of electronics. The circuit is straightforward, utilizing 68 Ohm, 1 Watt resistors. Infrared LEDs are readily available at most electronics stores. Users have reported that connecting five LEDs in series enhances brightness, although experimentation with the number of LEDs is encouraged. For assembly, a standard wiring board was used to arrange the Infrared LEDs in two concentric circles, creating a larger outer circle and a smaller inner circle. This configuration focuses the infrared light, producing a torch-like effect by concentrating the infrared beam in a specific area. After assembly, the wiring board was trimmed into a circular shape and housed within an old torch body, allowing it to function as an infrared headlight for use in conjunction with a security camera in a backyard setting.
The infrared illuminator circuit consists of several key components that work together to produce infrared light. The primary components include the infrared LEDs, resistors, and a power supply. The 68 Ohm, 1 Watt resistors are crucial for limiting the current flowing through the LEDs, ensuring that they operate within their specified limits to prevent damage from excessive current. The choice of using five LEDs in series can significantly enhance the output brightness, as each LED contributes to the overall luminous intensity.
The design of the wiring board is also essential for achieving the desired illumination pattern. By arranging the LEDs in two concentric circles, the circuit effectively focuses the infrared light into a narrower beam, which is particularly useful for applications such as security surveillance, where directed illumination is necessary for optimal camera performance.
The housing of the entire assembly within an old torch body not only provides physical protection for the components but also aids in the portability and ease of use of the infrared illuminator. This design allows for flexible positioning and can be easily integrated into existing security setups, enhancing nighttime visibility without drawing attention to the light source.
Overall, this DIY infrared illuminator project exemplifies a practical application of basic electronics principles, enabling users to create an effective illumination solution tailored to their specific needs.You can easily build an infrared illuminator yourself at home with a little effort. You should have basic electronics knowledge on order to attempt this simple IR illuminator project. There is nothing difficult in this circuit. I have used 68Ohm and 1 Watt resistors in this circuit diagram. The Infrared LEDs are easily available from every electronics store. Some users have reported that they have successfully used 5 LEDs in per series which made the LEDs a little brighter however it is up to you, you can do some experiments by changing number of LEDs. For fitting purposes, I used general wiring board available in the market and fit the Infrared IR LEDs in such a way that they make two circles.
A large circuit and a small circle inside the large circuit. This gave the Infrared light a torch like effect by concentrating IR Infrared Beam in a small area. After the fitting, I cut the outside of the wiring board in a round shape and fit it inside an old Torch`s body. Now I use it as an infrared Headlight in my backyard along with my security camera. 🔗 External reference


