
MIDI Drum Machine Project

The MIDI Drum Machine is an electronic musical instrument designed to generate drum sounds and patterns, utilizing the Musical Instrument Digital Interface (MIDI) protocol for communication with other MIDI-compatible devices. The core of the device is typically based on a microcontroller, such as the 8051 series, which manages the timing and sequencing of drum sounds.
The schematic of the MIDI Drum Machine includes several key components:
1. **Microcontroller**: The heart of the system, responsible for processing MIDI signals, generating audio outputs, and managing user input. The microcontroller interfaces with the MIDI IN and MIDI OUT ports to receive and send MIDI messages.
2. **MIDI Interface**: This section consists of a 5-pin DIN connector and associated circuitry to handle the MIDI communication. It includes opto-isolation for protection against voltage spikes from connected devices.
3. **Digital-to-Analog Converter (DAC)**: Converts the digital signals generated by the microcontroller into analog audio signals. This component is crucial for producing the actual sound output that can be amplified and sent to speakers or mixers.
4. **Sound Generation Module**: This can be implemented using sampled sounds stored in memory or synthesized sounds generated in real-time. The module may utilize techniques such as PCM (Pulse Code Modulation) for playback of recorded drum sounds.
5. **User Interface**: Typically includes buttons, knobs, or a touchscreen for user interaction, allowing the selection of drum sounds, pattern editing, and performance controls. This interface is connected to the microcontroller for real-time processing.
6. **Power Supply**: A stable power supply circuit is essential for the operation of the microcontroller and audio components. This may include voltage regulators to ensure consistent power levels.
7. **Output Stage**: Amplification circuitry that takes the DAC output and drives speakers or line outputs. This stage may include filtering to shape the sound and ensure compatibility with various audio equipment.
The MIDI Drum Machine serves as a versatile tool for musicians, allowing for the creation and manipulation of drum patterns in conjunction with other MIDI instruments. Its design facilitates easy integration into a larger MIDI setup, enabling a seamless workflow for live performances or studio recordings.The MIDI Drum Machine began in the Fall of 1991 as a project for a microprocessor system design course, shortly after I wrote PAULMON1, the 8051 monitor/debugger. A friend, Rod Seely, both a musician and electronics hobbiest suggested I design something using the Musical Instrument Device Interface, MIDI, that would be COOL and would work together with his collection of MIDI keyboards and synthesizers.
Of course, I wanted to build something that could end up as a finished commercial product. 🔗 External reference
Related Circuits
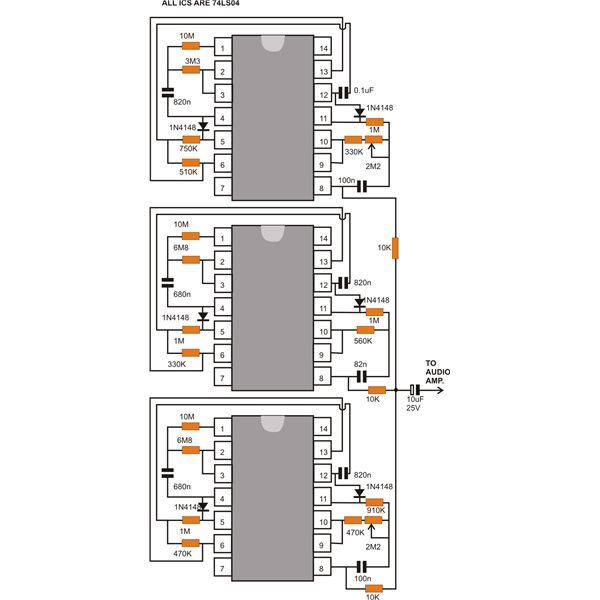
This document discusses a compact machine gun sound effect generator circuit. Once constructed, it can be integrated with any audio amplifier to create a realistic war-like simulation. This small hobby project is suitable for all electronics enthusiasts and generates...

Just a handful of components builds an 8-pin microcontroller based circuit for temperature logging via a serial port; small, fast, and acceptably accurate. More: provides real-time data to your computer via serial port, interfaces up to four DS1820 temperature...
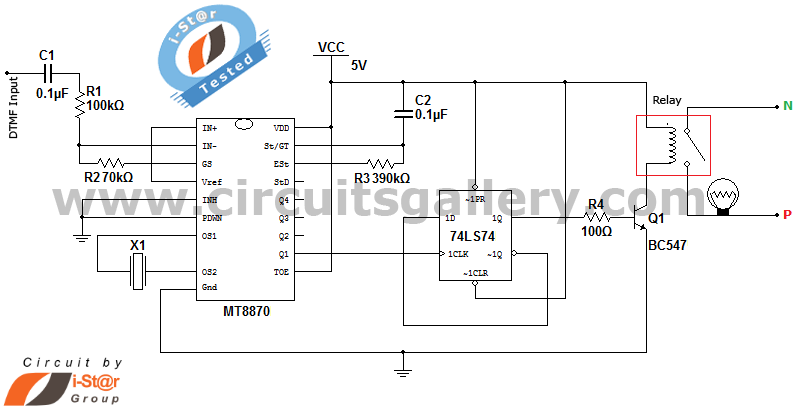
It is possible to control home and office electrical appliances using a mobile phone. This document presents a simple home automation electronic mini project circuit diagram designed for engineering students, allowing the control of electrical appliances without the use...
The input capacitor is used for low-frequency cut-off, with a standard value of 0.1 µF, resulting in a cut-off frequency of approximately 16 Hz. The input capacitor plays a critical role in electronic circuits, particularly in signal processing and audio...
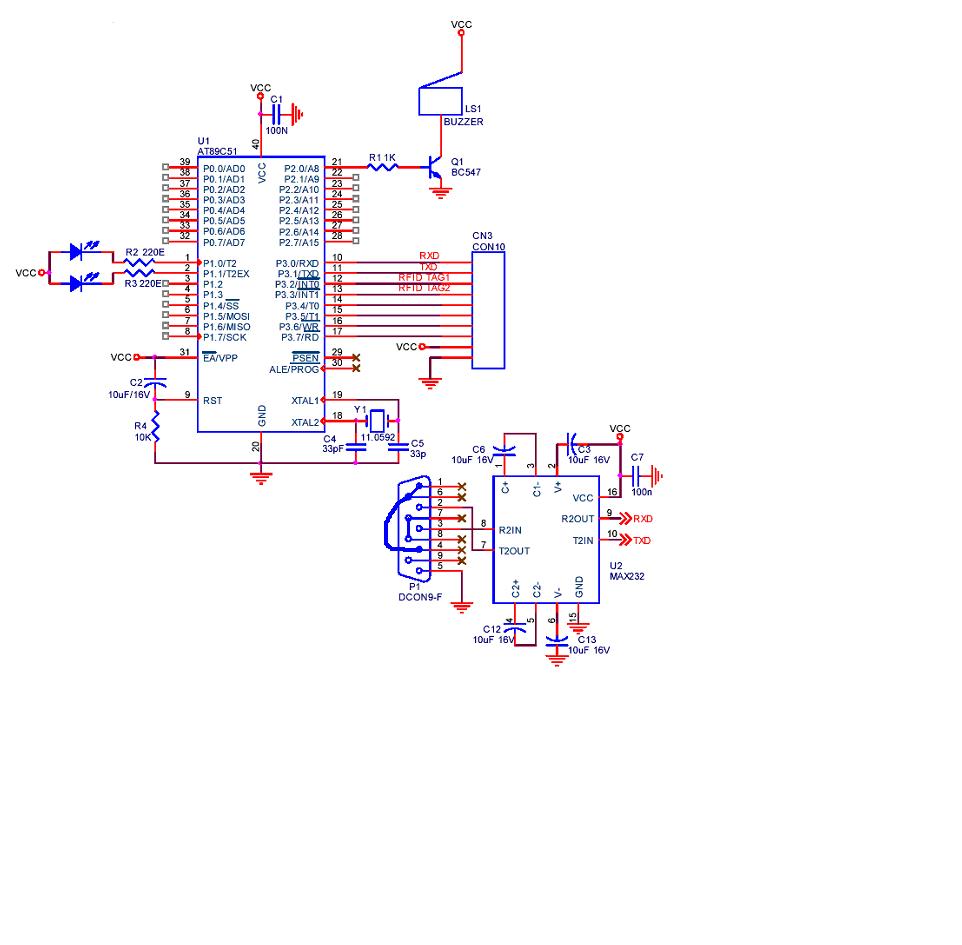
A project is being developed utilizing RFID (Radio Frequency Identification) technology. The microcontroller chosen for this project is the AT89C51/52/S52. Serial communication is being implemented using RS-232. The project involves the integration of RFID technology for identification and data exchange...
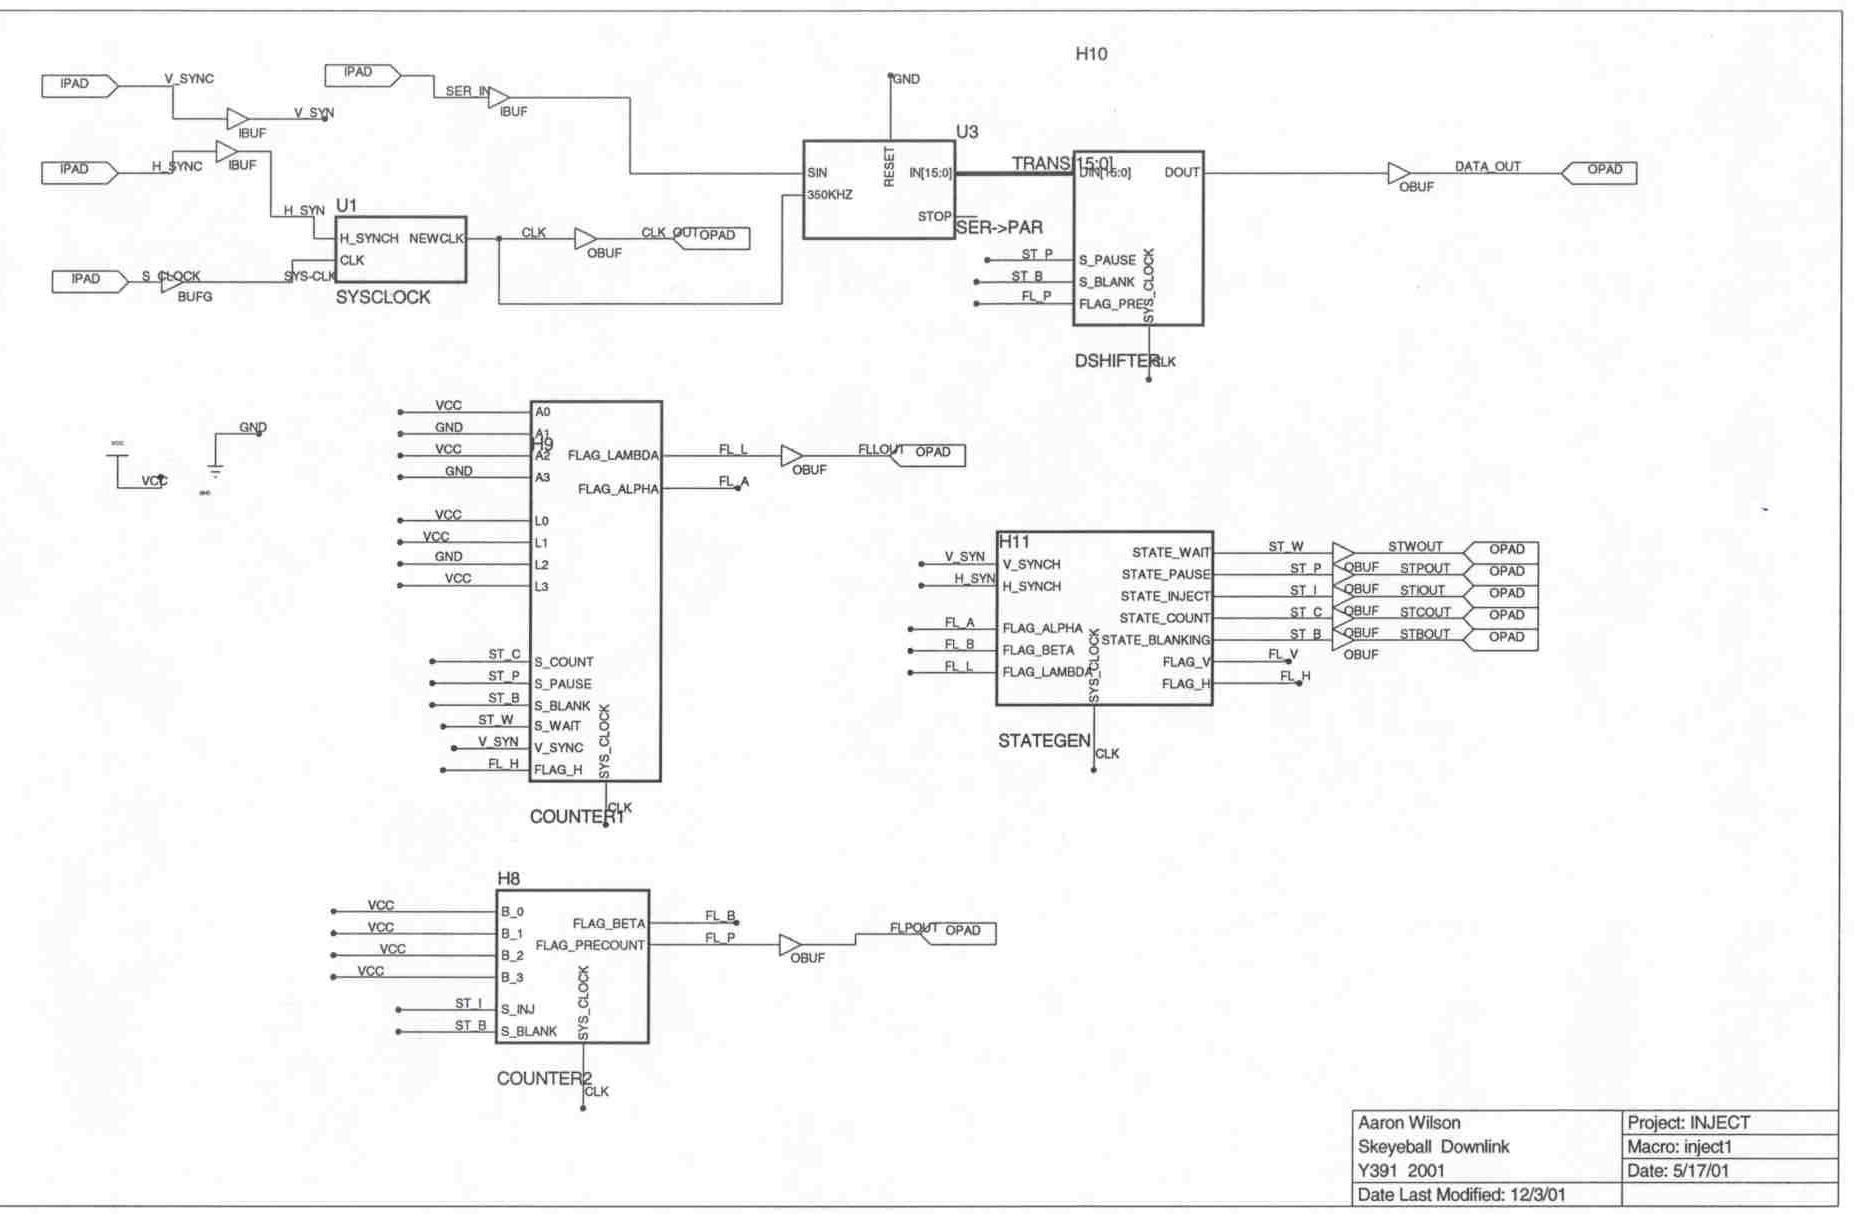
The Skeyeball project is an ongoing initiative within the Indiana University System Design Methods Laboratory, aimed at providing graduate and undergraduate students with opportunities to engage in embedded system design and implement various projects. The downlink segment of the...