
30w class ab amplifier circuit with

The setup process for the amplifier requires careful adjustment of resistors R1 and R12 to ensure optimal performance. Setting R1 to its maximum value allows for a wider range of output offset adjustment. The subsequent powering on of the amplifier initiates the operational phase, where the output offset must be measured. A target range of 30 mV to 100 mV is specified to maintain signal integrity and prevent distortion.
Once the output offset is within the desired range, R12 is adjusted to establish the quiescent current. This current is critical for the stable operation of the amplifier, influencing its linearity and overall sound quality. The target quiescent current of approximately 120 mA is a balance between performance and thermal management. It is important to note that the quiescent current may fluctuate as the amplifier reaches its operating temperature due to thermal drift in the output devices. Therefore, continuous monitoring during the warm-up phase is necessary to ensure that the current remains within acceptable limits.
The specification for heatsinks indicates a maximum thermal resistance of 0.6 K/W for two amplifiers. This rating is crucial for effective heat dissipation, preventing overheating, and ensuring the longevity of the amplifier components. Adequate heatsinking not only aids in maintaining the desired quiescent current but also enhances the reliability and performance of the amplifier under varying load conditions. Proper thermal management is essential in high-power applications to avoid thermal runaway and ensure consistent operation.To set the above amplifier up, set R1 to max and R12 to 0. After doing this successfully, power on the amplifier. Set R1 so that the measured output offset is between 30 and 100mV. Once set, adjust R12 slowly to achieve a quiescent current of around 120mA. Keep checking the quiescent current as the amp heats up as it might change due to voltage dr op changes in the output devices caused by heat. The heatsinks should be 0. 6K/W or less for two amplifiers. 🔗 External reference
Related Circuits

The high-frequency signal generator is designed to produce a low frequency of 1 kHz, an intermediate frequency (IF) signal of 465 kHz, and high frequencies ranging from 525 kHz to 1605 kHz. This device is particularly useful for radio...
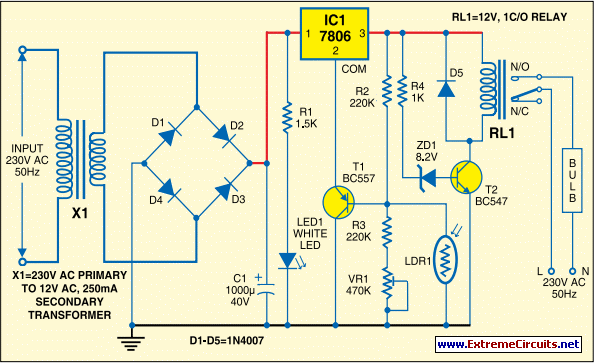
Voltage regulator ICs from the 78xx series deliver a stable output voltage in contrast to a highly variable input supply, provided that the common terminal is grounded. Any voltage applied above zero volts (ground) to the common terminal is...
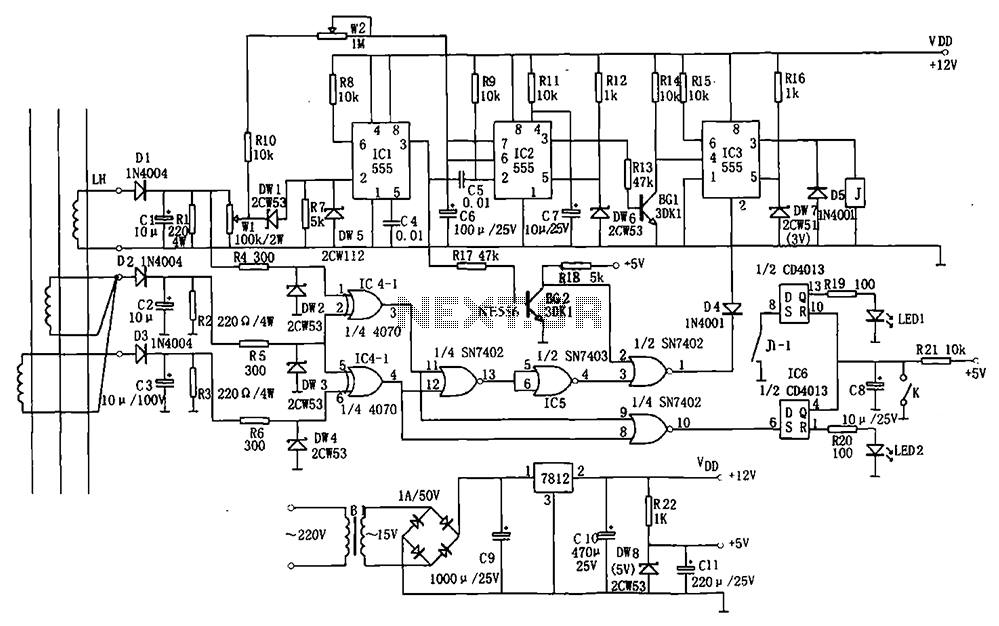
The electrical equipment overload and phase failure protection circuitry includes a +12V and +5V DC power supply, an AC transformer, voltage comparators, timers for blockade, a relay control circuit, and a phase loss protection circuit. The DC power supply...
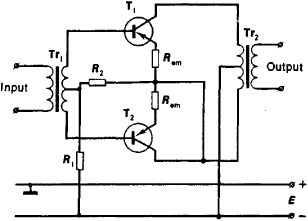
An amplifier is a device that accepts a varying input signal and produces an output signal that varies in the same way as the input but has a larger amplitude. The input signal may be a current, voltage, mechanical...
The circuit shown is a lighting control circuit that adjusts the speed of the flash output based on the strength of an audio signal. It utilizes eight flash integrated circuits (ICs) of the type LP188, which is housed in...
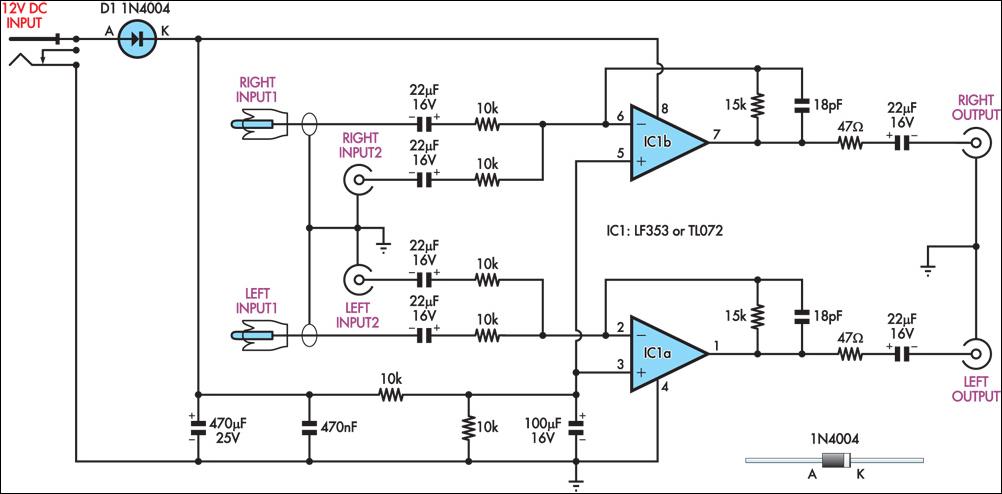
This circuit combines two separate line-level stereo (L & R) signals into one stereo (L & R) output, eliminating the need to switch between two pairs of input signals. It is utilized in a scenario where the stereo audio...