
arduino clone

To create an Arduino-compatible board, several key components are necessary. The main microcontroller often used is the ATmega328P, which serves as the brain of the board. This microcontroller requires a stable power supply, typically provided by a voltage regulator that converts a higher voltage input (such as from a battery or wall adapter) down to the necessary 5V.
The board should also include a crystal oscillator, usually a 16 MHz crystal, which helps to regulate the timing of the microcontroller's operations. Capacitors are essential for stabilizing the power supply and ensuring the microcontroller operates reliably. A minimum of two 22pF capacitors are connected to the crystal oscillator to filter out noise.
For programming the microcontroller, a USB-to-serial converter, such as the FTDI FT232 or CH340, is required. This component allows for easy uploading of code from a computer to the Arduino board. It is typically connected to the RX and TX pins of the microcontroller, facilitating communication between the board and the computer.
In addition to these components, a reset button is often included to allow the user to restart the microcontroller easily. A 10kΩ pull-up resistor is connected to the reset pin to ensure the microcontroller starts correctly when powered on.
The board layout should also feature a set of digital and analog input/output (I/O) pins, which can be used to interface with various sensors, actuators, and other peripherals. These pins are usually organized in a standard format to ensure compatibility with existing Arduino shields and accessories.
Finally, the design should consider the overall size and mounting options of the board, allowing for easy integration into projects. By carefully selecting components and designing the layout, an individual can create a cost-effective and functional Arduino-compatible board tailored to their specific needs.It seems like it`s a rite of passage for folks to build out their own Arduino compatible boards once reaching a certain level of proficiency. Indeed, for me I wanted to learn the Arduino platform more deeply by building it myself out of component parts.
Also I am curious to see how cheaply I can.. 🔗 External reference
Related Circuits
Finally, an Arduino Uno Open Source Prototyping Platform has been purchased, and the first impressions are noteworthy. The Arduino Uno is a widely used microcontroller board based on the ATmega328P microcontroller. It features 14 digital input/output pins, six analog inputs,...
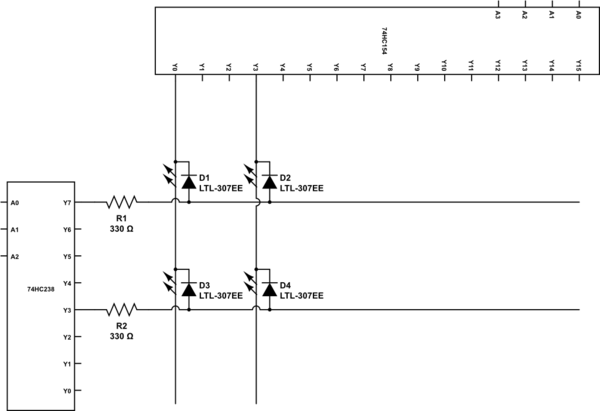
To construct a 7 to 128 demultiplexer using 3-to-8 and 4-to-16 demultiplexers, the three highest bits of the output address should be fed into the 3-to-8 demultiplexer. The outputs from this demultiplexer will serve as the enable inputs for...

Posts about a tutorial written by Harandi and Amirsab. The content refers to a series of instructional posts focused on a particular tutorial authored by individuals identified as Harandi and Amirsab. These posts likely encompass various topics related to electronics,...
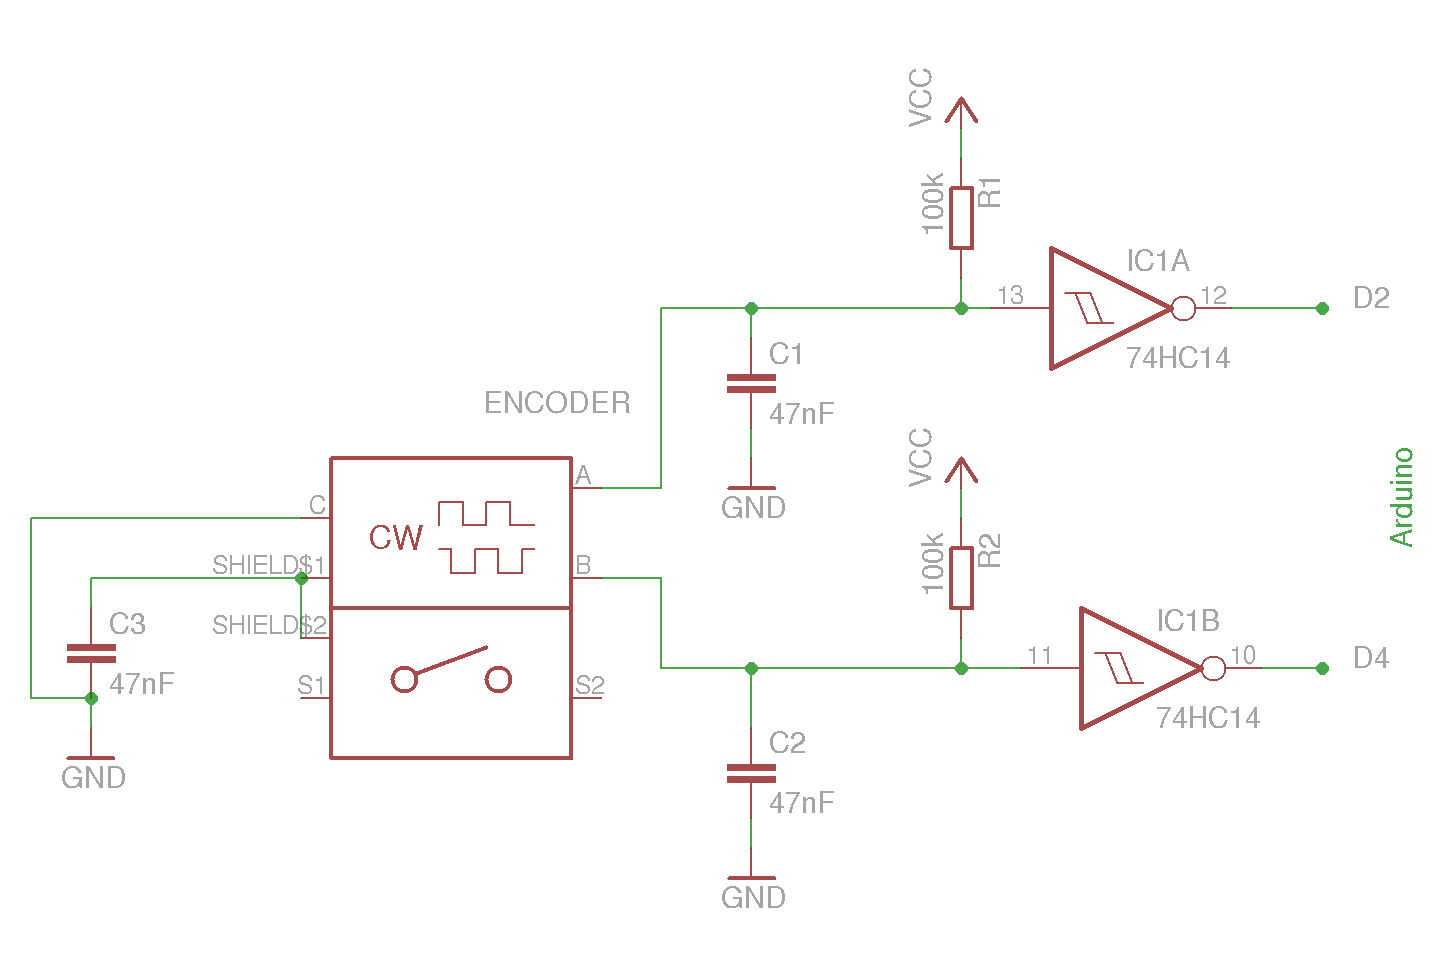
The example circuit and code should be sufficient to begin without delving into additional details. A rotary encoder is an electromechanical component with a shaft that records rotation and converts it into electrical pulses to indicate the direction of...
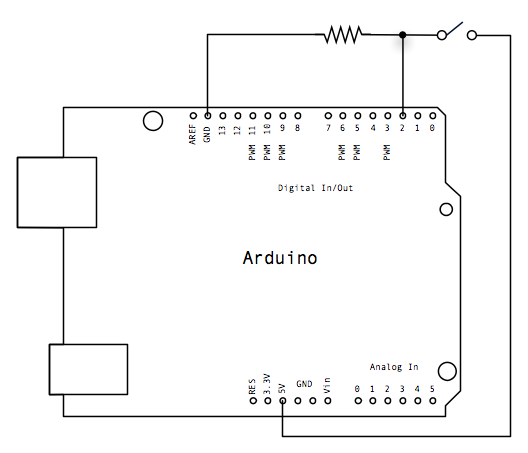
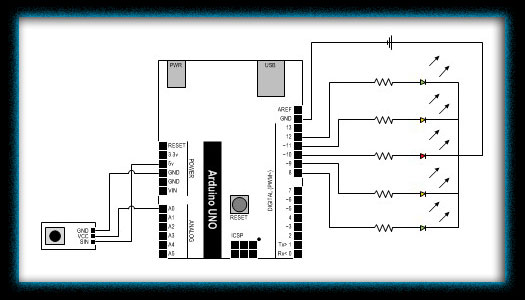
Connect three wires to the Arduino board. The first two, red and black, connect to the two long vertical rows on the side of the breadboard to provide access to the 5-volt supply and ground. The third wire goes...
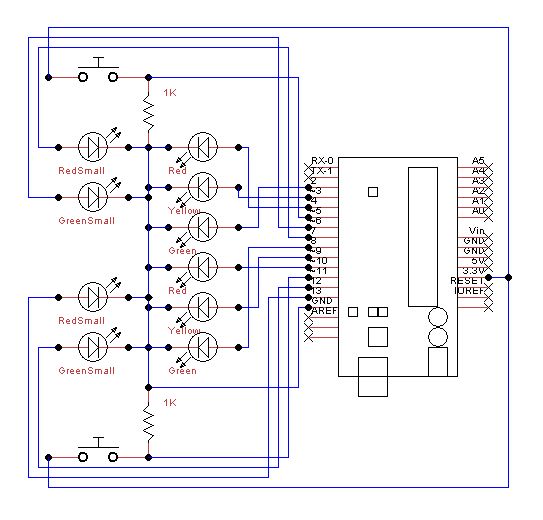
Set up the lights on the breadboard to resemble a traffic light configuration. The red LED should be positioned at the top, followed by the yellow LED, and then the green LED. The small red and green LEDs will...