
arduino uno parking sensor

The parking sensor circuit utilizes an Arduino Uno as the central microcontroller, interfacing with an HD44780 Character LCD for visual output and a PING))) Ultrasonic Distance Sensor for distance measurement. The ultrasonic sensor emits sound waves and measures the time taken for the echo to return, calculating the distance to an object. This information is processed by the Arduino, which then displays it on the LCD screen.
The circuit is constructed on a breadboard, allowing for easy modifications and testing. Wires connect the components, while resistors may be employed to ensure proper voltage levels and current limits for the LEDs and the speaker cone. The colored LEDs can indicate different statuses, such as proximity alerts, enhancing the functionality of the parking sensor.
The Arduino software is programmed to handle input from the ultrasonic sensor, process the data, and control the display output on the LCD. The code structure is modular, integrating snippets from various sources to enhance functionality and performance. The accompanying video provides a practical demonstration of the system in operation, illustrating how the parking sensor effectively detects obstacles and provides real-time feedback to the user.What You Need Arduino Uno HD44780 Character LCD PING)))â„¢ Ultrasonic Distance Sensor Speaker Cone from an old computer Breadboard Wires Resistors Colored LED`s Arduino Software Schematic This is a schematic of the parking sensor circuit. Video The video shows how the parking sensor performs. Code The code mainly consists of chuncks of code from different.. 🔗 External reference
Related Circuits
The initial step involves selecting software, and CadSoft Eagle was chosen due to the abundance of available tutorials, making it a suitable starting point. Once the process is understood, the choice of software can be reconsidered. For now, the...
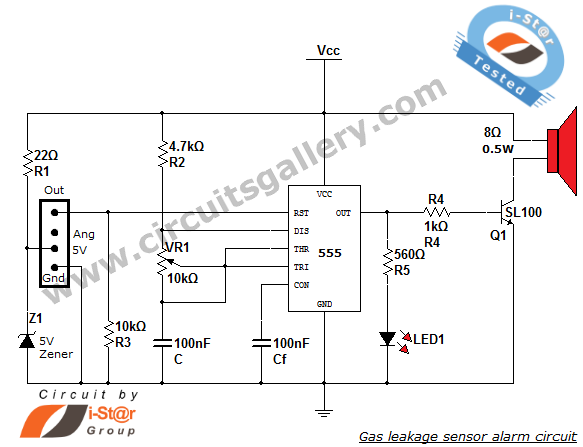
This article discusses a home security alarm circuit designed to detect LPG gas leakage. The circuit utilizes a gas sensor module, SEN 1327, which incorporates a QM 6 gas sensor. The output signal from this gas sensor module is...
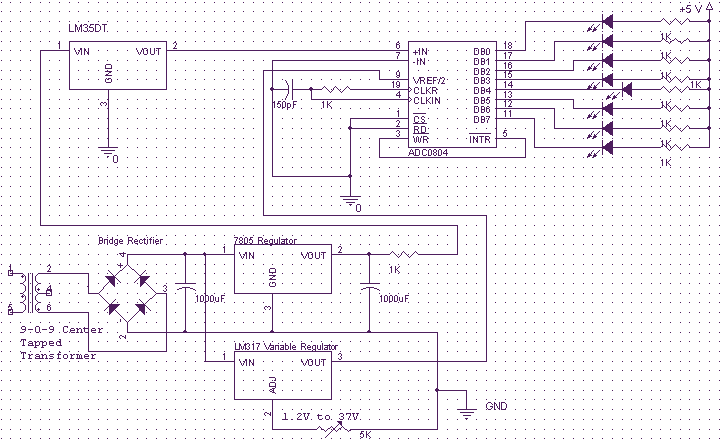
This is a very simple to implement Temperature Sensor. It uses LM35DT as a semiconductor temperature sensor which operates with a +5 volt DC. It produces an analog output voltage, proportional to the change in surrounding temperature in Celsius...
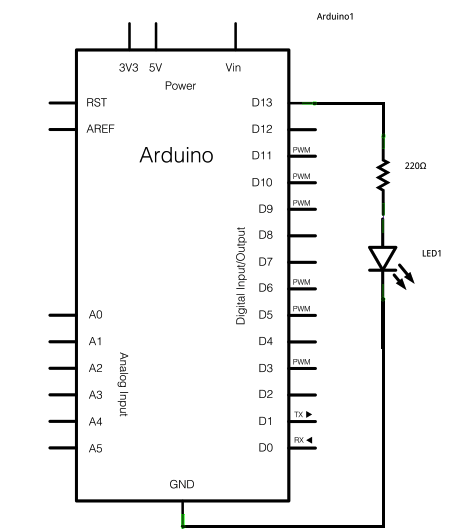
To construct the circuit, connect a 220-ohm resistor to pin 13. Next, connect the longer leg of an LED (the positive leg, known as the anode) to the resistor. The shorter leg (the negative leg, referred to as the...
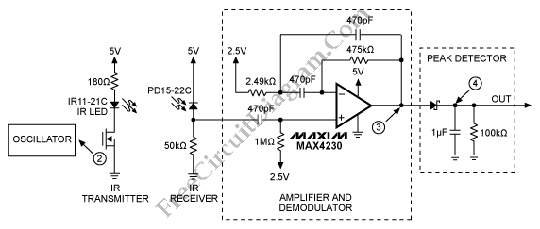
The photodiode is utilized to detect infrared (IR) light reflected from an object. However, it also picks up IR light generated by ambient conditions, which can lead to false detections. To mitigate this issue, it is essential to filter...
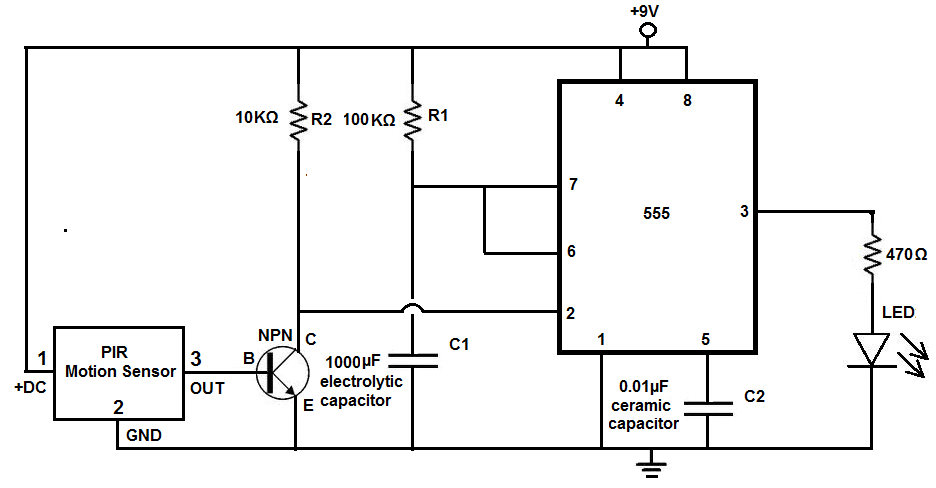
Many individuals install motion detectors in their backyards or homes to automatically turn on lights when movement is detected. Motion sensor lights have gained popularity and are increasingly utilized in various settings. Businesses frequently employ them in bathrooms, where...