
Computerize Your Room/House
Home automation systems allow for the control and monitoring of various household functions through a centralized interface, typically utilizing microcontrollers, sensors, and actuators. A typical computerized room setup may include lighting control, climate management, security systems, and multimedia integration.
The core of a computerized room is often built around a microcontroller or a single-board computer, such as an Arduino or Raspberry Pi. These devices serve as the central processing unit (CPU) for the automation system, receiving input from various sensors (such as temperature, motion, or light sensors) and sending output signals to control devices (like lights, thermostats, and locks).
Communication protocols play a crucial role in the functionality of home automation systems. Common protocols include Wi-Fi, Zigbee, Z-Wave, and Bluetooth, which facilitate the wireless communication between devices. A well-designed circuit will incorporate a wireless module compatible with the chosen protocol, allowing for remote access and control via smartphones or computers.
Power management is another essential aspect of a computerized room. The circuit should include voltage regulators to ensure stable operation of the microcontroller and connected devices. Additionally, incorporating relays or solid-state switches allows for the safe control of high-voltage appliances.
For user interaction, an interface such as a touchscreen display or a web-based dashboard can be integrated, providing real-time feedback and control options. The circuit design should also consider the layout of the room, ensuring that all devices are within range of the central controller and that the power supply is adequately distributed.
In summary, a computerized room requires careful planning and consideration of various components, including a microcontroller, communication modules, sensors, actuators, power management systems, and user interfaces, to create a cohesive and functional home automation environment.So you`ve read about my Computerized Room or have seen those nifty home automation products advertised in the back of electronics magazines? Or perhaps someone you know has done something similar. At any rate, you have decided to try it yourself. The first thing I will say, however is that it is not cheap. 🔗 External reference
Related Circuits
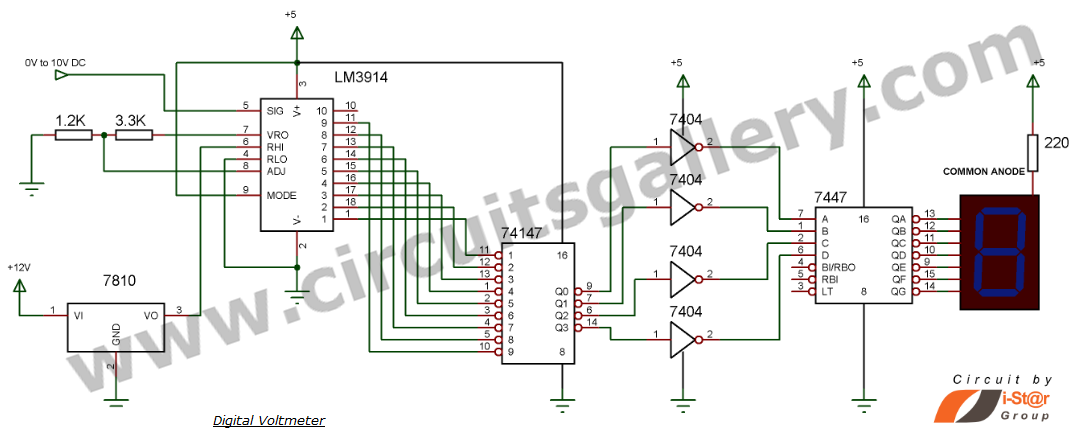
This document explains how to construct a voltmeter for measuring DC voltage without utilizing a multimeter. It describes a straightforward digital voltmeter circuit capable of measuring voltages ranging from 0V to 9V. The primary component of this circuit is...
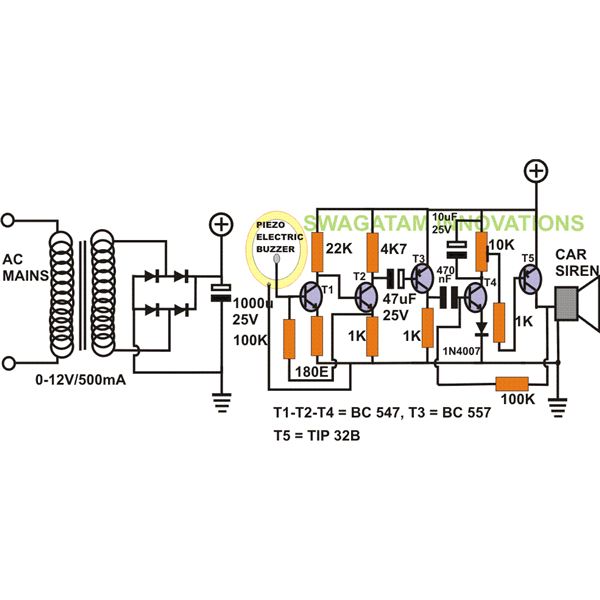
The project "DIY: Build a Sound Activated Switch" presented here is straightforward to construct and can be very useful in protecting a specific area from potential theft or intrusion. Learn how to build a simple sound-activated alarm here on...
This manual provides instructions on how to utilize each component in the kit, along with software sketch examples for each. Users can combine components to create automatic systems, such as a lighting controller. The Arduino IDE software has a...
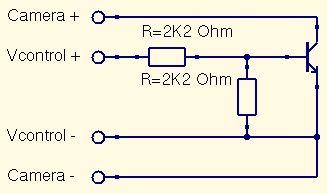
This is a straightforward guide to constructing a digital switch for a camera, enabling photo capture through microcontrollers. Required components include: 1. A digital switch for a camera can be implemented using a microcontroller, such as an Arduino or...
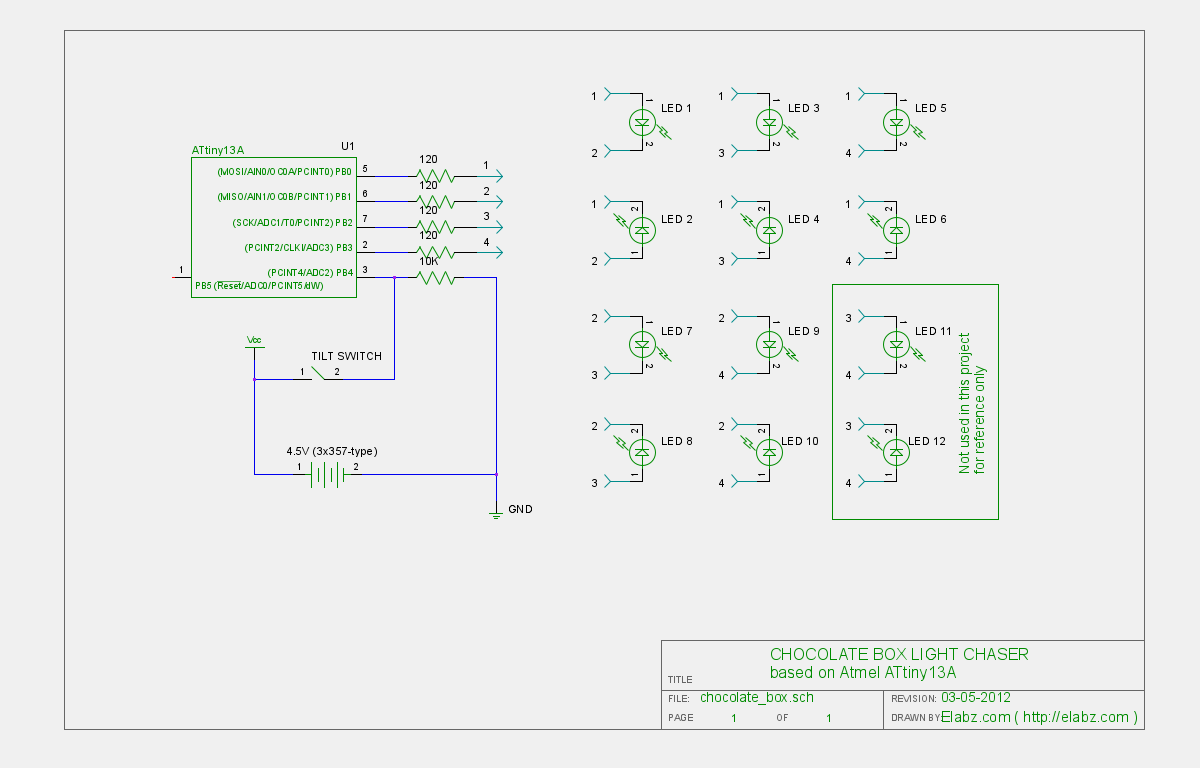
Transform a standard chocolate box into an impressive LED blinking display using an ATTiny13 AVR microcontroller, Arduino IDE, and several electronic components. The project involves creating an eye-catching LED display housed within a chocolate box. The core of the circuit...

Creating a variable space in a small room can be enjoyable; however, designing an actuator to move a wall or room partition poses challenges. This can be achieved using an analog audio line delay. To implement a system that allows...