
digital thermometer with arduino uno
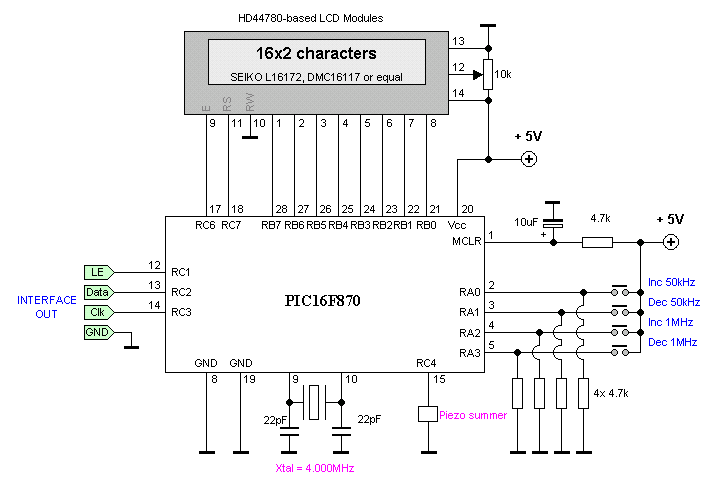
The digital thermometer circuit utilizes the Arduino Uno as the microcontroller, which serves as the central processing unit for the project. The LM35DZ temperature sensor operates by producing a linear voltage output that corresponds to the temperature in degrees Celsius. This voltage output is fed into the ADC pin A0 of the Arduino Uno, where it is converted into a digital value for further processing.
The LCD display, utilizing the HD44780 chip, is connected to several digital pins on the Arduino. Typically, 4 or 8 data lines are used for communication, along with control lines for enabling and setting the register select. The LCD allows for the visual representation of the temperature readings, making it easy for users to monitor the temperature in real-time.
In the software aspect, the Arduino sketch includes libraries for handling the LCD and for reading the temperature sensor. Calibration of the thermometer is an essential aspect of ensuring accurate readings. The initial calibration value set in the code can be adjusted based on comparative tests with a known accurate thermometer. This process involves modifying the calibration constant in the code and observing the output until it aligns closely with the reference thermometer's readings.
The entire setup is powered by the Arduino Uno, which can be connected to a USB power source or an external battery. This flexibility allows the digital thermometer to be used in various environments, whether stationary or portable. The combination of the LM35DZ sensor, Arduino Uno, and HD44780 LCD provides a robust platform for temperature measurement applications in both educational and practical scenarios.In this article we make digital thermometer on the Arduino Uno. In this Digital Thermometer temperature sensor used is LM35DZ. In other applications you can replace with LM35 temperature sensor such as DS18B20 and others. In principle, the sensor will detect the temperature, then go to the ADC (analog to digital converter) on the arduino Uno and processed, and then displayed on the LCD. In this digital thermometer LCD used is Hitachi HD44780 chip. Liquid crystal displays (LCDs) offer a convenient and inexpensive way to provide a user interface for a project. Here is a picture digital thermometer: In this circuit the output port LM35DZ temperature sensor, connected to the ADC analog port A0 on arduino uno.
LCD display digital thermometer, digital port pin of the LCD to the Arduino Uno is: In this piece of coding digital thermometer you can do to change the calibration value. In this experiment we include the value of 8. 6. You can change the value to 9 or 10. You will find the difference. Our advice to perform the calibration, after changing the settings on coding the value of digital thermometer, do the comparison with a digital thermometer on the market.
You can download a digital thermometer coding below. For password is: circuitdiagram- schematic. com. And Good luck . ! 🔗 External reference
Related Circuits
This circuit provides a visual 9-second delay using a 7-segment digital readout LED. When the switch is closed, the CD4010 up/down counter is preset to 9, and the 555 timer is disabled, holding the output high. When the switch...
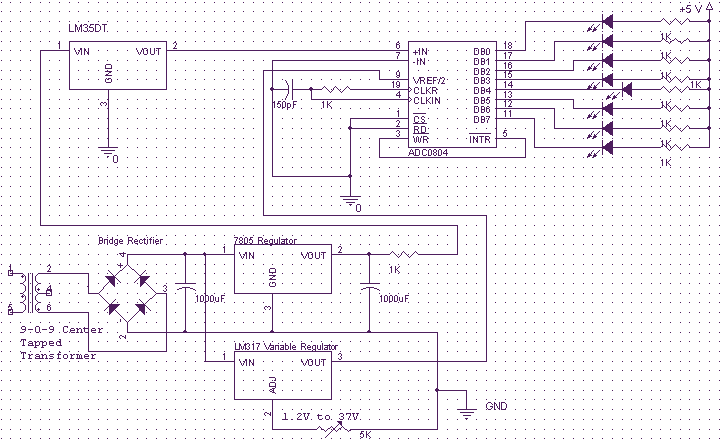
This is a very simple to implement Temperature Sensor. It uses LM35DT as a semiconductor temperature sensor which operates with a +5 volt DC. It produces an analog output voltage, proportional to the change in surrounding temperature in Celsius...

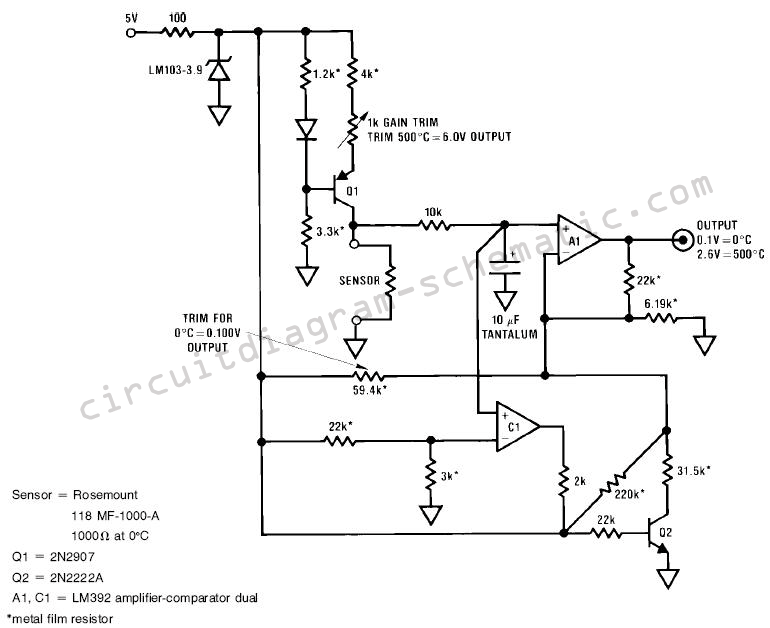
It may be easy to find a precision voltage reference for your application; however, a programmable precision reference is another matter. The circuit in Figure 1 yields a precision reference with an LSB of 62.5 µV. The circuit is...
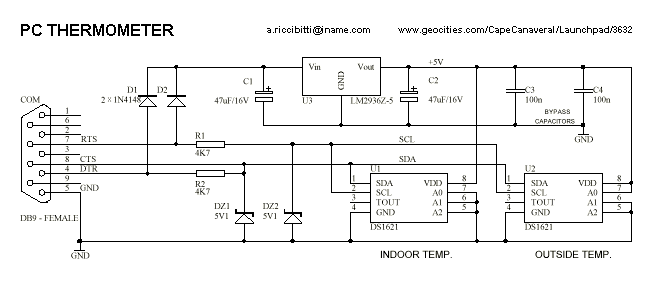
The goal is to utilize a PC to measure the outdoor temperature using a serial-connected device equipped with a probe that can be conveniently placed outside. Although various options were found through online searches, many appear to be overly...
Each step will result in a self-functional unit. By the end of this process, it will be possible to link the steps together into a powerful FM transmitter. This section will explain the main controlling unit for the FM...
Research has been conducted on a project aimed at enhancing understanding of electronics, networking, and programming. The project involves the construction of an online thermometer suitable for applications requiring temperature monitoring. The current work environment is a laboratory where...