
Leonardo Arduino clone a single-sided PCB using ATmega32U4

The Arduino Leonardo clone project focuses on replicating the functionality of the original Leonardo board while simplifying the design. This approach allows for a more accessible implementation for users who may not require all features of the standard Arduino Leonardo.
The simplified pin distribution is a significant aspect of this project. It may involve reassigning the digital and analog pins to optimize for specific applications or to reduce the complexity of the layout. The typical Arduino Leonardo features a variety of digital I/O pins, PWM outputs, and analog inputs, which are essential for various projects. However, in this clone, the pin configuration may be altered to suit particular requirements, which could include fewer pins, different functionalities, or alternative arrangements for ease of use.
To successfully create this clone, the following components will typically be required: a microcontroller compatible with the ATmega32U4 (the chip used in the original Leonardo), a USB interface for programming and communication, and essential passive components such as resistors and capacitors. The circuit design may also include support for additional features, such as onboard LEDs for status indication, a reset button, and possibly a power supply circuit that allows for both USB and external power sources.
The schematic will need to reflect the modified pin layout, ensuring that all necessary connections are made for the microcontroller to function correctly. This will include connections for power supply, ground, and the various I/O pins that will be utilized in the project.
In conclusion, this Arduino Leonardo clone project provides a unique opportunity to explore microcontroller design while adapting the standard pin configuration to meet specific needs, resulting in a versatile and simplified development platform.DESCRIPTION This project is to make a clone of Arduino Leonardo in a simple way.That is why the distribution of the pin does not match the standard Arduino. 🔗 External reference
Related Circuits
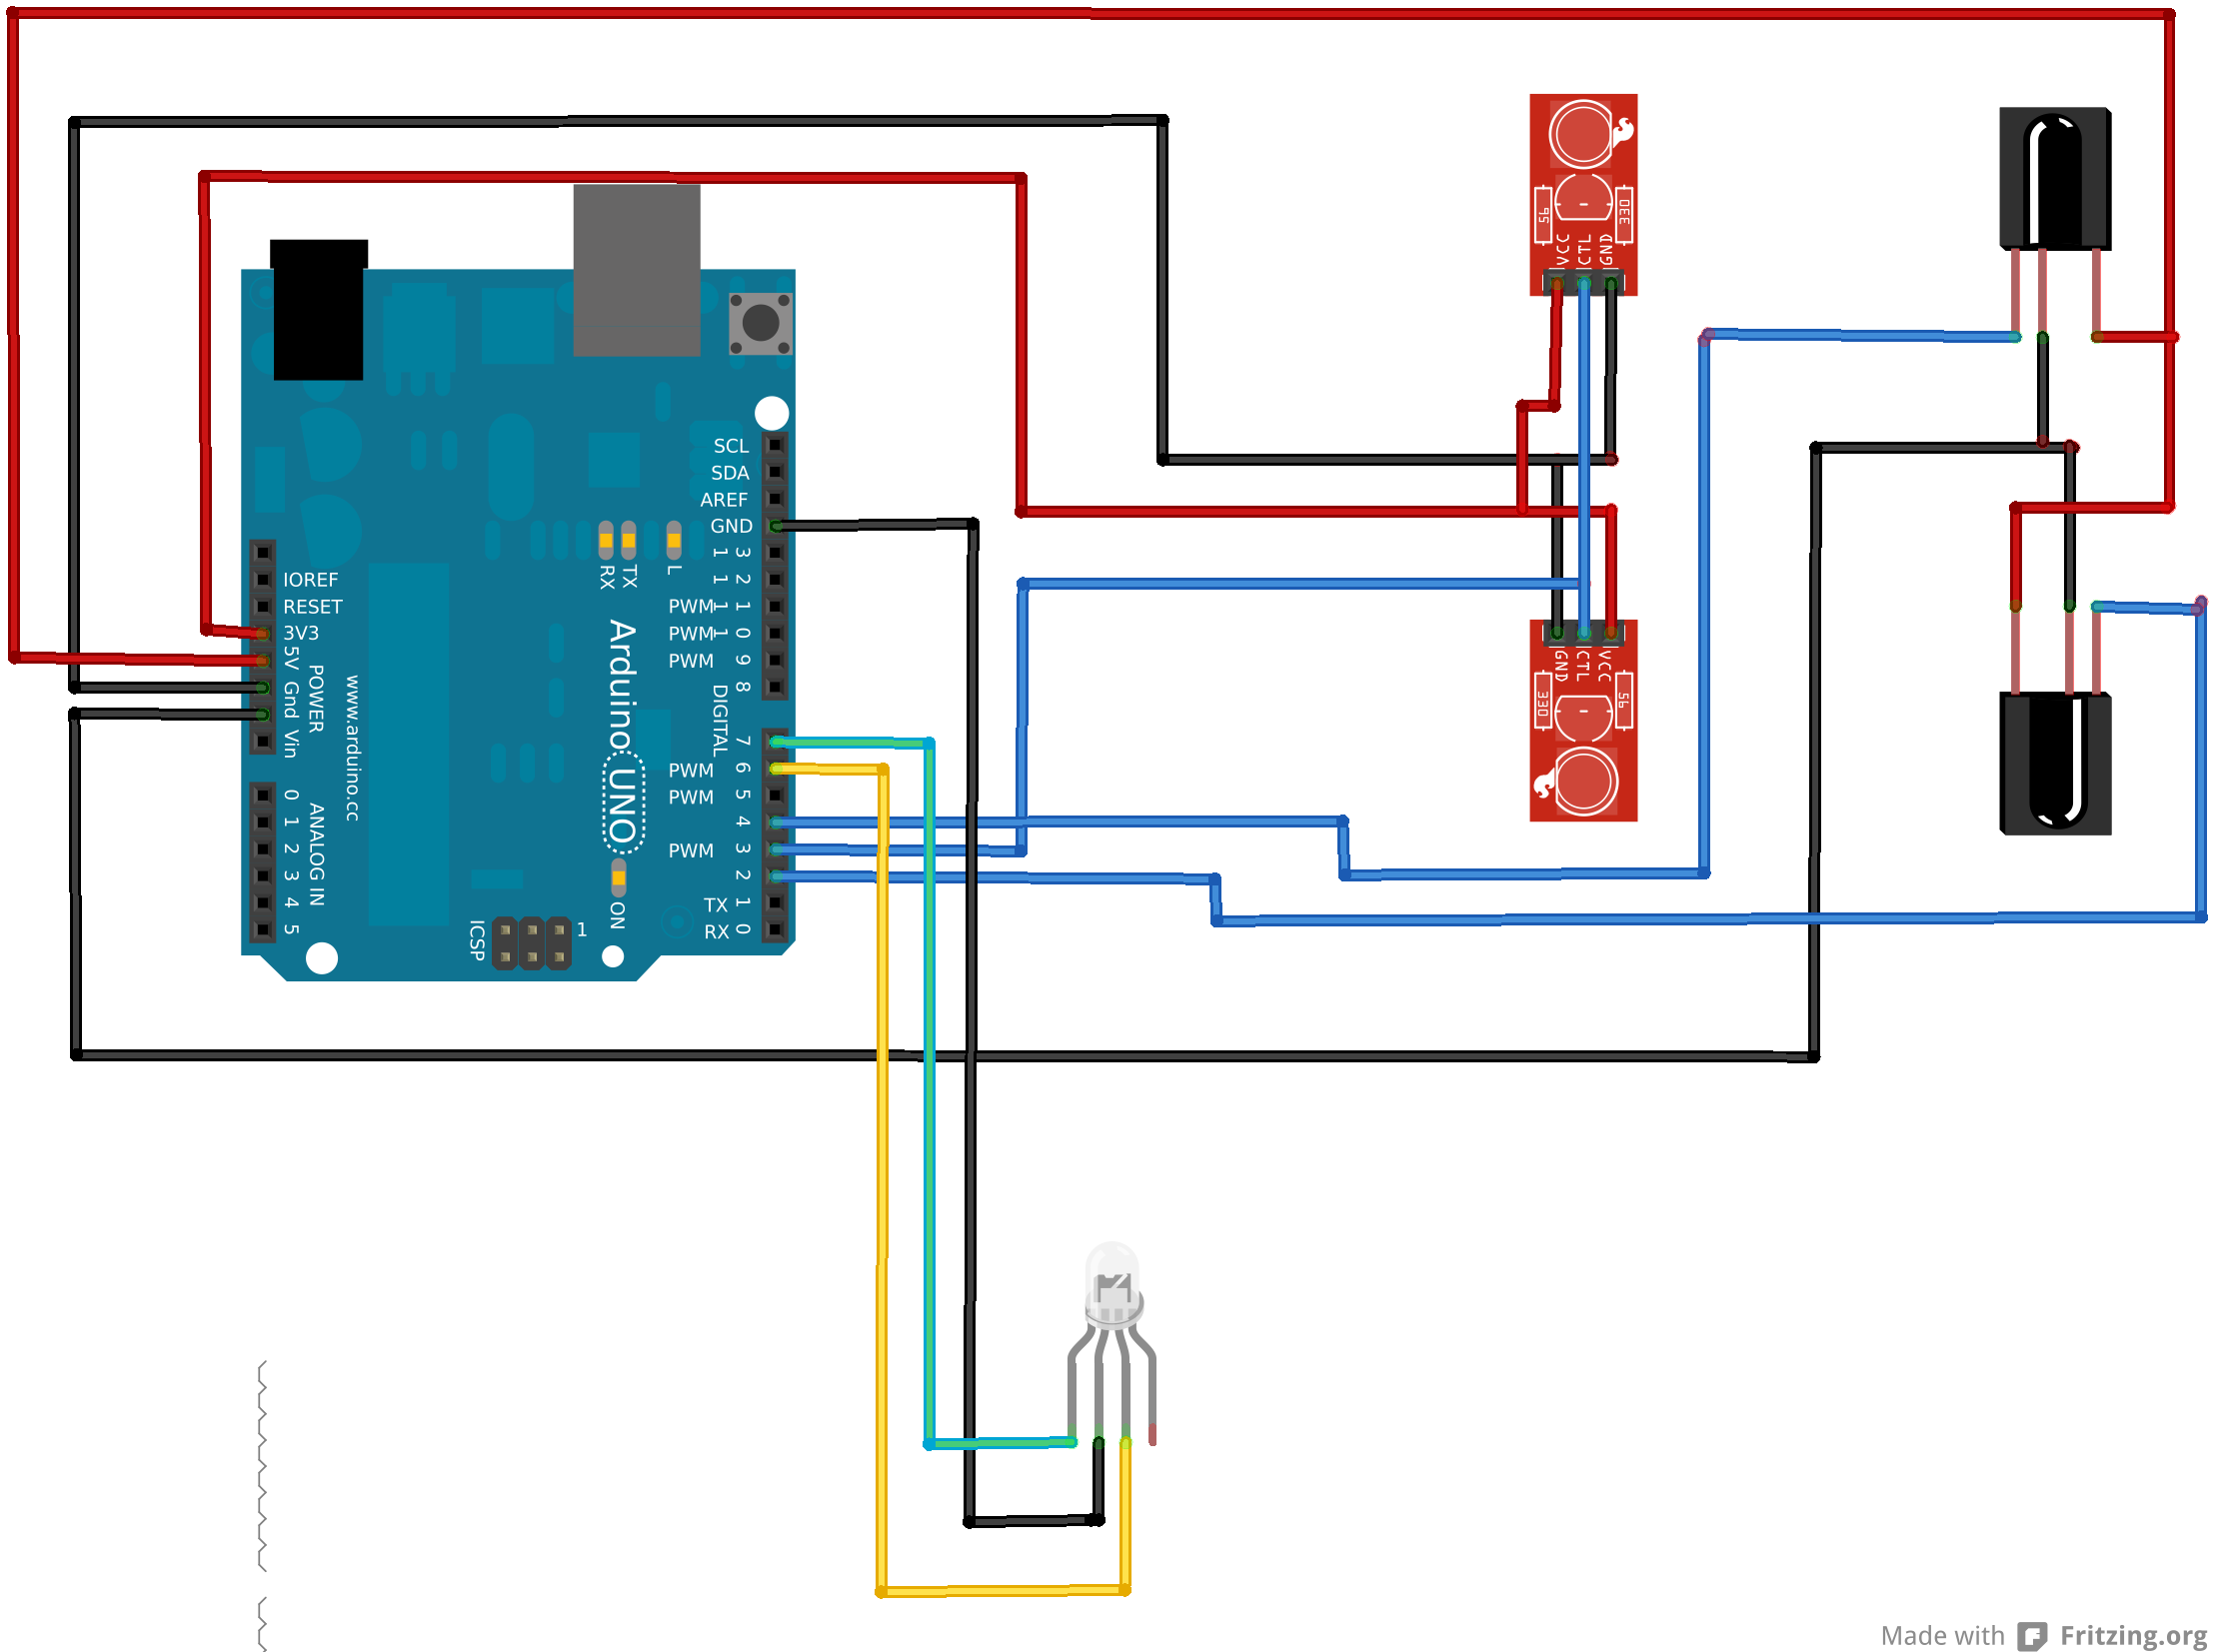
An Arduino Uno is connected to two infrared (IR) transmitters and their respective receivers. When one of the receivers detects a beam break, a strand of LEDs displays a pattern. While this setup functions correctly in principle, an issue...
For beginners in microcontroller projects who are unsure where to start, this project serves as one of the simplest options available. It provides a clear understanding of programming a microcontroller. Often, one may glance at a watch and ponder,...
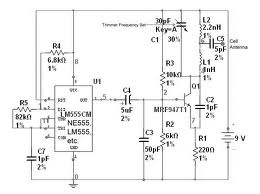
The team is highly interested in the design of a jammer circuit and has begun working on it. However, they are experiencing issues with the circuit, specifically that the signal is not being jammed effectively. The design of a jammer...
When starting with Arduino, one often accumulates more Arduino boards than RS232 or USB ports available on the computer. Therefore, it is more practical to use an external signal level converter rather than placing it directly on the Arduino...
Once the circuit receives power, all variables are initialized, and the loop function runs continuously. Initially, all LEDs are off, and there is no output signal. Pressing the signal switch activates the first LED, indicating the output signal. The...
MIDI, or Musical Instrument Digital Interface, is a protocol designed for controlling synthesizers, sequencers, and various musical devices. MIDI devices are typically categorized into two main classes: controllers, which generate MIDI signals based on user input, and synthesizers, which...