
Visual Basic & AVR RS232 interface

The circuit design for this project emphasizes the integration between the AVR microcontroller and the Visual Basic 6 application, facilitating a user-friendly interface for controlling and monitoring the microcontroller's functions. The communication is established via the RS232 serial protocol, which allows for reliable data transmission between the PC and the MCU.
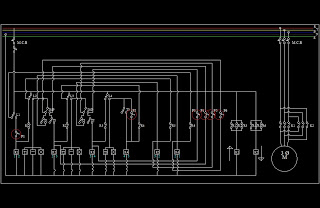
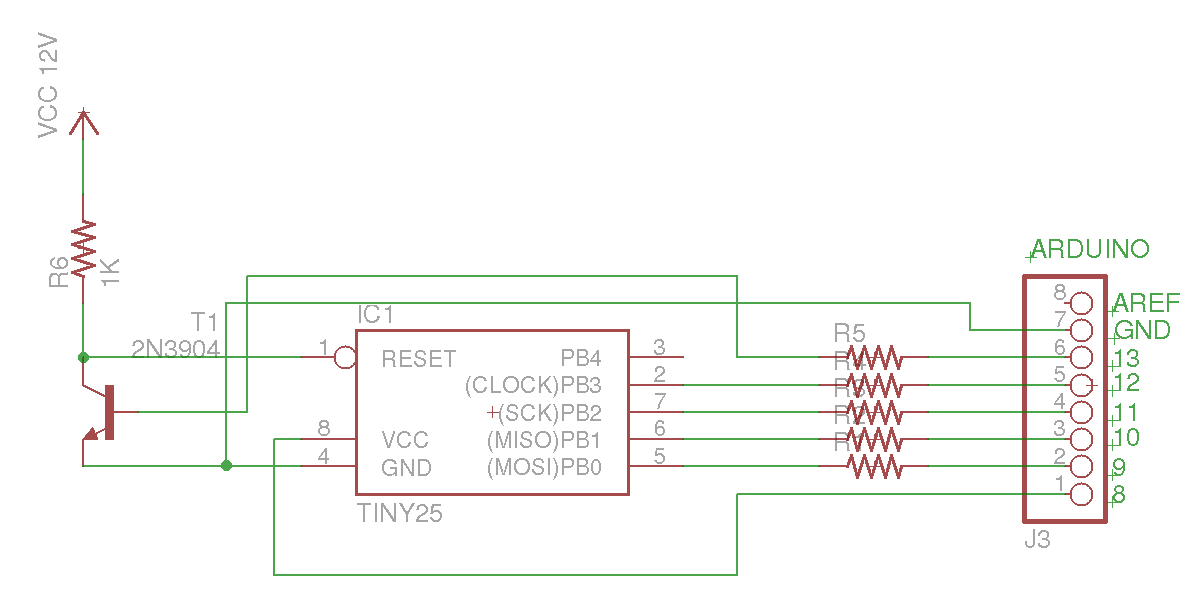
The AVR development board serves as the hardware platform for this project, equipped with essential components such as LEDs and switches. The LEDs provide visual feedback for the state of the microcontroller, while the switches allow user interaction. The RS232 interface, typically implemented using MAX232 or similar chips, converts the TTL-level signals from the MCU to the RS232 voltage levels, ensuring compatibility with the PC's serial port.
The Visual Basic 6 application acts as the user interface, enabling users to select the appropriate COM port for communication. The interface is designed to be intuitive, with clearly labeled buttons and indicators. The functionality of the switches is reflected in real-time on the interface, allowing users to monitor the status of the AVR board. The binary representation of received characters provides insight into the data being processed, while the LED control feature allows users to toggle the state of individual LEDs, enhancing the interactive experience.
Overall, this project exemplifies the practical application of microcontroller technology in conjunction with software development, showcasing how a simple serial communication protocol can be utilized to create versatile control systems for various applications.On this project we will control anAVR microcontroller (MCU) via Visual Basic 6. The applications of this circuit is countless. You can make, anything you want, that needs control from a Personal Computer (PC)or from anycircuit collects data from sensors. Finally, itsends these data to Visual Basic based software by using the RS232 port. You have to know, this project is in generic form, to give you the idea of controlling aMCU through a serial port. You can modify the source codes to make yourown circuit but onlyfor personal use. Any commercial use of this project is not allowed. You can use for your experiments, anAVR development unit such asMCU100, STK200, STK500 or an AVRdevelopment boardthat contains 8 LEDs, 5 switches or more and some RS232 chip like MAX232, MAX202 etc. The software is named "AVR RS232 interface" and it`s writtenin Visual Basic 6. It`s constituted by the main windowand "about" window. On the generic mask you can choose the COMport you have connected the AVR board ( For development boards I mean the spareRS232 connector, not the connector that you programming the MCUs ).
On the "Switches on interface" window, are5 green cycles. If you press any of these 5 switches on the AVR board, this cycle will be in red color. The value of the receivedcharacter canbe viewed in binary format, onthe below text box. On the "LEDs on interface" window, you will see 8 buttons with green color. When you press abutton you will see that the current led on AVR board will be turned-off. If you press it again, the LED will be turned-on. The value of the sentcharacter can be viewed in Decimal and ASCII format in two below text boxes. 🔗 External reference
Related Circuits

Wire the circuit diagram shown here on a breadboard. The choice of V type of AVR is important. For example, Tiny13V is very appropriate for such an application. To successfully implement the circuit diagram on a breadboard, several considerations must...
This is a basic lift circuit. When the P1 push button is pressed, the lift starts operating from the 1st floor to the 2nd floor. After a specified time duration, it automatically moves to the 3rd floor. The same...

CMOS and PMOS cross interface circuit with PMOS integrated circuit providing high input impedance, allowing the input current to be negligible. The CMOS and PMOS interface circuit is illustrated in the accompanying figure. The CMOS and PMOS cross interface circuit...

RS232 to RS485 Converter Circuit Schematic. RS232 to RS485 converters are primarily utilized in industrial and commercial settings. The RS232 to RS485 converter circuit is designed to facilitate communication between devices using different serial communication standards. RS232 is commonly found...
This Arduino sketch is designed to recover ATtiny microcontrollers that have become non-functional due to incorrect fuse settings. It achieves this by placing the affected ATtiny into high-voltage serial programming mode and rewriting the fuses to safe values. The...
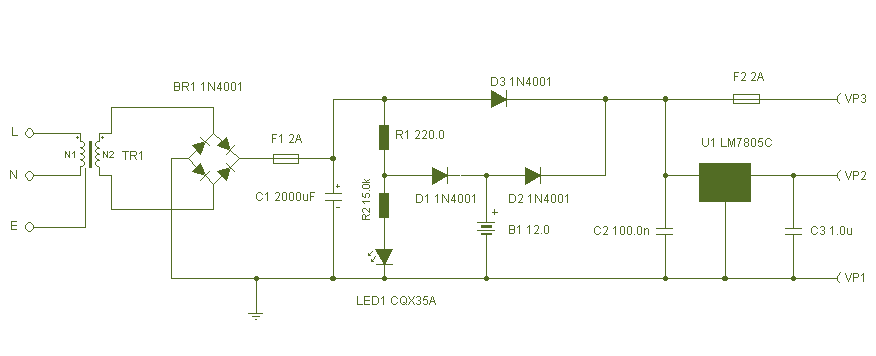
This circuit is a simple form of the commercial UPS, the circuit provides a constant regulated 5 Volt output and an unregulated 12 Volt supply. In the event of electrical supply line failure the battery takes over, with no...
Warning: include(partials/cookie-banner.php): Failed to open stream: Permission denied in /var/www/html/nextgr/view-circuit.php on line 713
Warning: include(): Failed opening 'partials/cookie-banner.php' for inclusion (include_path='.:/usr/share/php') in /var/www/html/nextgr/view-circuit.php on line 713