
Modify an Arduino for DebugWIRE

The Arduino platform has evolved significantly since the introduction of the Diecimila and Duemilanove boards. Modifying an Arduino board can enhance its functionality, particularly for debugging purposes. Debugging is essential for developers to identify and resolve issues in their code or hardware setup efficiently.
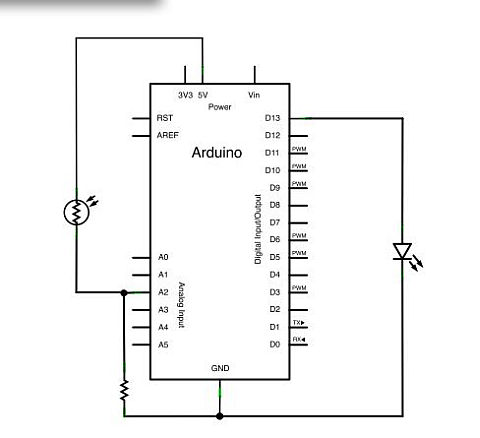
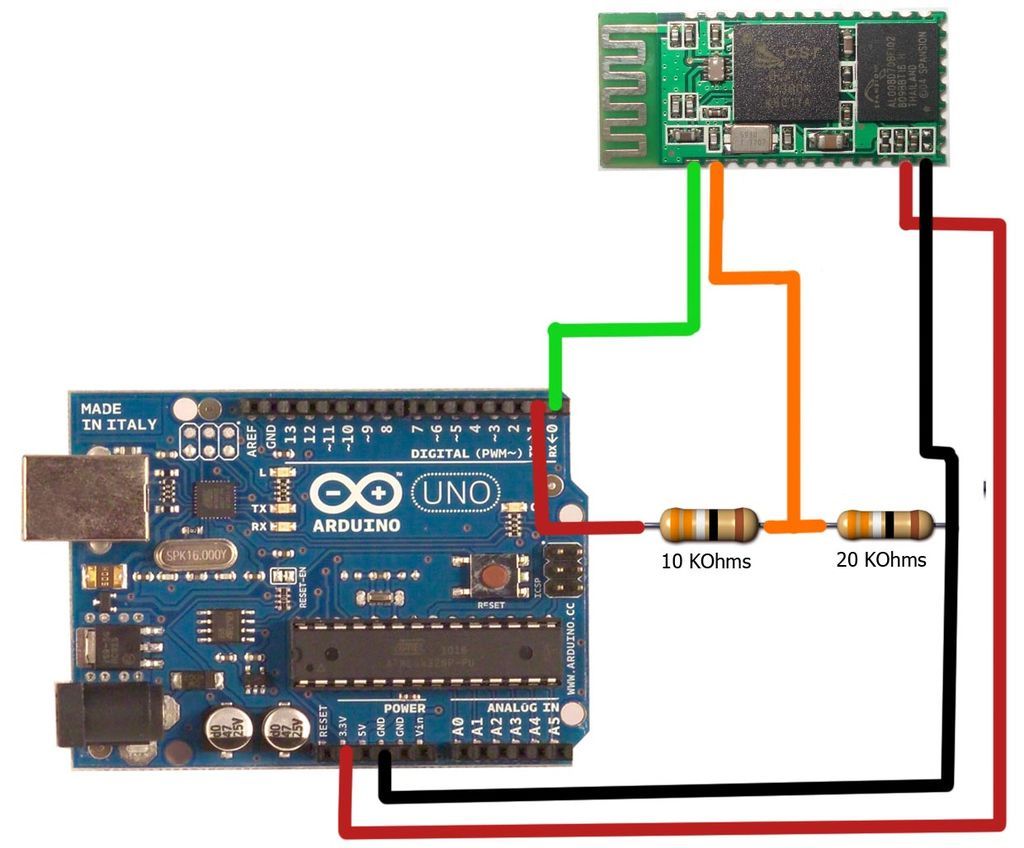
To modify an Arduino board for debugging, several steps and components may be involved. One common method is to add a serial debugging interface. This can be achieved by connecting a USB-to-serial converter to the Arduino's TX (transmit) and RX (receive) pins. This setup allows the user to send and receive debug messages from the Arduino to a computer, providing real-time feedback during code execution.
Additionally, incorporating an LED indicator can be beneficial. By connecting an LED to a specific digital pin, the board can visually signal different states or errors during operation. For instance, blinking patterns can indicate successful execution or errors, allowing for easier troubleshooting without needing to connect to a computer.
Another modification may involve adding a reset switch. This switch can help reset the Arduino without needing to unplug and replug the power supply, which can be particularly useful during the debugging process when frequent resets are necessary.
Overall, modifying an Arduino board to facilitate debugging involves careful consideration of additional components and their integration into the existing circuit. By employing these modifications, users can significantly improve their workflow and efficiency in developing and testing Arduino-based projects.This article talks about the Diecimila, but there is a newer article that talks about the Duemilanove Here`s a departure. Today I`m going to give a little instruction in how to modify an Arduino board so you can actually do something useful with it - like debug it.
But first, since my regular reader expects. 🔗 External reference
Related Circuits
Government data sets available online are often sourced from major metropolitan areas or infrastructural centers. With an easy-to-follow introduction to new software and technologies, the urban sensor kit allows anyone to obtain location-specific information and share it with a...
The Arduino GSM Shield connects an Arduino board to the internet using the GPRS wireless network. To use this module, it must be plugged onto the Arduino board, and a SIM card from a GPRS coverage provider should be...

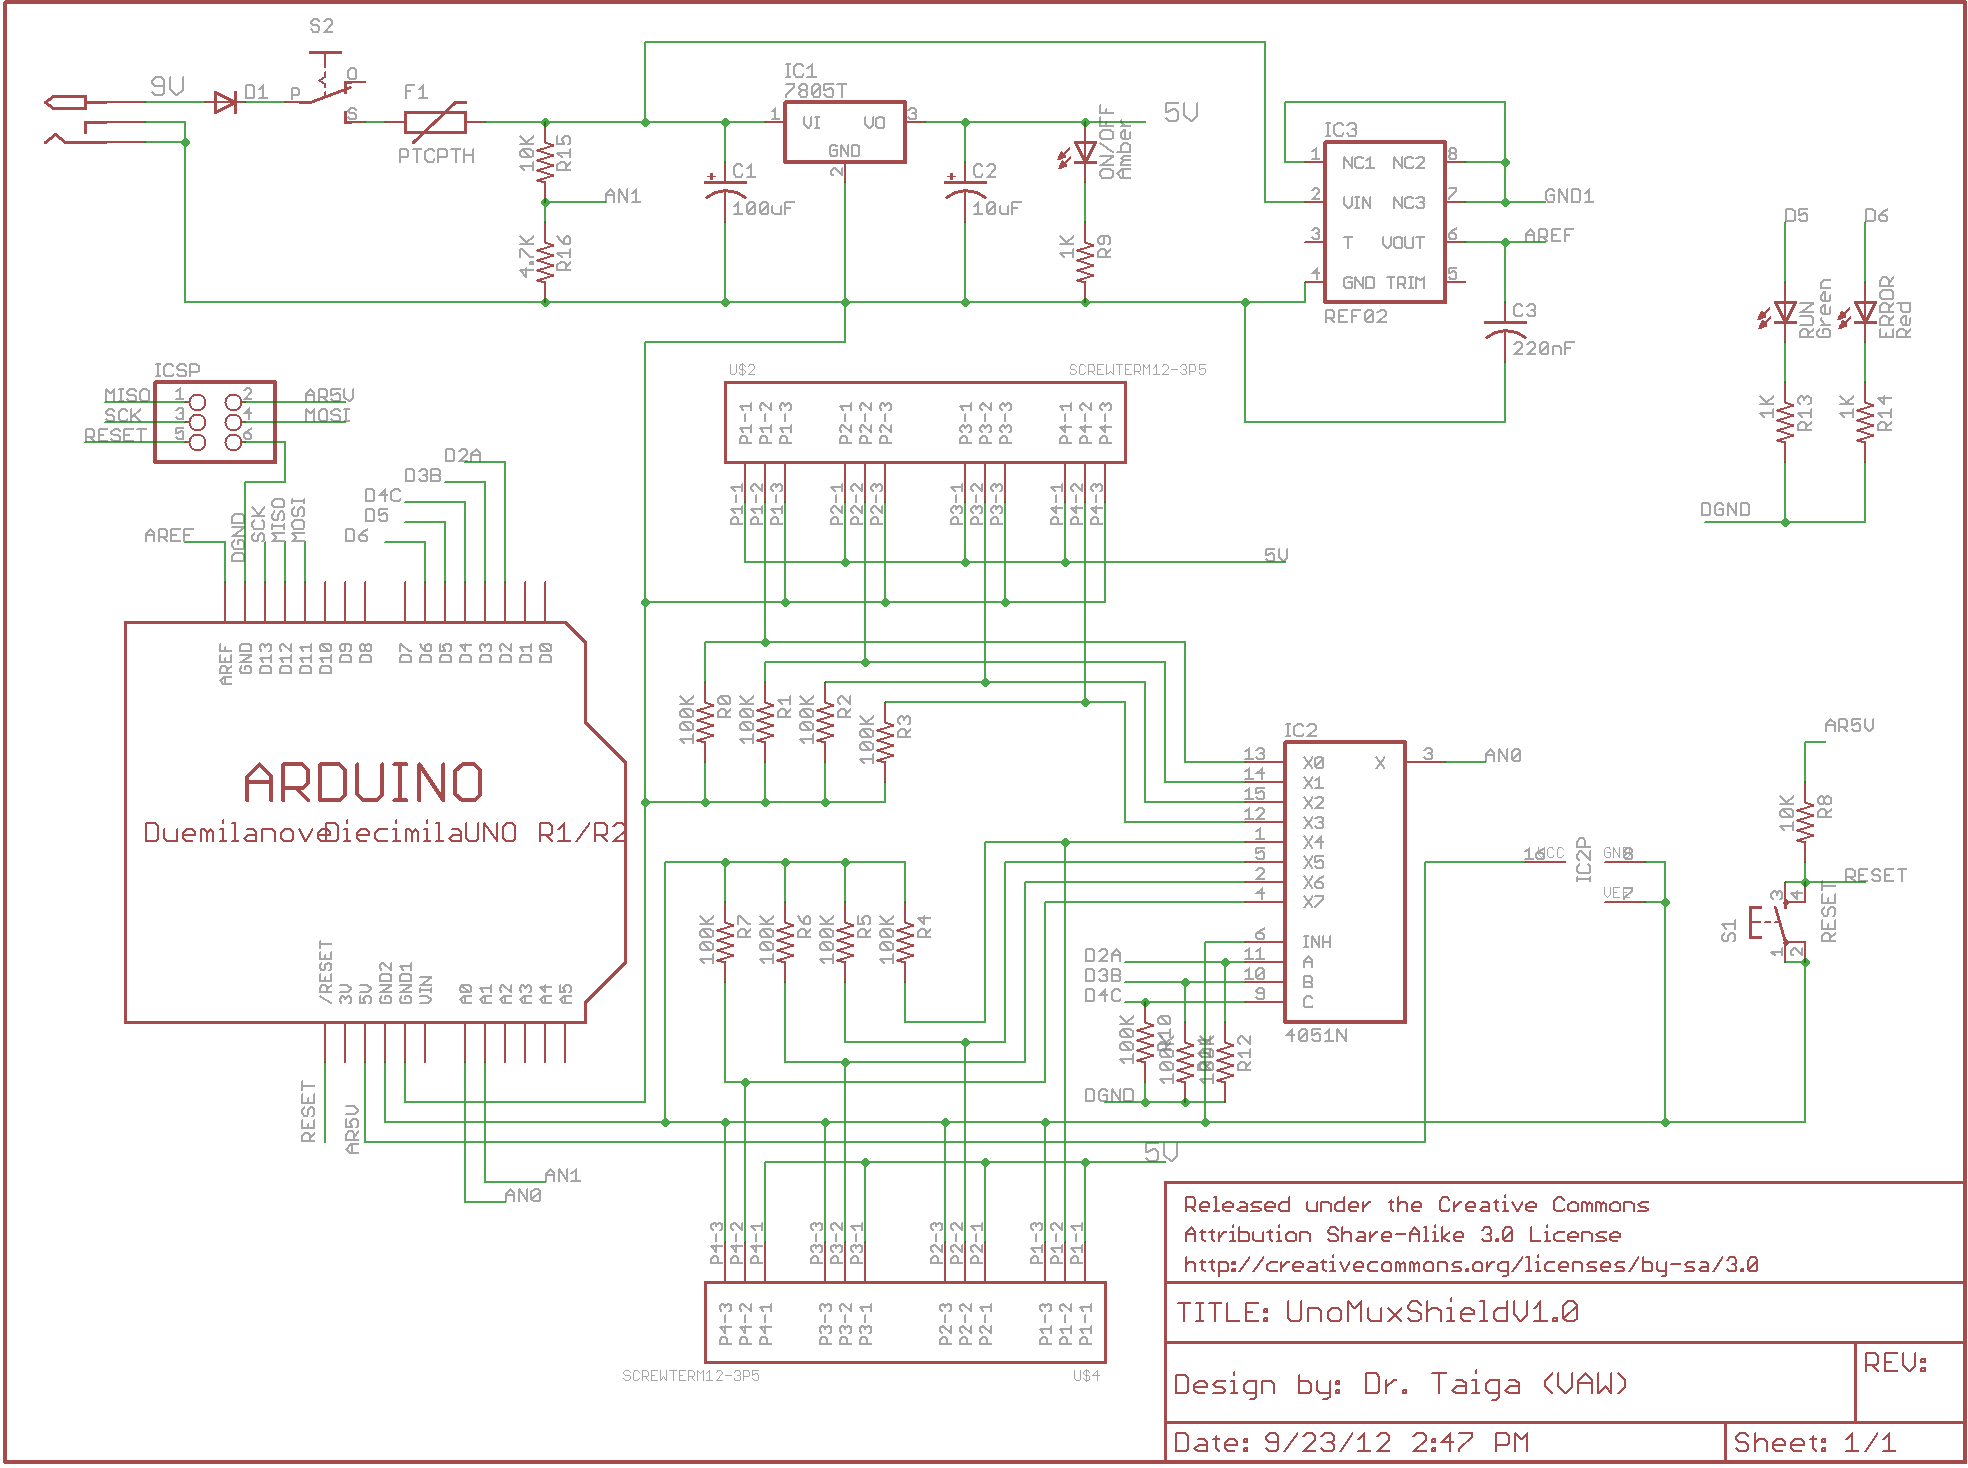
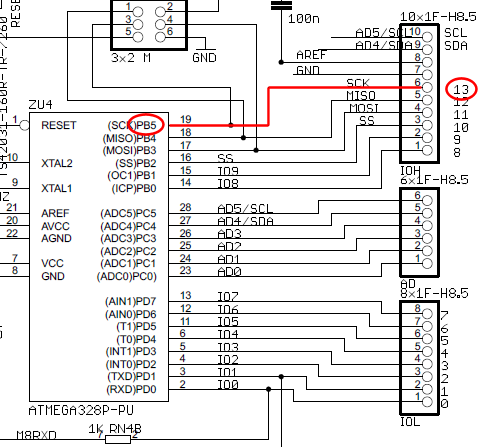
This schematic represents a minimalistic circuit that includes only the essential components required for operating an ATmega328 microcontroller with the Arduino Uno bootloader. The design of the voltage regulation circuit is left to the user. Connections to AREF and...
There is enthusiasm for using Arduinos in science projects. However, it is important to address several shortcomings of the Arduino before it can be utilized for more serious applications. Specifically, the addition of robust screw terminals is necessary. The Arduino...
The wire connected to the 5V pin is linked to the positive pins of the breadboard, which are not connected to any other components. There are no additional connections on the positive column. While this may seem like a...
The motion games on the Nokia 5800 sparked an interest in creating a real-world version of a racing car controlled by tilting a phone. The motion-controlled robot, named Hercules due to its high torque and speed, is operated via...