
12V stroboscope

The stroboscope circuit operates on a low-voltage DC supply, specifically 12V, which allows for safe operation without direct exposure to mains voltage. This design is particularly advantageous for portable applications where battery operation is desired. The circuit features a flash power selection switch that allows the user to choose between different capacitors (C1, C2, C3) to adjust the flash intensity and frequency. C3 enables high flash rates exceeding 50 Hz, while C2 is intended for standard operational settings, and C1 is used for generating bright single flashes.
The core functionality of the stroboscope revolves around an external trigger input, which initiates the flash when a suitable voltage pulse is detected. This input can be sourced from various devices, such as a variable frequency oscillator or a music source, allowing for versatile applications in different environments. The stroboscope tube requires a high voltage of approximately 250-400V DC to function effectively. This high voltage is achieved through a step-up transformer configuration involving transistors Q1 and Q2, along with transformer T1. The output of this circuit is approximately 230V AC, which is subsequently rectified by a high-voltage rectifying bridge (U1) rated for at least 400V, and stored in the main capacitor (C1).
Safety considerations are paramount due to the presence of dangerously high voltages within the circuit. Appropriate precautions must be taken to avoid contact with live circuits, as the stored charge in the main capacitor can deliver severe electric shocks, potentially resulting in fatal consequences. To mitigate risks, it is advisable to incorporate bleeding resistors (1 MΩ) across the capacitors (C1, C2, C3) to ensure safe discharge of voltage after the circuit is powered off.
Additionally, a transparent plastic shield should be placed in front of the flash tube to protect users from potential glass shards in the event of a flash tube failure. Care must be taken to ensure that the flash tube does not exceed its power rating, as this could lead to overheating and failure. Proper orientation of the power supply is critical; a diode may be added to prevent reverse polarity connections that could damage the transistors and transformer.
The stroboscope's flash output is notably bright, comparable to that of high-powered camera flashes, and users are cautioned against viewing the flash directly from close distances, as it may cause temporary blindness. The design leverages components salvaged from old camera flash units, including the flash tube, reflector, and some capacitors, ensuring cost-effectiveness and sustainability in component sourcing. A triac capable of handling at least 1A and 400V is recommended for the triggering circuit to ensure reliable operation.This is one of my stroboscope designs. Usually many stoboscope circuit work directly from mains voltage, but this circuit uses 12V DC intead od mains AC. This is very good idea if you don't want to mess with direct mains voltage connected circuit or you want to run the stroboscope from batteries.
The circuit has some special functions compared to other stroboscope circuits found electronics books. First the there is a switch for selecting the flash power: with C3 you can get very fast flash rates (over 50 Hz), C2 is most suitable for normal operation and using C1 directly you get very bright single flashes.
The stroboscope circuit does not include any timing circuit of it's own. The strobocope will flash when a suitable voltage pulse is applied to the strigger input. This trigger source can be a small variable frequency oscillator, music source or a special strobo controller. The stoboscope tube needs about 250-400V DC to operate. This high voltage is generated using simple voltage step up circuit built from transistors Q1,Q2 and transformer T1.
This circuit gives out about 230V AC voltage which is then rectified with rectifying bridge U1 (must have at least 400V voltage rating) and stored to the main capacitor C1. When the circuit operates there are dangerously high voltages in the circuit. Do not in any case get in contact with live circuit. The charge in the main capacitor can give you very nasty electric shock and are even capable of killing.
And remeber that thew main capacitors will keep their high voltage charges long time after you have switched off the circuit because there is no bleeding resistors (you can add your own if you wish, just wire 1Mohm resistors in parallel with C1, C2 and C3). Make sure that you have some plastic shield (transparent plastic) in front of the flash tube all the time.
If the power rating of the flash tube is exceeded or the flash tube is damaged the flash tube can explode. A plastic shield in front of the flash tube will make sure that the flying pieces of glass will not damagen anybody.
Because the capacitor charging circuitry is more powerful than in the original flash unit the flash tube might get more average power than it is designed to handle. It is possible that the flash tube can overheat because of this. Do not connect the power supply in the wrong way because this can damage the power transistors and/or the transformer T1.
It might be a good idea to add a diode to the power input to make sure that you can't connect the power in the wrong way to the circuit. Do not look directly to the flash tube at short distances. The flashes generated by this circuit are very bright (as bright as the original camera flash in high power mode).
Those flashes can temporarily blind you if you are too near to the circuit. I built my stroboscope from parts taken from old camera flash unit. This approach gave me nice flash tube with reflector, trigger transformer and some of the capacitors (for example C1). Other parts were the one luying around. I used some strange triac I found in my for the triggering circuit, but any triac which can handle at least 1A and 400V should do the job well.
🔗 External reference
Related Circuits

An Xbox 360 console previously experienced a problem known as the 3 Red Lights of Death (3RLOD). To address this issue, the stock heatsinks were removed, and a Koolance external water cooling system was installed. This modification has effectively...

A digital camera has been purchased that is capable of capturing both images and videos. However, it has been reported that the camera has limitations related to battery life, which affects its operational duration. The digital camera operates using a...

A 40-watt fluorescent tube lamp or two 20-watt tubes in series will be driven by this circuit; however, this circuit will produce less brightness than usual, since... This circuit is designed to operate a 40-watt fluorescent tube lamp or two...

This PWM control circuit generates control pulses for the DMOS power switch in the flyback circuit. The PWM output produces a pulse width that is proportional to the input control voltage, with the repetition rate governed by an external...
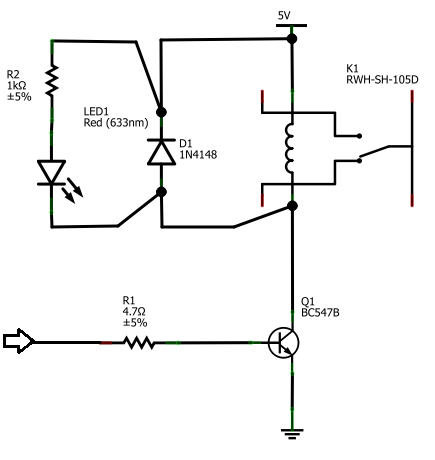
The BC547B transistor has a collector-base voltage (Vcbo) of 50V, a collector-emitter voltage (Vceo) of 45V, and an emitter-base voltage (Vebo) of 6V. In contrast, the BC548 transistor in the original circuit has a Vcbo of 30V, a Vceo...

Although modern electrical appliances are increasingly self-powered, particularly portable devices used during camping or summer vacations, there are still occasions when a 230 V AC source is necessary. Additionally, it is beneficial for this source to operate at a...