
Arduino Producing DTMF Tones

To implement this project, the HT9000A DTMF chip is interfaced with an Arduino microcontroller. The HT9000A can generate the standard DTMF tones corresponding to the digits 0-9, the letters A-D, and symbols such as the pound (#) and asterisk (*). The Arduino can be programmed to send signals to the HT9000A to produce the desired tone when a specific button is pressed or a condition is met.
The low output volume from the HT9000A necessitates the use of an audio amplifier to ensure that the tones are audible. An LM386 audio amplifier is a suitable choice for this application due to its low cost, ease of use, and sufficient power output for driving small speakers. The LM386 can be connected directly to the output of the HT9000A, and its gain can be adjusted using external resistors and capacitors to achieve the desired volume level.
To verify the operation of the DTMF tones, a Ham Radio program can be employed. This software listens for audio signals and decodes the DTMF tones, displaying the corresponding numbers on the screen. This feedback loop allows for real-time verification of the tone generation and ensures that the system is functioning as intended.
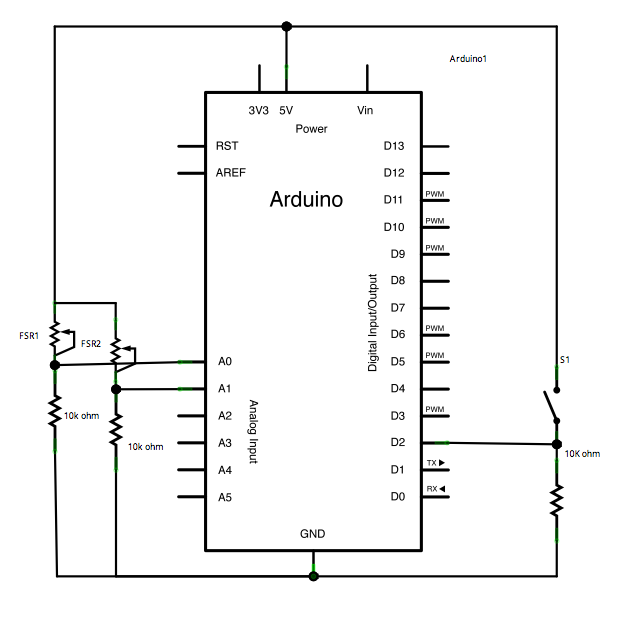
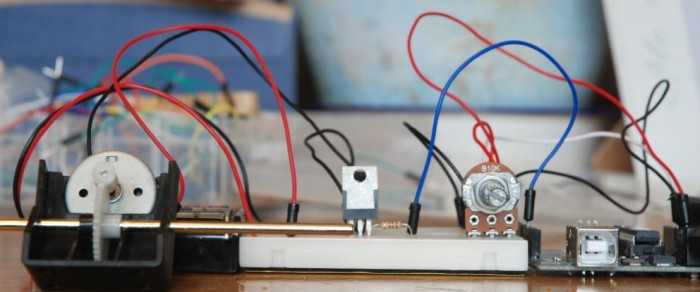
In summary, this project combines an Arduino, the HT9000A DTMF chip, and an LM386 audio amplifier to create a functional DTMF tone generator, with the capability to verify output using specialized software. The design is flexible and can be expanded in future projects to react to detected DTMF tones using different components.I wanted to teach my Arduino to talk telephone, so I added a HT9000A DTMF chip to produce the familiar "touch tones" (upcoming projects will act upon "heard" DTMF tones, but with a different chip). The output is really low volume, so you may want to plug in amplified speakers or use an input on your stereo.
You could build an amplifier circuit with a LM386 as well. I used an Ham Radio program that listens for touch tones and displays the number it hears to verify operation. 🔗 External reference
Related Circuits
This sketch transmits an ASCII 'A' (byte value 65) upon startup and continues to do so until it receives a serial response from the computer. After receiving a response, it sends three sensor values as individual bytes and waits...
A quick circuit showing how to control the speed of a DC motor with a potentiometer with your Arduino board. Also shows how to use a TIP120 transistor to allow the Arduino control a larger power supply. This circuit utilizes...
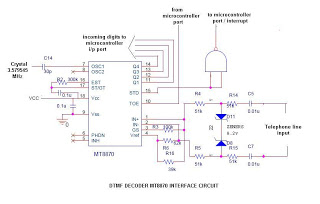
This is a straightforward circuit utilizing the DTMF decoder MT8870 (or CM8870). As illustrated in the circuit, an interrupt will be generated (if the NAND output is connected to the INT of the microcontroller) whenever a call is received...
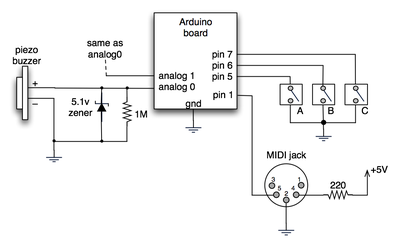
The notes for the fourth and final class are available on the Spooky Arduino class page. At the conclusion of the class, Mark from Machine Project awarded each student a merit badge. A project utilizing techniques from this week's...
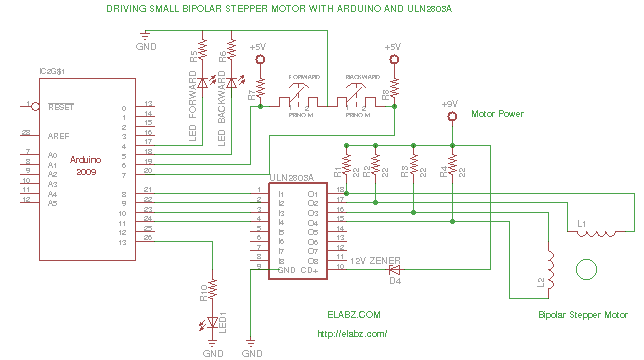
While preparing to disassemble several broken DVD-RW drives obtained from an eBay seller, the idea arose to create a testing platform for the bipolar stepper motors that would be salvaged from these drives. A collection of ULN2803AG Eight Darlington...
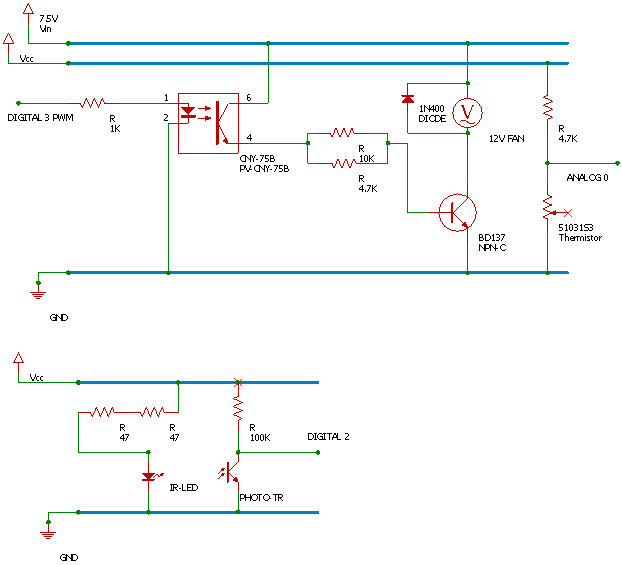
An Arduino is used to measure the rotational speed of a basic computer fan. This project was part of a series of YouTube videos created during a Master's program in Computer Science, specifically focusing on an embedded systems programming...