
Arduino Runing On && Charging NiMH batteries
An Arduino-based project utilizing 2 or 4 rechargeable NiMH AA batteries requires careful consideration of the charging mechanism to ensure efficient operation while allowing the batteries to charge when the system is connected to an external power supply. The chosen batteries, with a capacity of 2000-2400 mAh, necessitate a charging strategy that adheres to the recommended charging rates for NiMH technology, specifically a trickle charge of less than 0.1C and a fast charge of approximately 1.2C to 2C.
To create a simple charging circuit, an external 12V power supply can be used in conjunction with the Arduino. The Arduino can be programmed to monitor the battery voltage via an analog input pin. This voltage can be read at the battery terminals or at the output of the charging circuit, ensuring that the Arduino is capable of accurately assessing the battery's state of charge. Implementing a voltage divider may be necessary to bring the battery voltage within the Arduino's safe operating range, allowing for precise voltage readings.
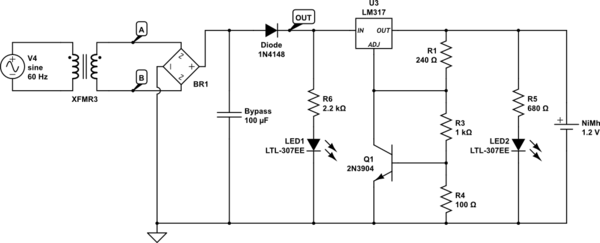
In terms of managing the charging process, utilizing an integrated circuit designed for battery management could simplify the design and enhance safety. Such an IC would typically handle the charging current, provide temperature monitoring, and include features to prevent overcharging. It is essential to select an IC that is compatible with NiMH batteries and is capable of managing the desired charging rates. The circuit design should include bypass capacitors near the IC to ensure stable operation and minimize noise.
As this project represents a complex circuit design, it is advisable to create a schematic that outlines all components, including the Arduino, the battery configuration, the external power supply, and the charging IC. This schematic will serve as a foundation for further development, allowing for adjustments based on testing and performance evaluations.An Arduino running on 2 or 4 rechargeable NiMH AA batteries. I say 2 because I might boost up the voltage to what`s needed. My problem is that this project will sometimes be plugged in and I would like the batteries to be able to charge during that time. These batteries will each have a capacity of around 2000-2400 mAh. I must have done half a days amount of research on this topic and although I feel much more informed I still don`t know how to proceed. Based on what I`ve read the most important thing is a constant current, with <. 1c trickle charge for NiMH batteries and ~2c 1. 2cSource linked below for a fast charge. First off, is there a way to make a crude `dumb` charger with say an external 12v power supply and the Arduino reading the battery voltage and shut off accordingly If so where should the voltage be read at along the circuit for it to properly read. I`d like to know that last bit the most, because regardless of what charging mechanism in the end is selected, I wish to know whether the Arduino can read the battery voltage while the batteries are plugged in.
Also, should I in the end use an IC like and let it take care of the entire situation. If so is the one I have selected a good one for this particular application I have tried to continue research and attempt to present a circuit. I will say this is the most complicated circuit I have attempted to design. Besides the couple dozen schematics I had looked at, I mostly used the following: 🔗 External reference
Related Circuits
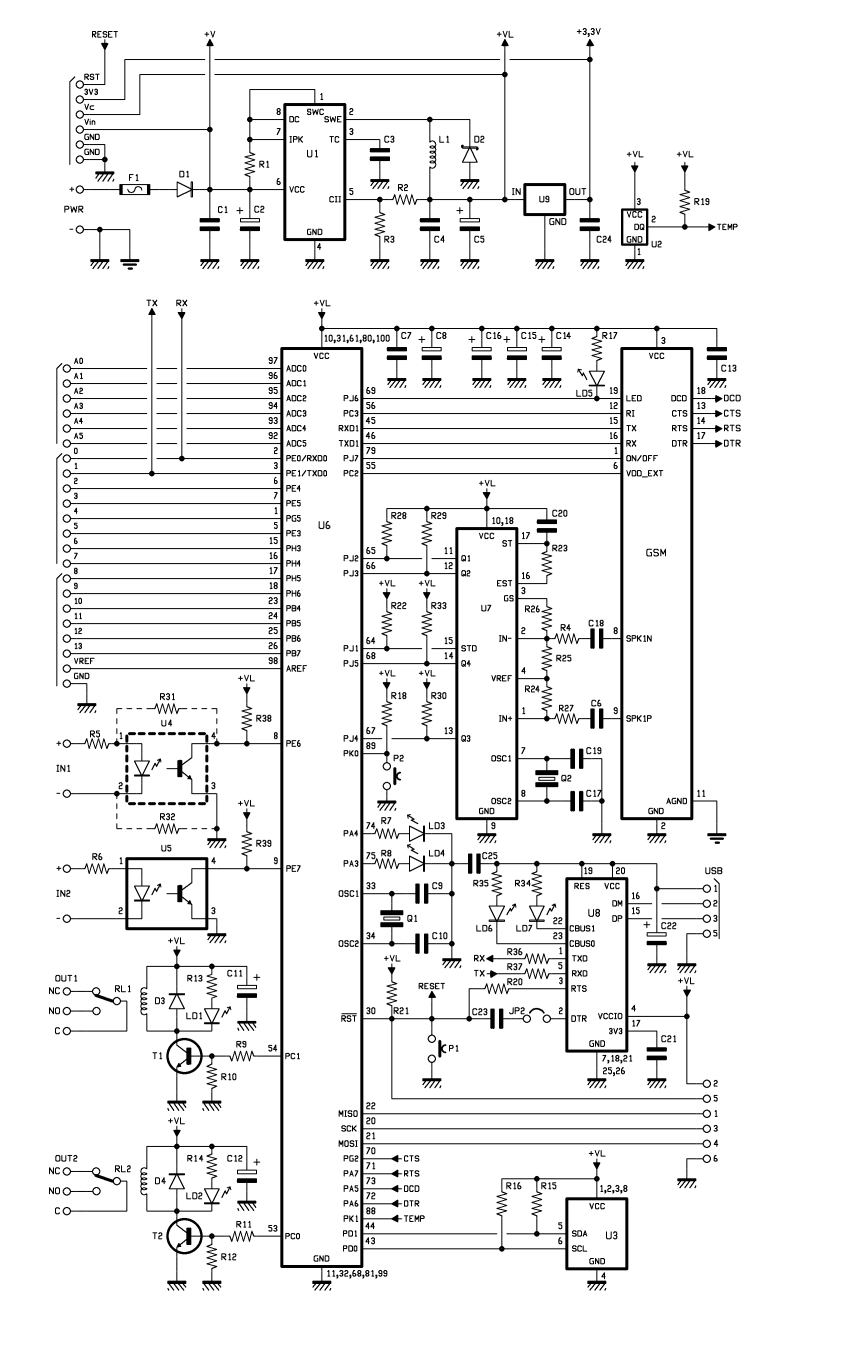
Utilizing the ATmega 2560, which serves as the core of the Arduino platform, a universal remote control with GSM capabilities has been developed. This device allows for the control of 2 inputs and 2 outputs, DTMF key functionality, gate...
The battery packs were approximately $60 per pair, including a charger and batteries, and feature a three-bar battery gauge. Through experimentation, it was found that a voltage greater than 4.28V activates all three bars, while a voltage above 3.47V...
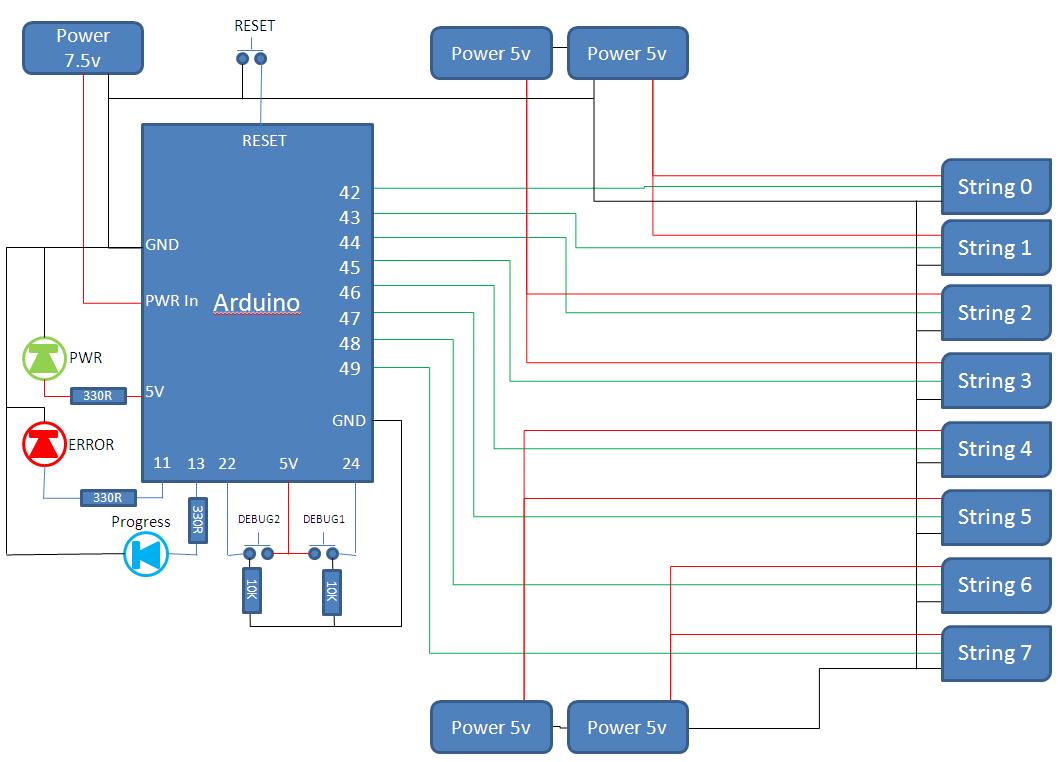
This project develops a Christmas lights controller for GE Color Effects lights, enabling programmed control of up to eight sets of lights. It includes a function-specific language for programming light patterns and an emulation environment for testing programs before...
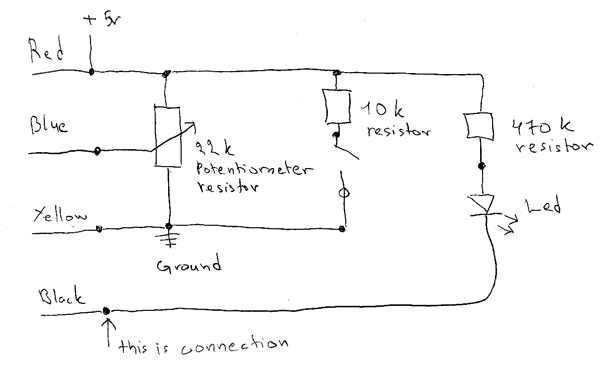
The circuit consists of a 10 kΩ resistor, a 470 kΩ resistor, a potentiometer, and an LED. This circuit is intended for learning Arduino programming in class. The circuit utilizes a combination of resistors and an LED to create...
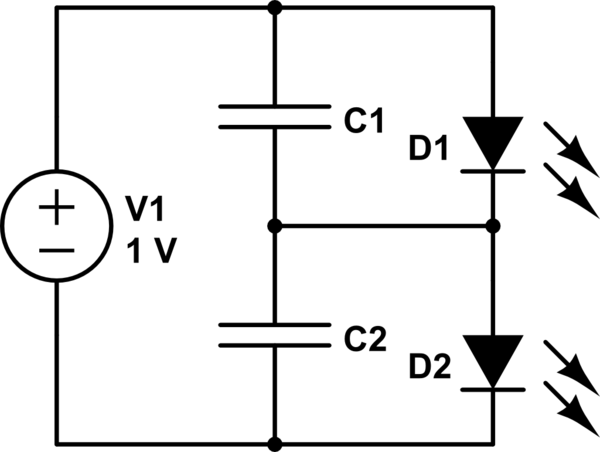
The first option is a Zener diode. There are several 2.2V Zener diodes available that could adequately protect the capacitor. However, a significant drawback is that half the energy may be wasted across the diode short. The question arises...
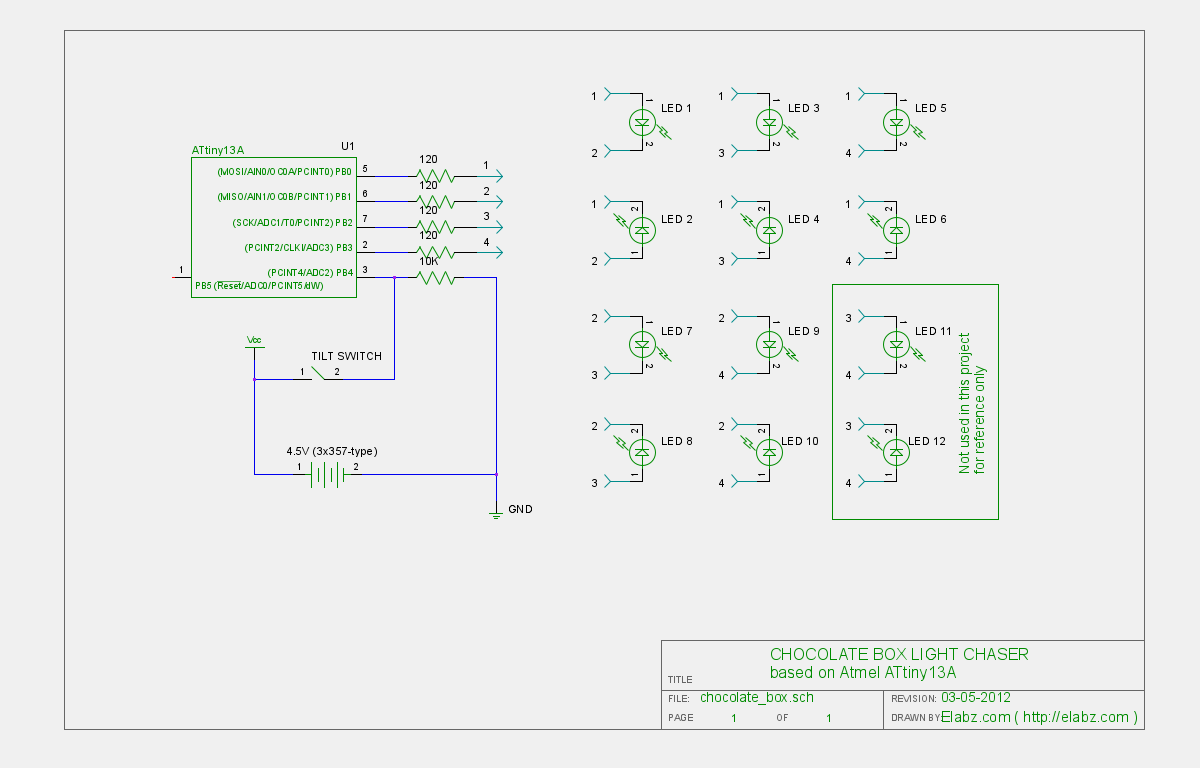
Transform a standard chocolate box into an impressive LED blinking display using an ATTiny13 AVR microcontroller, Arduino IDE, and several electronic components. The project involves creating an eye-catching LED display housed within a chocolate box. The core of the circuit...