
dvd burner laser pointer proper way 18

The construction of a burning laser involves several critical components and considerations to ensure both functionality and safety. The laser diode is the heart of the system, and it is imperative to select one that meets the necessary specifications. For optimal performance, a laser diode from a DVD burner operating at a speed of 16x or higher is recommended, as these diodes are designed to emit visible light with sufficient power for burning applications.
The Aixiz housing serves a dual purpose: it not only protects the delicate laser diode but also allows for the precise focusing of the laser beam. Proper focusing is essential for achieving the desired burning capabilities and ensuring that the laser can effectively concentrate its energy on a target.
The driver circuit is a fundamental aspect of this project. It must be designed to regulate both voltage and current supplied to the laser diode. This regulation is critical, as exceeding the diode's rated current can lead to thermal runaway and eventual failure. The driver circuit typically includes components such as resistors, capacitors, and possibly a microcontroller or transistor to manage the power supply dynamically.
When assembling the circuit, attention must be paid to the layout to minimize the risk of static damage to the laser diode. Using anti-static wrist straps and working on anti-static mats can help mitigate these risks. Additionally, proper soldering techniques should be employed to avoid applying excessive heat to the diode during assembly.
After the circuit is assembled, it should be housed in a durable enclosure that allows for safe operation. If utilizing a flashlight as a housing, ensure that the internal components are securely mounted and insulated to prevent short circuits.
Finally, safety precautions should always be taken when working with lasers. Protective eyewear specifically rated for the wavelength of the laser being used is essential to prevent eye damage. It is also advisable to work in a controlled environment where reflections and unintended exposure to the beam are minimized.
By following these guidelines and utilizing the appropriate components, a reliable and powerful burning laser can be successfully constructed.Build your very own burning laser. Unlike other popular ways of building your own burning laser I will show you how to do it properly to ensure a long and healthy life for your new laser. There are several reasons for building a burning laser this way instead of just connecting it to batteries and having it die in a couple days or months.
The best reason is that it will be just a bit more powerful. But the main reason for building this circuit is to regulate voltage and current. As simple as connecting your diode to a set of AA batteries is. You must realize that that you are feeding the diode too much current. It is also not protected from other dangers such as voltage spikes. This driver circuit will take care of that. One of the most important things you will need to do this project is a laser diode. The second is an Aixiz housing to put your diode in. You need the Aixiz housing in order to focus you beam when you are finished. There is a link to purchase one right from Aixiz below in the parts list. You can also buy the laser diode on ebay or you can simply harvest your own from an old or broken DVD Burner you may have laying around. And to answer the question you are asking yourself right now, yes it must be a DVD Burner. Any that are 16x or higher in speed. Normal DVD player diodes will not create a laser pointer with burning power. Never use a CD Burner for this project either. They contain infrared diodes. The light they emit is invisible to the naked eye and contain enough power to blind you before you will even realize it is happening.
Simply put, stay away from CD Burner diodes. You cant actually see the laser it will make anyway. Now, harvesting a laser diode can be a tricky process as they tend to be very fragile and sensitive to static and other forms of shock. It is very important to take your time in harvesting your precious diode. Do not ever drop it! Before we go on, here is the list of parts you will need to finish this project. You can walk right into Radio Shack if there is one in your area and ask for these components or you can order them online.
Be sure to have a look if you cant find something you are looking for. Optionally you can buy a kit that contains everything you need to build your circuit here. You will also need something to put everything in when you are done. (a flashlight works if you can make the circuit small enough to fit in it) If you 🔗 External reference
Related Circuits
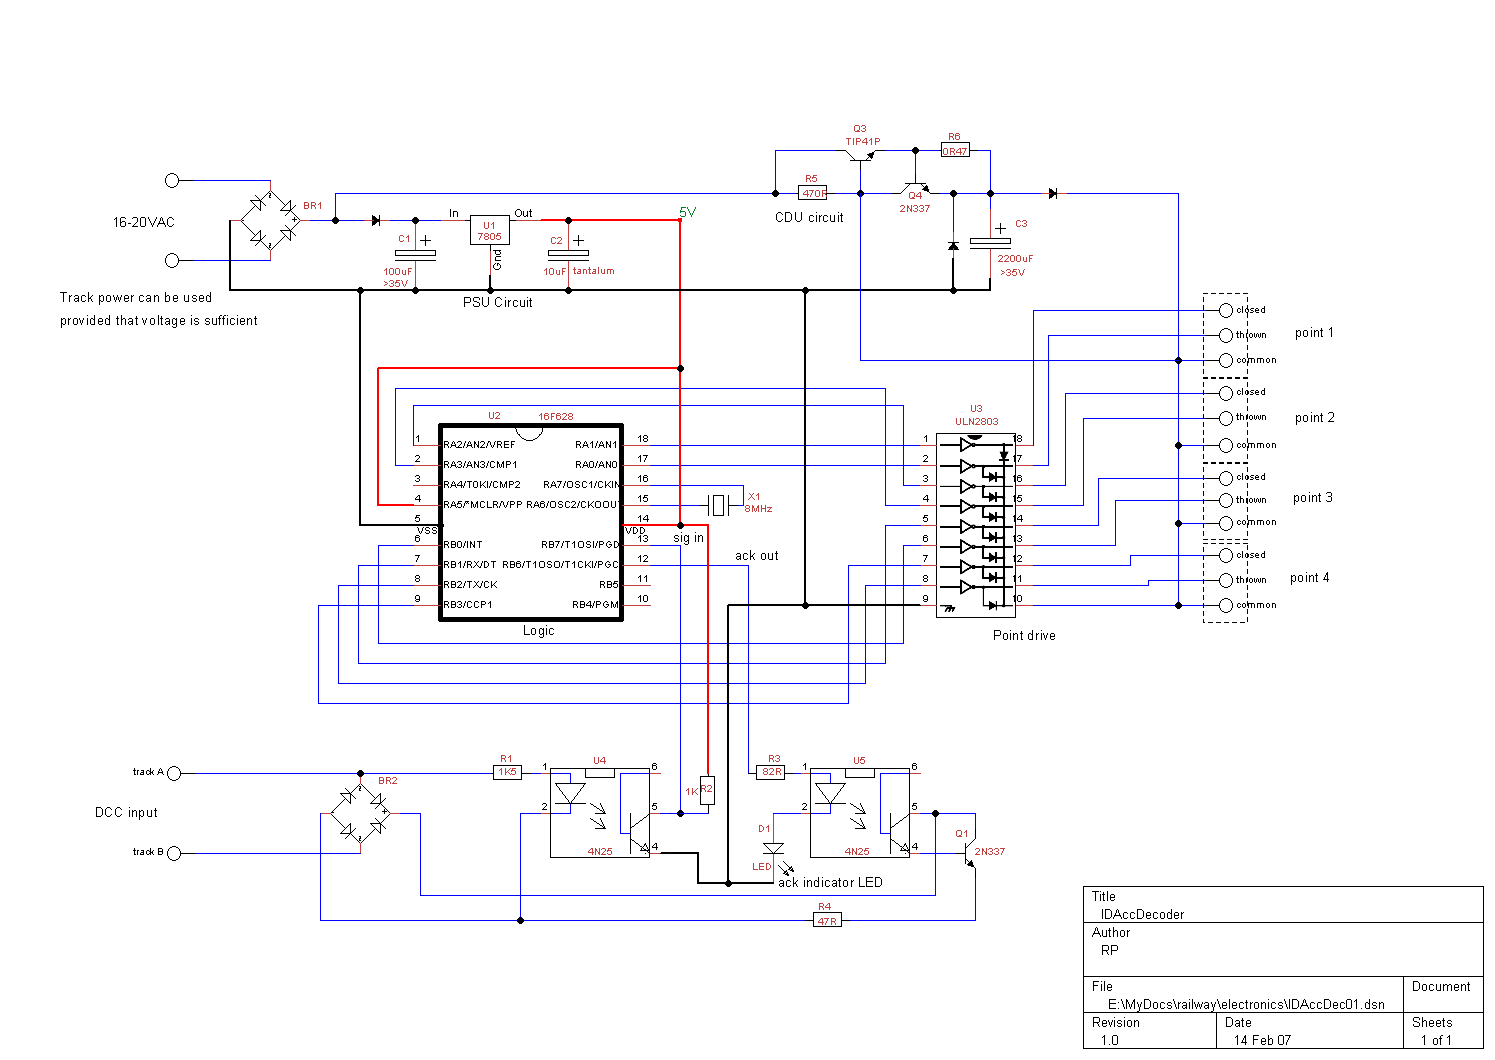
Digital Command Control (DCC) provides significant advantages over traditional DC analog control systems, primarily due to its simplified wiring. DCC enables the individual control of multiple locomotives on the layout without requiring electrical isolation of track sections. The main...
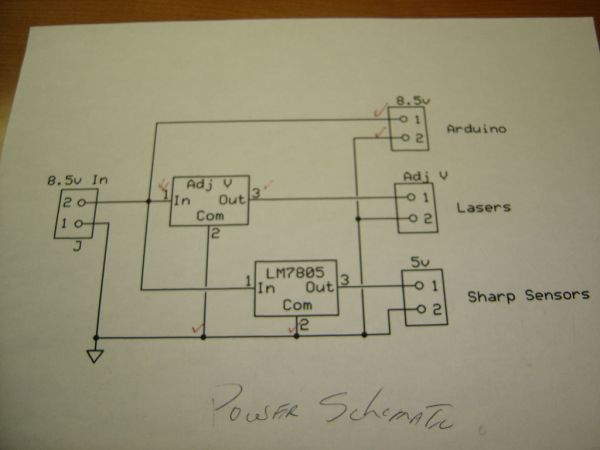
The parts list referenced is from the first page of a Make Magazine article. This list is intended for a harp that utilizes six lasers, so most quantities can be simplified to one. The schematic design based on the described...
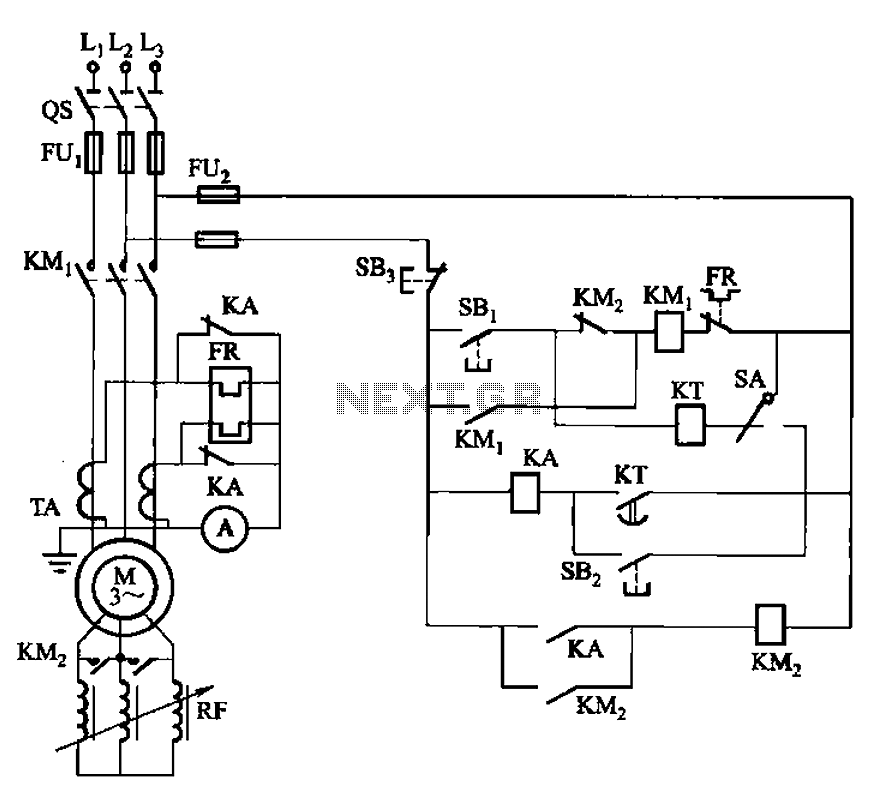
The circuit shown in Figure 3-164 can operate in both manual and automatic modes. During startup, the normally closed contact of relay KA is shorted, which affects the heating element to avoid prolonged startup times that could lead to...
This chapter presents a variety of circuits for basic power supplies, including both line-powered and inverter types, some of which feature regulators, modulation inputs, and additional functionalities. Several circuits have been reverse-engineered from actual commercial products, and others, designed...
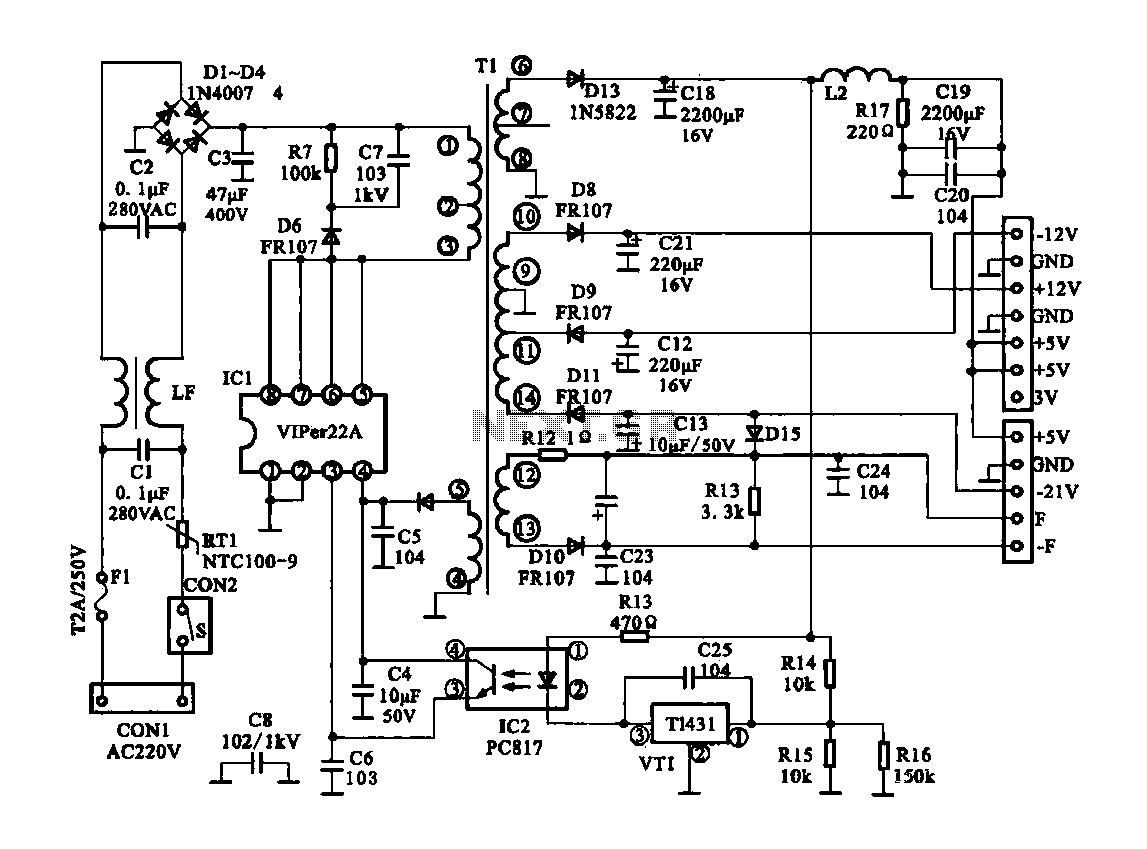
The Dragon ZL-2801A is a DVD machine that utilizes a switching power supply circuit. The circuit primarily consists of an AC input circuit, a rectifier filter wave circuit, an oscillation circuit switch, a switch transformer (Tl), a secondary rectifier,...
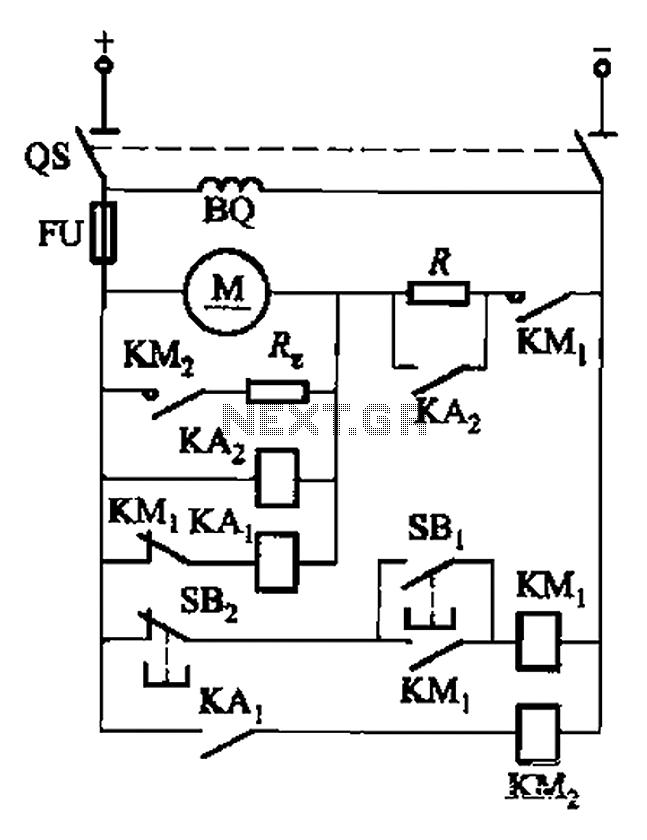
The circuit illustrated in Figure 3-196 features a starting resistance level and an undervoltage relay (KAz) that is controlled by the removal of the startup resistor. It also includes dynamic braking for shutdown purposes. The undervoltage relay (KAL) operates...