
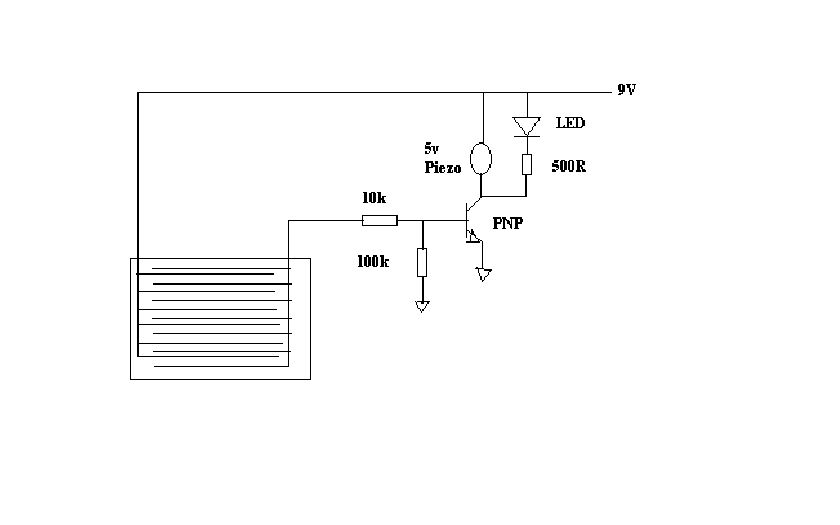
Plant water gauge
The calibration process for the gauge involves a few critical steps to ensure accurate moisture detection in potted plants. Initially, the device must be powered by connecting it to a suitable battery. This connection activates the internal circuitry, allowing the gauge to function properly.
The next step involves inserting the probes into the soil of a plant that is nearing the point of requiring water. It is essential to insert the probes deep enough to ensure they make contact with the moisture level in the soil, while leaving approximately one inch of the probe visible above the soil surface. This placement is crucial as it directly influences the readings obtained from the gauge.
Once the probes are positioned correctly, the user must adjust the potentiometer, which is a variable resistor that allows fine-tuning of the gauge's sensitivity. By turning the potentiometer, the user should observe the "OK" LED indicator. The goal is to adjust this LED to light up, indicating that the device is calibrated to recognize the moisture level when the plant is adequately watered.
After achieving the "OK" state, the potentiometer should be turned back slightly until the "OK" LED turns off. At this point, the "W" or "Water" LED should illuminate, signaling that the soil moisture level has dropped to a point where the plant requires watering. This dual LED indication system provides a clear visual feedback mechanism for the user, ensuring that the calibration is both intuitive and effective.
Upon completion of these steps, the device should be accurately calibrated to provide reliable moisture readings, enabling optimal care for the plant by preventing over or under-watering. Regular checks and recalibrations may be necessary, especially in varying environmental conditions or with different plant species.To calibrate the gauge, connect the battery and press the probes gently into a pot containing a plant that is just on the verge of needing water (stick it in so that only an inch of the probe is left visible at the top). Turn the potentiometer until the "OK" LED lights and then turn it back to the point where that LED goes out and the ''W", or ' 'Water", LED just comes on.
The device should now be properly adjusted. 🔗 External reference
Related Circuits
This project outlines a simple water detector circuit. The components required for this project include the following: 1. One IC 555 timer, and 2. A small-sized general-purpose relay. The water detector circuit utilizes the IC 555 timer configured in a...
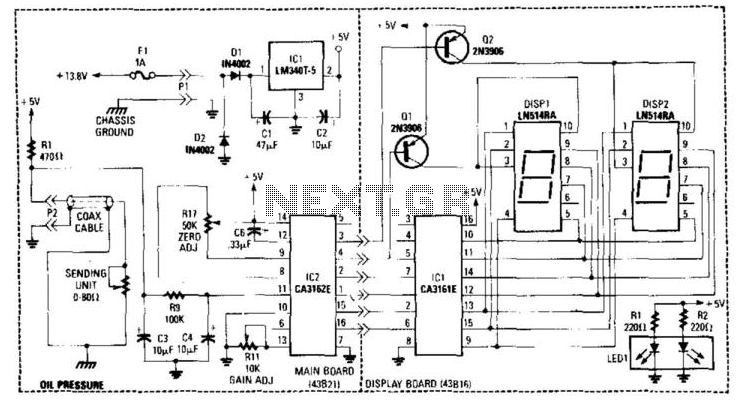
This gauge utilizes a sensor along with resistor R1 to generate a DC voltage that is proportional to oil pressure. Integrated circuits IC1 and IC2 form a two-digit digital voltmeter (DVM). Transistors Q1 and Q2 act as display selectors...
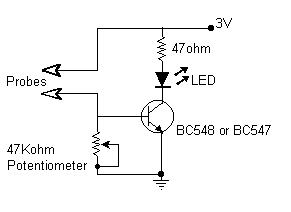
This simple device checks if there is water in a pot plant. You stick the two probes (paperclips) into the pot plant and if the LED lights, it means there is water in the pot plant. The described device operates...
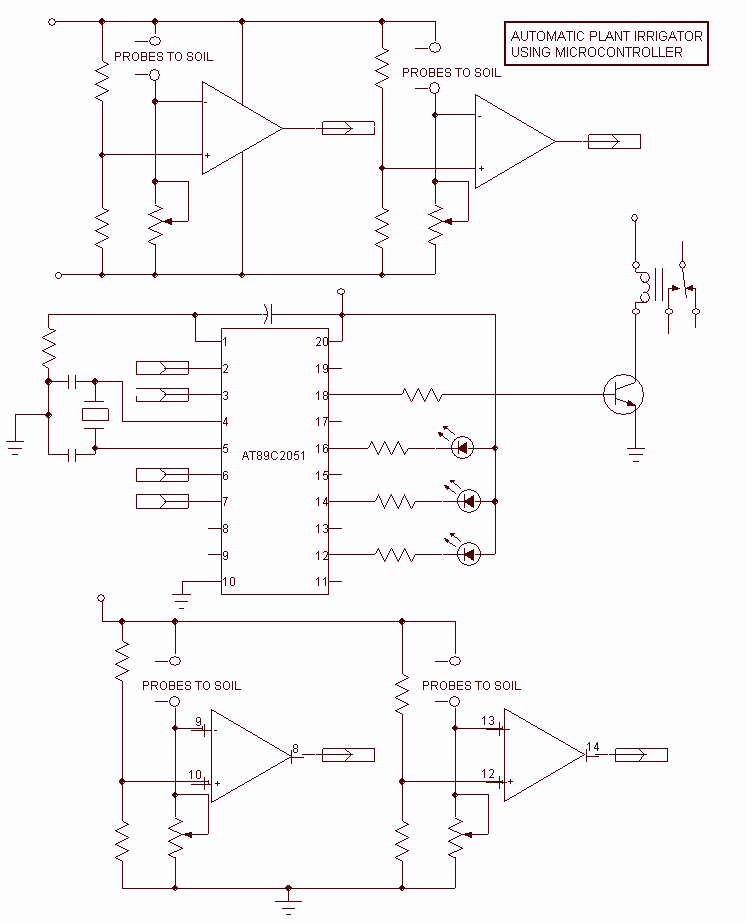
The Project presented here waters your plants regularly when you are out for vocation. The circuit comprises sensor parts built using op-amp IC LM324. Op-amps are configured here as a comparator. Two stiff copper wires are inserted in the...
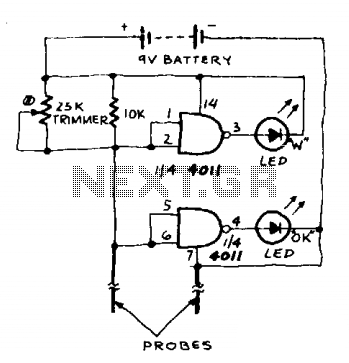
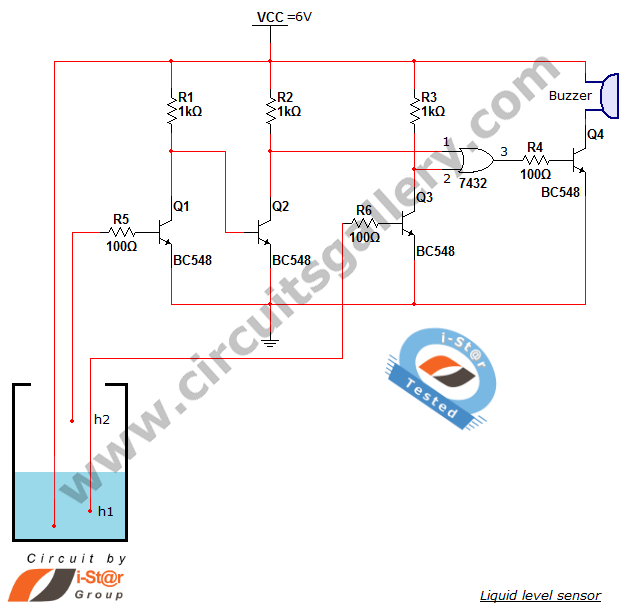
This water level sensor circuit utilizes a standard NAND logic gate to generate oscillation and detect water levels. The oscillation functionality is integrated within the circuit. The water level sensor circuit employs a NAND logic gate to create a square...
A variety of small electronic projects related to water level sensors have been posted in the Circuits Gallery. This particular project is designed for school students to detect the water level within a water tank or any other water...