
Programming Arduino Wirelessly
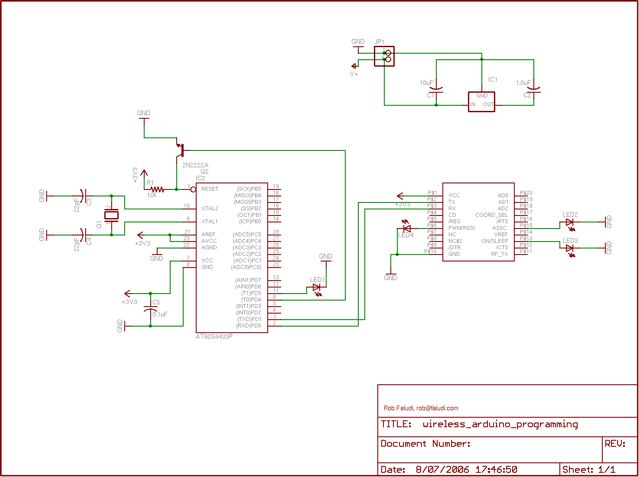
To implement a wireless code upload system for an Arduino microcontroller, the primary components needed include two XBee radios (one configured as a coordinator and the other as a router) and an Arduino board with a bootloader capable of receiving code updates over the air.
The first step involves configuring the XBee radios using the XCTU software. The coordinator XBee is connected to a computer via USB and is set to operate in API mode. The router XBee, which will connect to the Arduino, must also be configured with the same PAN ID as the coordinator to ensure they can communicate. The router XBee is connected to the Arduino's serial interface (TX and RX pins) to facilitate data exchange.
The Arduino sketch should be written to initialize the serial communication with the XBee module. This sketch will include functions to handle incoming data and to reset the Arduino wirelessly. The XBee module will listen for incoming data packets that contain the new code to be uploaded. Upon receiving the data, the Arduino will write it to its flash memory and reset itself to execute the new code.
For the wireless reset functionality, the Arduino can be programmed to listen for a specific command from the XBee. Upon receiving this command, the Arduino will perform a software reset, allowing it to enter the bootloader mode and prepare for the new code upload.
This setup allows for remote programming of the Arduino from a distance, making it suitable for applications where physical access is limited. It is particularly useful in scenarios such as environmental monitoring, remote sensing, or any project requiring deployment in challenging locations. The combination of XBee radios and Arduino provides a robust framework for developing innovative wireless solutions in electronics.The Arduino system offers an easy and open-source method for programming microcontrollers. Normally this means using a serial cable or USB cable attached directly to the microcontroller project. But what if your project is floating in a weather balloon, glued to the bottom of a swimming pool or baked into a loaf of bread It would be great to uplo
ad code changes wirelessly, and even greater if you could do it from several kilometers away. The following example demonstrates how to build a complete wireless solution for uploading code to a remote Arduino microcontroller using a couple of XBee radios, and a handy function for accomplishing wireless resets. 🔗 External reference
Related Circuits

This post outlines the steps taken to build an Arduino-based thermostat, as demonstrated in accompanying videos. The first video showcases a preliminary version of the menu system, providing an overview of the features. The second video presents the completed...
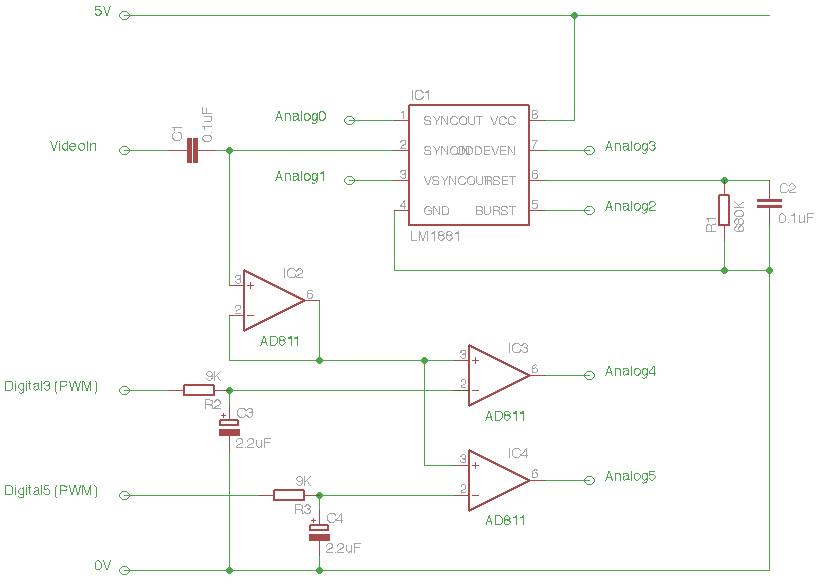
The Arduino Eye Shield is a circuit board that can be plugged on top of the Arduino, enabling it to interpret analog video (PAL or NTSC) from a camera or other source. This provides the Arduino with visual capabilities,...

If you are interested in working with Arduino, you may have considered creating your own Arduino board. Creating a custom Arduino board can be an enriching project that allows for greater flexibility and personalization in electronic designs. The process typically...
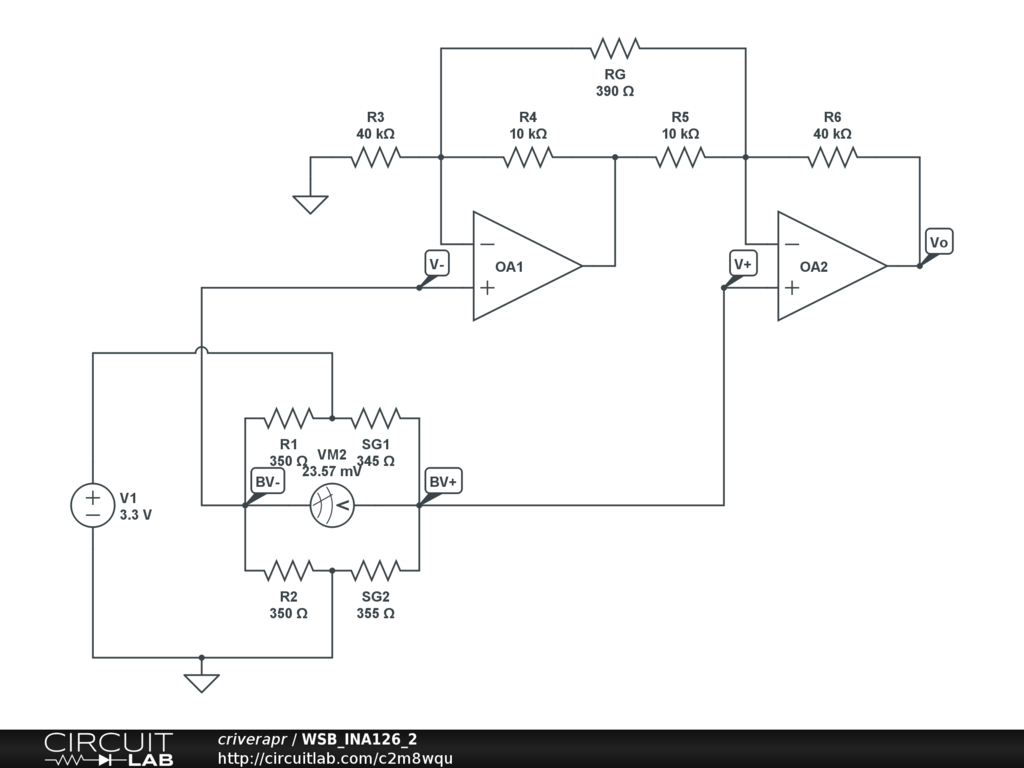
A half-bridge setup is utilized with strain gauges and an INA126 to amplify the voltage. The voltage can be read accurately when the lever is bent in one direction; however, no reading is obtained when the lever is bent...

The Arduino microcontroller board can supply a current of 40mA from its output connections, with digital outputs fixed at 5V for "ON" and 0V for "OFF." This current is suitable for LEDs, but devices like motors, solenoids, and high-brightness...
The approximate center of the base was marked, and a hole was drilled large enough to accommodate a setscrew for the servo armature. The armature was then secured to the underside of the base using hot glue, ensuring that...