
arduino unipolar stepper

To connect and program the Arduino/Atmega168 microcontroller for operating a unipolar stepper motor, the following steps should be followed:
1. **Components Required**:
- Arduino or Atmega168 microcontroller
- Unipolar stepper motor
- Motor driver (such as ULN2003 or L298N)
- Power supply (suitable for the stepper motor)
- Jumper wires
- Breadboard (optional for prototyping)
2. **Wiring Connections**:
- Identify the wires of the unipolar stepper motor. Typically, a unipolar stepper motor has five or six wires. The center tap wires are usually connected to the power supply.
- Connect the center tap wires of the motor to the positive terminal of the power supply.
- Connect the remaining motor wires to the input pins of the motor driver. If using ULN2003, connect the four motor wires to the IN1, IN2, IN3, and IN4 pins of the driver.
- Connect the output pins of the motor driver to the corresponding pins on the Arduino (for example, pins 8, 9, 10, and 11).
- Ensure that the ground of the Arduino is connected to the ground of the motor driver and the power supply.
3. **Programming the Microcontroller**:
- Install the Arduino IDE on a computer.
- Write a program (sketch) to control the stepper motor. The program will typically include the following:
- Include the Stepper library: `#include <Stepper.h>`
- Define the number of steps per revolution (e.g., 2048 for a 1.8-degree stepper motor).
- Create a Stepper object by specifying the number of steps and the pins connected to the motor driver.
- In the `setup()` function, set the speed of the motor using the `setSpeed()` method.
- In the `loop()` function, use the `step()` method to rotate the motor a specific number of steps in either direction.
4. **Testing the Setup**:
- Upload the program to the Arduino.
- Power the circuit and observe the stepper motor's operation. Adjust the speed and number of steps in the program as necessary to achieve desired performance.
This configuration allows for precise control of the unipolar stepper motor, enabling applications such as robotics, CNC machines, and automation systems. Proper attention to wiring and programming will ensure reliable operation and performance of the motor.How to connect and program the Arduino/Atmega168 microcontroller to operate a unipolar stepper motor.. 🔗 External reference
Related Circuits
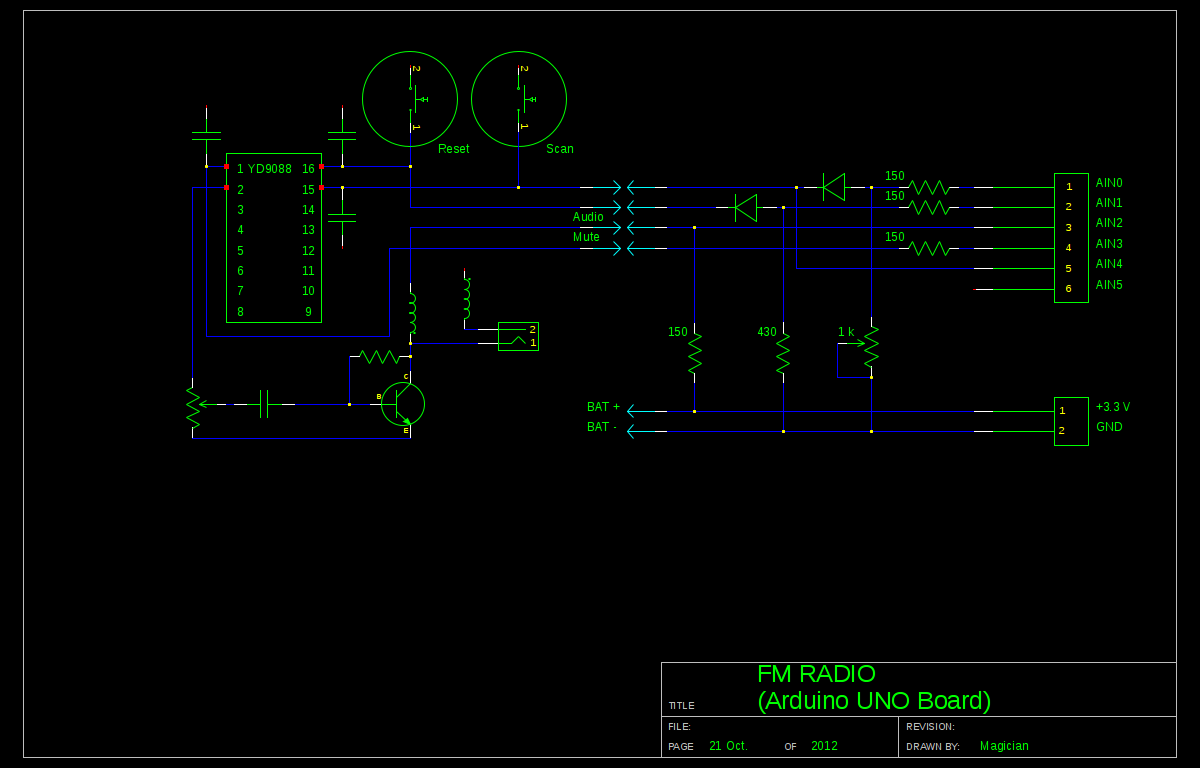
A local convenience store (Dollarama in Montreal, Canada) offers an appealing FM radio for just $3. The idea of interfacing this radio with an Arduino presents a fun challenge. Although the primary goal is not to create a radio,...
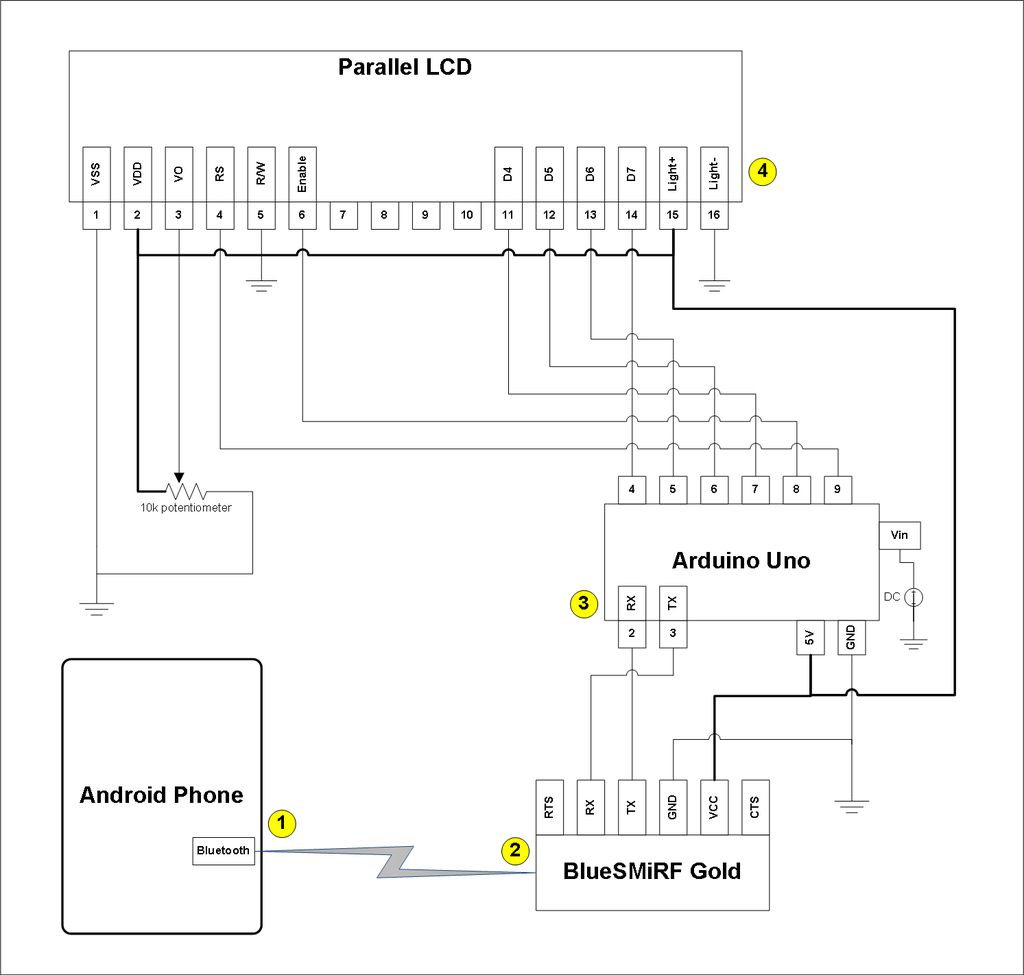
This project involves a modification of the Google Android sample app known as Bluetooth Chat, allowing users to type a message in the Android app and display that same message on an LCD connected to an Arduino Uno. The...
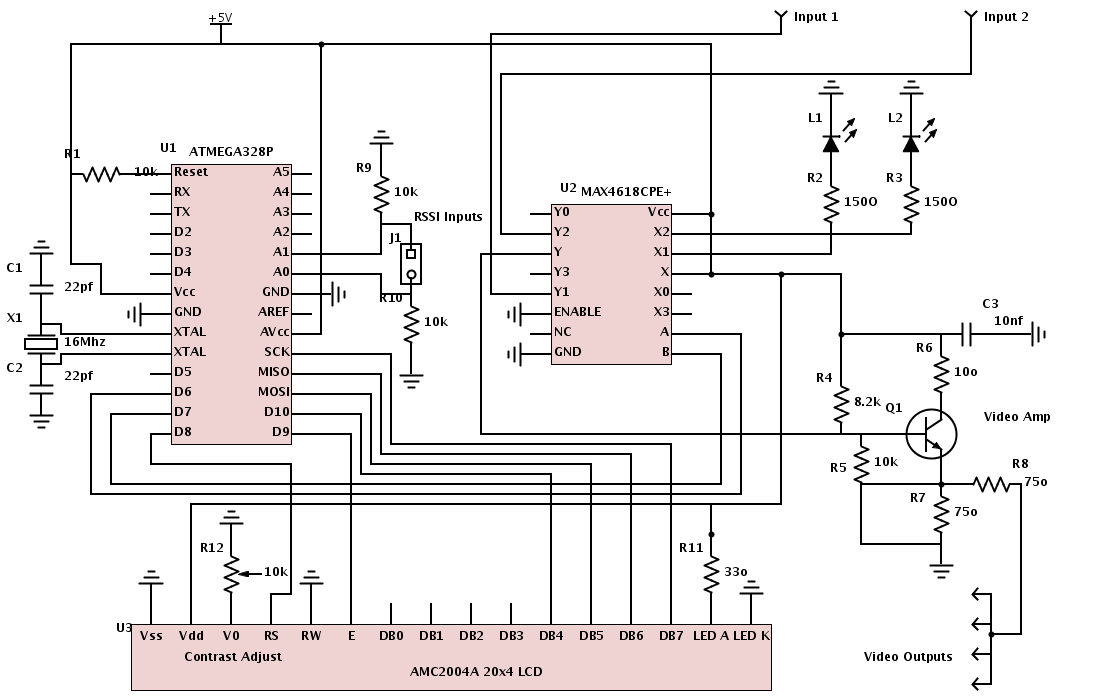
All necessary materials have been gathered to work on an Arduino-powered diversity controller. The design aims to support two inputs, although the hardware can accommodate up to four inputs, and features four amplified outputs. The diversity function will utilize...

The hardware consists of an Arduino board connected via USB to a laptop, which recognizes the Arduino as a serial device. Three LEDs (red, green, blue) are mounted directly on the Arduino board using a prototyping shield. The schematic...
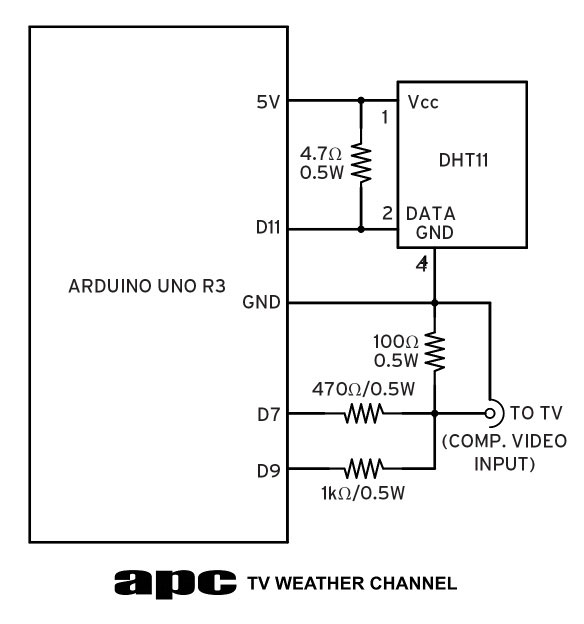
The current goal is to demonstrate how the Arduino Uno board, equipped with the Atmel ATMEGA328P microcontroller, can interact with external devices. This project simplifies the electronics while increasing the demands on the microcontroller by connecting it to a...
Two stepper motors are to be controlled by a dsPIC microcontroller. The programming of the microcontroller has been completed, but there is confusion regarding the use of the L298 driver. Assistance is needed with the circuit design. To control two...