
Serial LCD Library

This project leverages the capabilities of the Hitachi HD44780 controller to simplify the wiring requirements for interfacing with LCD displays. By reducing the number of necessary connections to just two data wires, the design enhances flexibility and minimizes complexity in circuit design. The use of the libSerialLCD library streamlines communication by providing a set of predefined commands for initializing the LCD and sending data to be displayed.
The initialization sequence is crucial for ensuring that the LCD is set up correctly before any data is sent. The SerialLCD_Init function is called with parameters specifying the port and the pins used for communication. The commands sent to the LCD, such as SerialLCD_Cmd(_LCD_Clear), ensure that the display is ready for new information by clearing any previous content. The subsequent output commands, SerialLCD_Out, are responsible for displaying specific strings at designated positions on the LCD, allowing for organized and clear information presentation.
In practical applications, this approach is particularly beneficial in environments where space and wiring complexity are concerns. It is suitable for projects ranging from simple user interfaces to more complex systems requiring visual feedback. The versatility in character lengths and line configurations allows for a wide variety of display options, accommodating different project requirements while maintaining ease of use and implementation.This project can be used with a standard Hitachi HD44780 (or compatible) controller chip to control it through only 2 wires. There is a variety of shapes and sizes available. Line lengths of 8, 16, 20, 24, 32 and 40 characters are all standard, in one, two or four-line versions.
The problem was that these LCDs required at least 4 data wires and 2 control wires. With this project you can communicate with the LCD through only 2 wires. program SerialLcdExample; uses libSerialLCD; begin SerialLCD_Init(PortB, 0, 1); SerialLCD_Cmd(_LCD_Clear); SerialLCD_Out(1, 1, `Serial LCD Test`); SerialLCD_Out(2, 2, `riecktron. co. za`); end. 🔗 External reference
Related Circuits
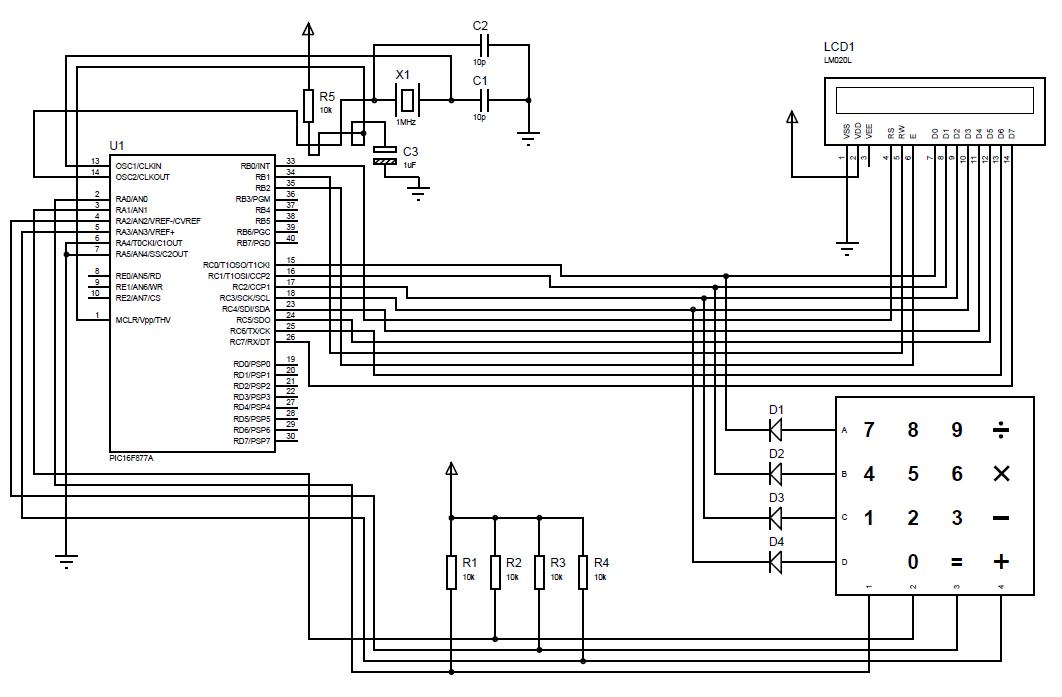
A beginner or hobbyist is seeking to learn more about microcontrollers. The objective is to display an output on an LCD when a button on the keypad is pressed. To achieve the desired functionality of displaying output on an LCD...
Connecting a LCD display to your personal computer is an easy job. Displaying data from your PC to a LCD can be proven very exciting, so give it a try and build your own today! In this article, we...
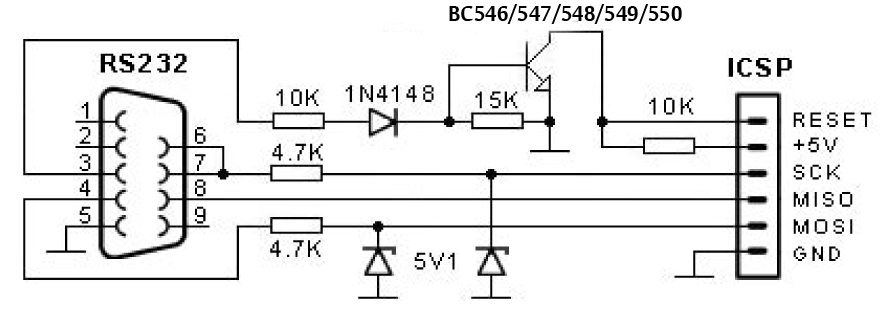
The entire AVR programmer has been built using common parts and fits in the case of the serial connector. The socket PCB has been created to accommodate a 28-DIP AVR ATmega8 microcontroller, but a socket PCB can be designed...
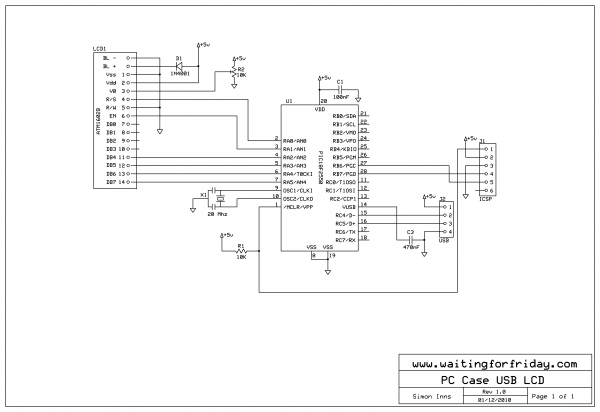
The first version of an Open Source Framework for USB Generic HID devices based on the PIC18F and Windows includes an example of how to utilize the library with a USB interface for an LCD. With the completion of...
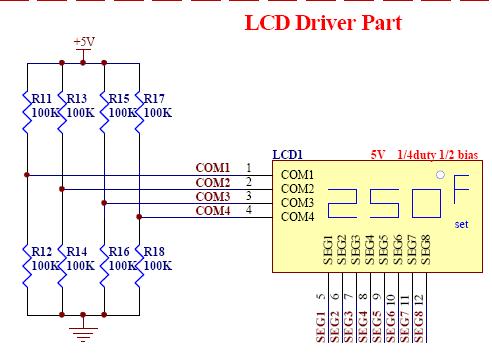
The LCD in question has more pins than the microcontroller. It was not possible to expand the image for a better view. Unless there is a strong preference for using this display, it is recommended to obtain a Hitachi-compliant...
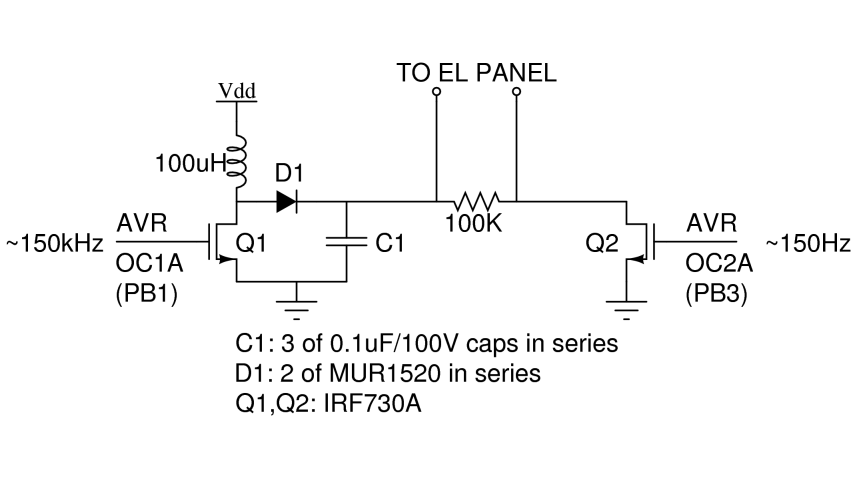
There are two primary types of backlights for LCDs: LEDs, which stands for light-emitting diodes, and EL, which stands for electroluminescent. EL backlights are generally more efficient and provide more uniform lighting compared to LED backlights, but they require...